ART
BEAUTY & WELLNESS
CRAFT
CULTURE & HISTORY
ENTERTAINMENT
ENVIRONMENT
FOOD & DRINKS
REVERSE ENGINEERING
SCIENCES
SPORTS
TECHNOLOGY
WEARABLES
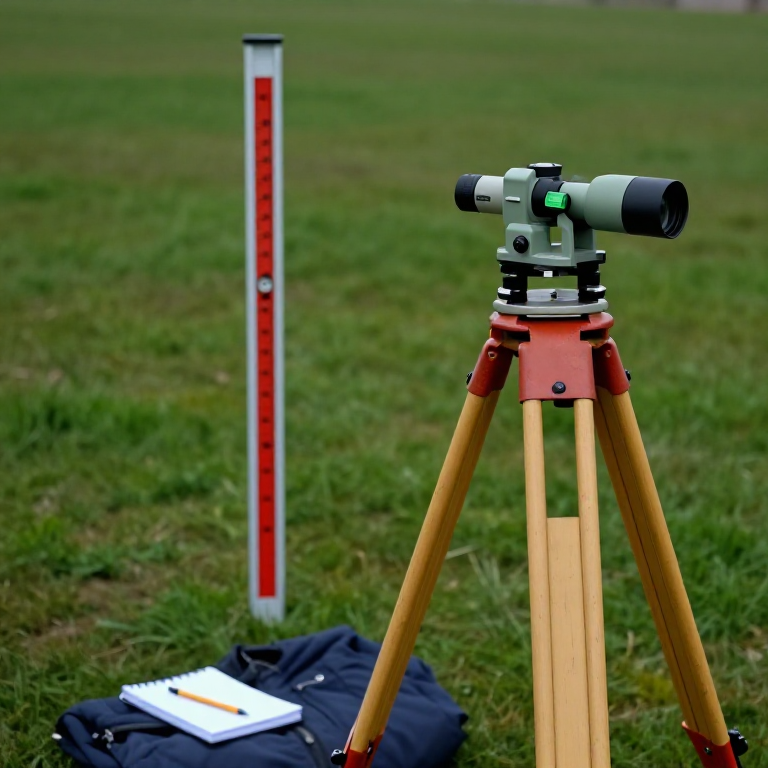


Differential Levelling: Carrying a Height Across a Site
The water level carries a height beautifully and runs out of patience at about thirty metres. To take a height a kilometre, or up a hill, you need an instrument that defines a horizontal LINE OF SIGHT and a graduated staff to read against it.
The arithmetic is deliberately simple, because it was designed to be done in the rain by someone who has been walking all day. Read the staff on a point of known height — that is a backsight — and add it to get the height of the instrument's line of sight. Read the staff on an unknown point — a foresight — and subtract it. That is the whole method, repeated.
What makes it trustworthy is not the instrument. It is that the work closes: you finish back where you started, and the discrepancy tells you whether to believe any of it.
Intermediate
1 day
Instructions
1
1
Set the instrument up and make it truly level
Set the instrument up and make it truly level
Set the tripod firmly, tread the legs in, and level the instrument with its footscrews: align the bubble over two screws, centre it, turn ninety degrees, centre again, and repeat until it holds in every direction.
Check it by rotating the instrument a full circle — the bubble must stay centred throughout. If it wanders, the instrument is not level and every reading from this setup is wrong by an amount that depends on which way you were pointing, which is the hardest kind of error to find afterwards.
Tools needed:
 Optical Level (Surveying)
 Camera Tripod
2
2
Hold the staff plumb, and mean it
Hold the staff plumb, and mean it
The staff must be vertical. Use a small circular bubble on the staff, or have the staffholder rock it slowly back and forth toward the instrument while the observer takes the MINIMUM reading.
A leaning staff always reads too HIGH — never too low — because tilting moves the graduation the sight line crosses further up the staff. So this is a systematic error that biases everything one way. Rocking the staff and taking the minimum finds vertical geometrically, and it needs no bubble at all.
Tools needed:
 Levelling Staff
3
3
Book it in a rise-and-fall table
Book it in a rise-and-fall table
Rule columns: point, backsight, intermediate, foresight, rise, fall, reduced level. Enter every reading as you take it, in ink, and never rewrite a figure — strike it through and write the correct one beside it.
A rewritten figure is indistinguishable from a forged one, and the whole value of the record is that it can be checked later. The rise-and-fall form has a built-in arithmetic check the collimation form does not, which is why it is worth the extra column.
4
4
Keep the sights balanced
Keep the sights balanced
Set up so that the backsight and foresight distances are roughly EQUAL, and keep neither longer than about fifty metres.
This is the most important habit in the whole method. Any collimation error — the line of sight not quite horizontal — adds a false amount proportional to distance. With equal sights the two false amounts are equal and CANCEL exactly when you subtract, so the instrument's largest defect disappears for free. Earth curvature and refraction cancel the same way.
Tools needed:
 Measuring Tape
5
5
Close the loop, and check the arithmetic
Close the loop, and check the arithmetic
Finish by levelling back to your starting benchmark. Then check: the sum of the backsights minus the sum of the foresights must equal the sum of the rises minus the sum of the falls, and must equal the last reduced level minus the first.
Those three quantities agreeing proves only that the ARITHMETIC is right — it says nothing about the readings. The closing error, the amount by which you fail to return to your benchmark, is the one that tells you about the work itself. Both checks are needed and they test different things.
6
6
Reducing the levels, and closing the error
Reducing the levels, and closing the error
Loading Jupyter Notebook...
7
7
Find your instrument's collimation error once
Find your instrument's collimation error once
Do a two-peg test. Set two pegs about fifty metres apart, level from exactly midway between them and record the difference; then move the instrument close behind one peg and read both again.
From the middle, any collimation error cancels, so that difference is the TRUE one. From the end it does not cancel, so the discrepancy between the two results is the error over that distance. Knowing the number lets you judge how strictly you must balance your sights — and on a good instrument it is small enough that balanced sights make it irrelevant, which is the whole point of step 4.
Materials for this step:
 Wooden Pegs4 pieces
Tools needed:
Optical Level (Surveying)Levelling StaffMeasuring TapeMaterials
1- 4 piecesPlaceholder
Tools Required
4- Placeholder
- Placeholder
- Placeholder
- 1 vendor sell this, none ship to you yetPlaceholder
Related Blueprints
These blueprints share knowledge with this one — techniques, materials, or principles that connect them in the learning graph.


CC0 Public Domain
This blueprint is released under CC0. You are free to copy, modify, distribute, and use this work for any purpose, without asking permission.
Support the Maker by purchasing products through their Blueprint where they earn a Maker Commission set by Vendors, or create a new iteration of this Blueprint and include it as a connection in your own Blueprint to share revenue.