Collaboration
ART
BEAUTY & WELLNESS
CRAFT
CULTURE & HISTORY
ENTERTAINMENT
ENVIRONMENT
FOOD & DRINKS
REVERSE ENGINEERING
SCIENCES
SPORTS
TECHNOLOGY
WEARABLES
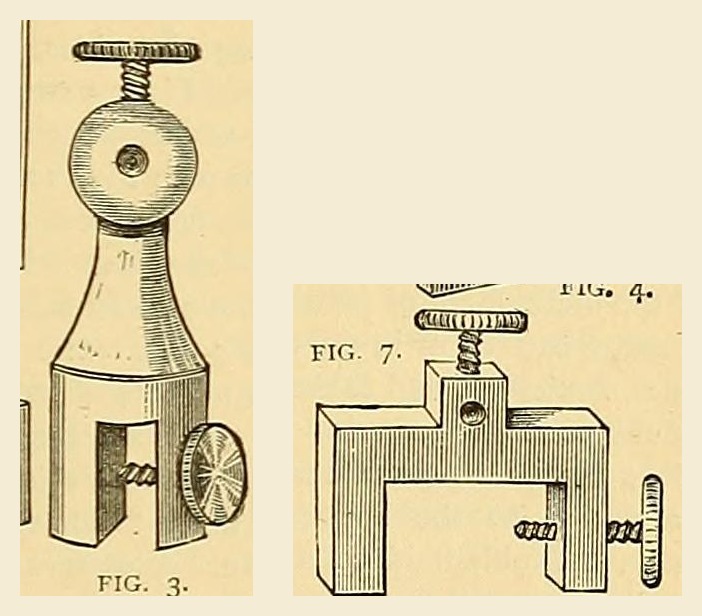


Brass Binding-Screw: Body Turned from 5/8 in. Rod, Thumb Screws from 3/8 in. Rod, and a Bent Brass Clamp (Edwinson, 1881)
The Victorian battery terminal, from George Edwinson's Electro-plating at Home (Amateur Work, 1881): a brass body turned from 1 1/2 in. of 5/8 in. rod, slotted for the plate and bored for the wire, with thumb screws turned from 3/8 in. rod; or a clamp bent hot from a brass strip with a soldered-on wire piece.
Intermediate
Two hours at the lathe
Instructions
1
1
His sizes
His sizes
Loading Jupyter Notebook...
2
2
Read Edwinson
Read Edwinson
"Those who may have lathes ... may easily turn up a binding-screw ... out of a 1 1/2 in. length of 5/8 in. brass rod."
3
3
Turn the body
Turn the body
Cut 1 1/2 in. (38 mm) of 5/8 in. (16 mm) brass rod and turn the body to shape first (his fig. 3: a round head on a tapering neck over a forked foot).
Materials for this step:
 Brass Rod1 piece
Tools needed:
 Hacksaw
 Metal Lathe
 Parting Tool
4
4
Slot and bore
Slot and bore
Cut the slot that grips the plate. Bore a hole for the wire through the head, then bore the holes for the screws.
Tools needed:
 Bench ViseHacksaw
 Files (Hand File)
 Hand Drill
5
5
Turn the thumb screws
Turn the thumb screws
Turn the screws from 3/8 in. (9.5 mm) brass rod with plain thumb-screw heads (he says milled heads are a mistake). Cut a fine thread on them and tap the holes to match.
Materials for this step:
Brass Rod1 pieceTools needed:
Metal LatheParting Tool Tap and Die Set
6
6
Bent clamp (variant)
Bent clamp (variant)
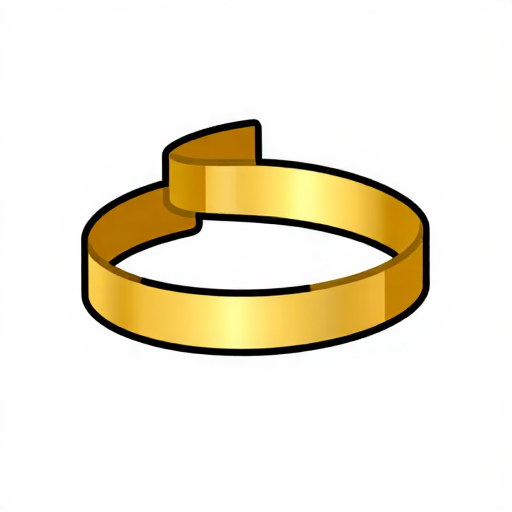
From good malleable brass take a strip 3 in. long, 1/2 in. wide and 1/4 in. thick (76 x 13 x 6 mm). Heat it to a dull red and bend it over a former of hot iron. Cut the piece for the wire and centre screw separately, hard-solder it on and trim it. Fit thumb screws as above. (A clamp may also be cast from a wooden pattern.)
Materials for this step:
 Brass Strip1 piece
 Silver Solder1 piece
Tools needed:
 Blacksmith Forge
 Blacksmith Tongs
 Hammer
 Brazing TorchFiles (Hand File)Hand DrillTap and Die Set
7
7
Clean and keep it working
Clean and keep it working
Clean the slot with folded emery cloth and the wire hole with the tang of a file. Now and then oil the screw, work it in and out, and wipe the oil off. Do not screw up too tight.
Tools needed:
Files (Hand File)8
8
Troubleshooting
Troubleshooting
Binding-screw troubleshooting.
Flow
Loading...
9
9
History and honest limits
History and honest limits
From George Edwinson, "Electro-plating at Home", **Amateur Work, Illustrated**, vol. I (1881), p. 81 figs. 3 and 7 and p. 99 (checked on the archive.org scan amateurworkillus11881lond). He gives no thread size. Modern panel binding posts add an insulating bush and a banana-plug socket; this is the 1881 brass terminal. The metric figures and the tools are ours.
Materials
3- 1 piecePlaceholder
- 1 piecePlaceholder
- 1 piecePlaceholder
Tools Required
11- Placeholder
- Placeholder
- Placeholder
- Placeholder
- Placeholder
- Placeholder
- Placeholder
- Placeholder
- Placeholder
- Placeholder
- Placeholder
This blueprint makes
Related Blueprints
These blueprints share knowledge with this one — techniques, materials, or principles that connect them in the learning graph.


CC0 Public Domain
This blueprint is released under CC0. You are free to copy, modify, distribute, and use this work for any purpose, without asking permission.
Support the Maker by purchasing products through their Blueprint where they earn a Maker Commission set by Vendors, or create a new iteration of this Blueprint and include it as a connection in your own Blueprint to share revenue.