
Collaboration
ART
BEAUTY & WELLNESS
CRAFT
CULTURE & HISTORY
ENTERTAINMENT
ENVIRONMENT
FOOD & DRINKS
REVERSE ENGINEERING
SCIENCES
SPORTS
TECHNOLOGY
WEARABLES
Sliding-Head Churn Drive: The Churn Rides on the Pulley Head and Stays in Line When the Belt Is Slacked
Martin

Created by

Martin

9. November 2026NO
2
0
0
0
0

Sliding-Head Churn Drive: The Churn Rides on the Pulley Head and Stays in Line When the Belt Is Slacked

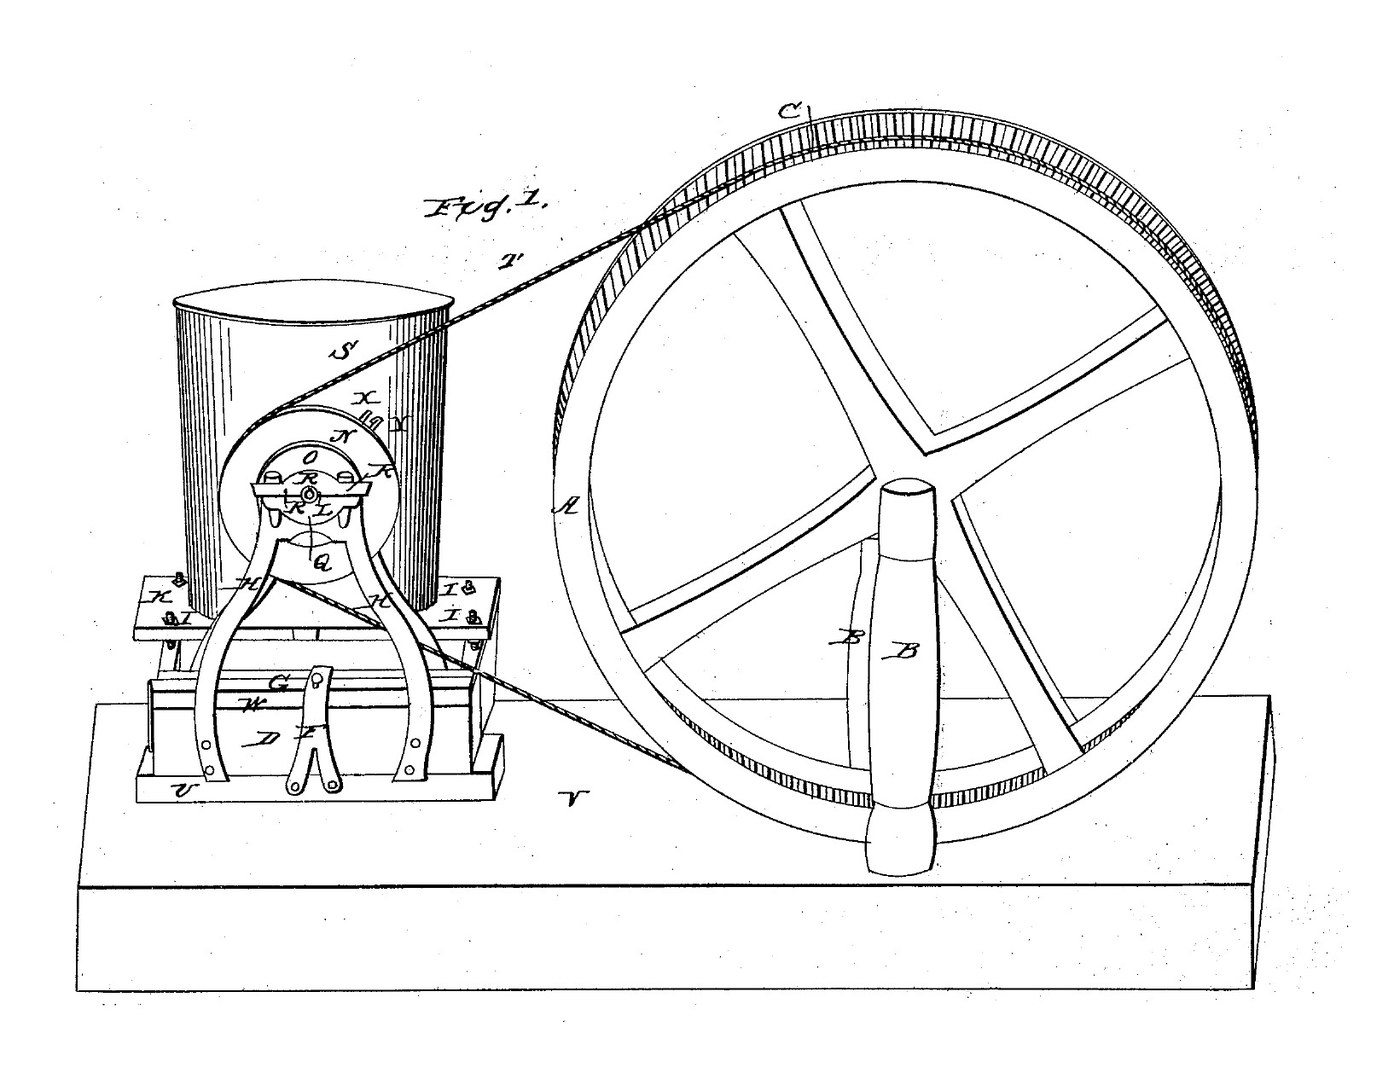
Joseph Forsyth of Wheeling, Virginia, received US 22,022, dated 9 November 1858, for working a churn by power from a big belt wheel. The pulley head slides along a guide block to tighten or slack the belt, which starts or stops the churn. The churn stands on a carriage fixed to the head, so its shaft stays in line with the pulley's. A platform on four screws raises or lowers different churns to the pulley's height. This rung builds it full size with a hand-cranked wheel and a rope belt.
Intermediate
About 2 days

Instructions

1

Speed, rope and slack

Loading Jupyter Notebook...
2

Churns worked by power, before it

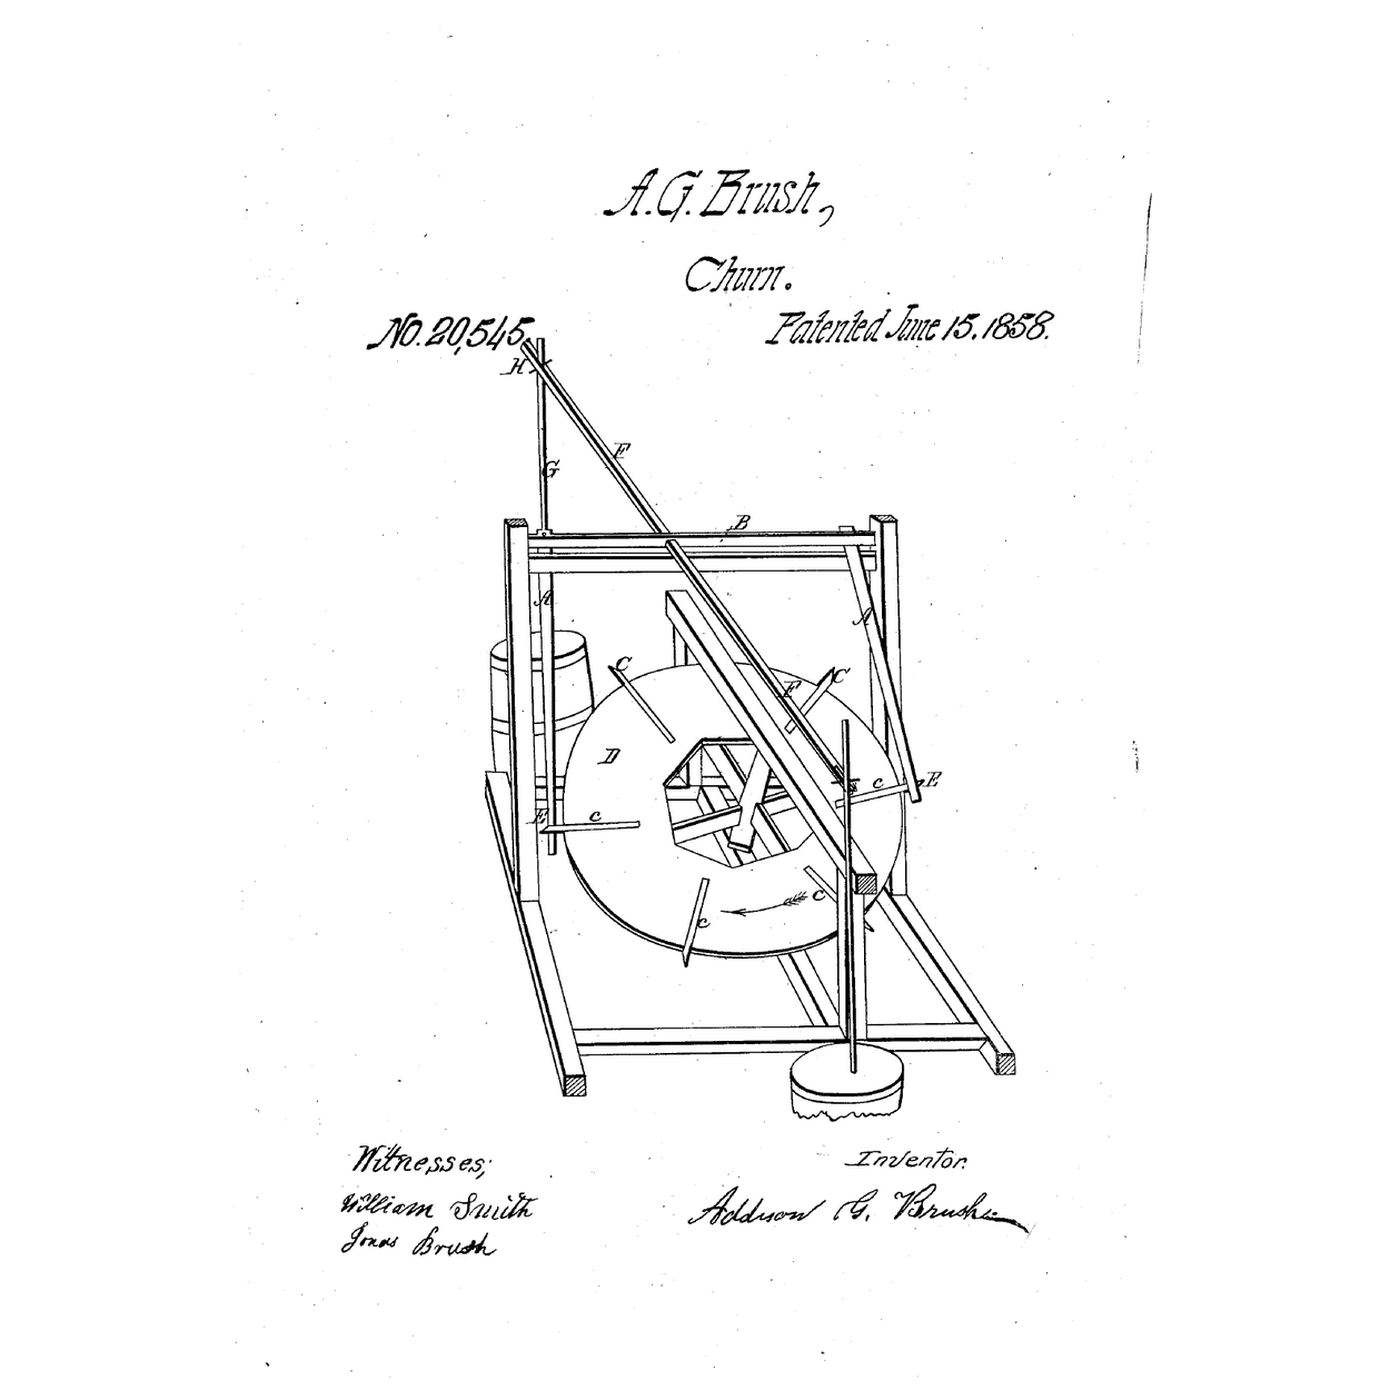
Brush worked a dasher from a dog's tread-wheel. Forsyth turns a crank churn by a belt and stops it by slacking the belt.
3

Read US 22,022

"The nature of my invention consists, first, in combining the carriage D with the movable pulley head H H in such a manner that the said carriage will move with the head when it is required to stop or start the motion of the churn, thereby enabling me to keep the shafts of the pulley, and churn in line."
4

Wheel A and posts B

Cut a plywood disc 1160 mm across and two discs 1200 mm across from 18 mm plywood. Glue and screw a larger disc to each face of the smaller one: the gap between them is the rope groove C. Screw a 160 mm hub block on each side. Stand two 70 mm posts 730 mm tall on 900 mm sills, 150 mm apart, each with two braces. Bolt a flange bearing on each post's outer face, 700 mm up, and run a 30 mm shaft M through bearings, posts and wheel, cross-bolted to the hub.

Materials for this step:

Plywood SheetPlywood Sheet3 pieces
Wood GlueWood Glue1 piece
#8 x 1" Wood Screw#8 x 1" Wood Screw60 pieces
Softwood Timber 70x70mmSoftwood Timber 70x70mm4 pieces
#10 x 3" Wood Screw#10 x 3" Wood Screw24 pieces
Flange BearingFlange Bearing2 pieces
Steel Shaft 30mmSteel Shaft 30mm1 piece
Hex Bolt Set M10Hex Bolt Set M105 pieces

Tools needed:

JigsawJigsaw
Hand SawHand Saw
Cordless DrillCordless Drill
Drill Bit SetDrill Bit Set
Spade Bit SetSpade Bit Set
ClampsClamps
Adjustable SpannerAdjustable Spanner
Spirit LevelSpirit Level
Tape MeasureTape Measure
5

Crank

How the wheel is turned is not given; ours has a crank. Bolt a hardwood arm 350 x 70 x 30 mm on shaft M outside one bearing and glue a 30 mm dowel 150 mm long into it 280 mm from the shaft as the handle.

Materials for this step:

Hardwood BoardHardwood Board1 piece
Hardwood DowelsHardwood Dowels1 piece
Wood GlueWood Glue1 piece
Hex Bolt Set M10Hex Bolt Set M101 piece

Tools needed:

Hand SawHand Saw
Cordless DrillCordless Drill
Spade Bit SetSpade Bit Set
SandpaperSandpaper
Adjustable SpannerAdjustable Spanner
6

Guide block and pulley head

Screw a 900 mm guide block U of 70 mm timber to the floor in line with the wheel, 1300 mm from shaft M. Lay a 400 mm head block on it. Cut two frames H from 50 x 8 mm flat bar, 420 mm long, and bolt them to the head block's sides so their ends run down the guide block's sides. Bolt a flange bearing on each frame's outer face 400 mm up. Make the pulley O like the wheel: a 200 mm disc between two 240 mm rings. Fit it on a 30 mm shaft through the bearings.

Materials for this step:

Softwood Timber 70x70mmSoftwood Timber 70x70mm2 pieces
#10 x 3" Wood Screw#10 x 3" Wood Screw8 pieces
Mild Steel Flat BarMild Steel Flat Bar2 pieces
Hex Bolt Set M10Hex Bolt Set M104 pieces
Flange BearingFlange Bearing2 pieces
Steel Shaft 30mmSteel Shaft 30mm1 piece
Plywood SheetPlywood Sheet1 piece
Wood GlueWood Glue1 piece
#8 x 1" Wood Screw#8 x 1" Wood Screw12 pieces

Tools needed:

HacksawHacksaw
Files (Hand File)Files (Hand File)
Bench ViseBench Vise
Cordless DrillCordless Drill
Drill Bit SetDrill Bit Set
JigsawJigsaw
Adjustable SpannerAdjustable Spanner
7

Strap F and thumb screw E

Bend a 30 x 5 mm flat bar into a bridge over the head block, 80 mm from the frames, and screw its legs to the guide block's sides. Drill its top for an M8 rod, run a nut onto the rod under the strap, and lock a wing nut on top as the thumb screw. Turn it down to clamp the head block.

Materials for this step:

Mild Steel Flat BarMild Steel Flat Bar1 piece
#8 x 1" Wood Screw#8 x 1" Wood Screw4 pieces
Threaded RodThreaded Rod1 piece
Hex NutHex Nut2 pieces
Wing NutWing Nut1 piece

Tools needed:

Bench ViseBench Vise
HacksawHacksaw
Cordless DrillCordless Drill
Drill Bit SetDrill Bit Set
8

Carriage D and platform K

Bolt two 70 mm side bars, 865 mm long, to the head block's side, 330 mm apart, and join their far ends with a cross tie with a caster under its middle as the roller. Drill each bar twice for M12 rods (screws I), 360 mm apart; fix each rod with a nut above and below the bar. Run a nut down each rod, lay an 18 mm plywood platform 430 x 440 mm on them, and lock it with a second nut on top.

Materials for this step:

Softwood Timber 70x70mmSoftwood Timber 70x70mm2 pieces
Hex Bolt Set M10Hex Bolt Set M104 pieces
Caster Wheel SetCaster Wheel Set1 piece
Threaded RodThreaded Rod4 pieces
Hex NutHex Nut16 pieces
Flat WasherFlat Washer8 pieces
Plywood SheetPlywood Sheet1 piece

Tools needed:

Hand SawHand Saw
Cordless DrillCordless Drill
Drill Bit SetDrill Bit Set
Adjustable SpannerAdjustable Spanner
Spirit LevelSpirit Level
9

Arm X and the rope belt

Bolt a 140 mm flat-bar arm X with a 20 mm slot to a collar on the pulley shaft's end. Stand a crank churn on the platform and raise or lower the platform's nuts until its crank shaft is level with the pulley shaft and its handle V sits in the slot. Splice 12 mm cotton rope into a loop about 5 m long round both grooves (see the notebook), with the head slid towards the wheel.

Materials for this step:

Mild Steel Flat BarMild Steel Flat Bar1 piece
Hex Bolt Set M10Hex Bolt Set M101 piece
Nylon Insert Lock NutNylon Insert Lock Nut1 piece
Cotton RopeCotton Rope6 m

Tools needed:

HacksawHacksaw
Files (Hand File)Files (Hand File)
Cordless DrillCordless Drill
Drill Bit SetDrill Bit Set
Adjustable SpannerAdjustable Spanner
Tape MeasureTape Measure
10

The build in 3D

FreeCAD model of this build: the wheel on its posts with the crank, the guide block, pulley head, strap and thumb screw, the carriage with its caster, platform K on its four screws, a stand-in churn and arm X. The rope is not drawn.
Design FileBLENDCC0 - Free
11

Churn

Pour about 10 litres of heavy cream at about 15 °C into the churn. Slide the head away from the wheel until the rope is tight and clamp it with the thumb screw. Turn the wheel steadily, about 10 times a minute, and time it. To stop, loosen the thumb screw and slide the head towards the wheel: the carriage and churn move with it. When the butter comes, pour off the buttermilk, wash the butter in cold water until it runs clear, work in a pinch of salt and weigh it.

Materials for this step:

Heavy CreamHeavy Cream10 l
Coarse Sea SaltCoarse Sea Salt1 piece
WaterWater1 piece

Tools needed:

Butter ChurnButter Churn
Leave-In Probe ThermometerLeave-In Probe Thermometer
StopwatchStopwatch
Digital Kitchen ScaleDigital Kitchen Scale
Stainless Steel Mixing Bowl (Large)Stainless Steel Mixing Bowl (Large)
12

Troubleshooting

Churn drive troubleshooting.

Flow

Loading...
13

History and honest limits

**Joseph Forsyth** of Wheeling, Ohio County, Virginia (now West Virginia), US 22,022, 9 November 1858, "Operating Churns". He claimed the carriage D combined with the movable platform K. He gave no sizes, named only the "metallic" frames H, and did not say what turns wheel A or what the belt is: our hand crank, plywood wheel and pulley, cotton rope, timber, bearings, rods and caster are ours.

Materials

21

Tools Required

18

Design Files

1

Related Blueprints

These blueprints share knowledge with this one — techniques, materials, or principles that connect them in the learning graph.

CC0 Public Domain

This blueprint is released under CC0. You are free to copy, modify, distribute, and use this work for any purpose, without asking permission.

Support the Maker by purchasing products through their Blueprint where they earn a Maker Commission set by Vendors, or create a new iteration of this Blueprint and include it as a connection in your own Blueprint to share revenue.

Discussion

(0)

Log in to join the discussion

Loading comments...