ART
BEAUTY & WELLNESS
CRAFT
CULTURE & HISTORY
ENTERTAINMENT
ENVIRONMENT
FOOD & DRINKS
REVERSE ENGINEERING
SCIENCES
SPORTS
TECHNOLOGY
WEARABLES
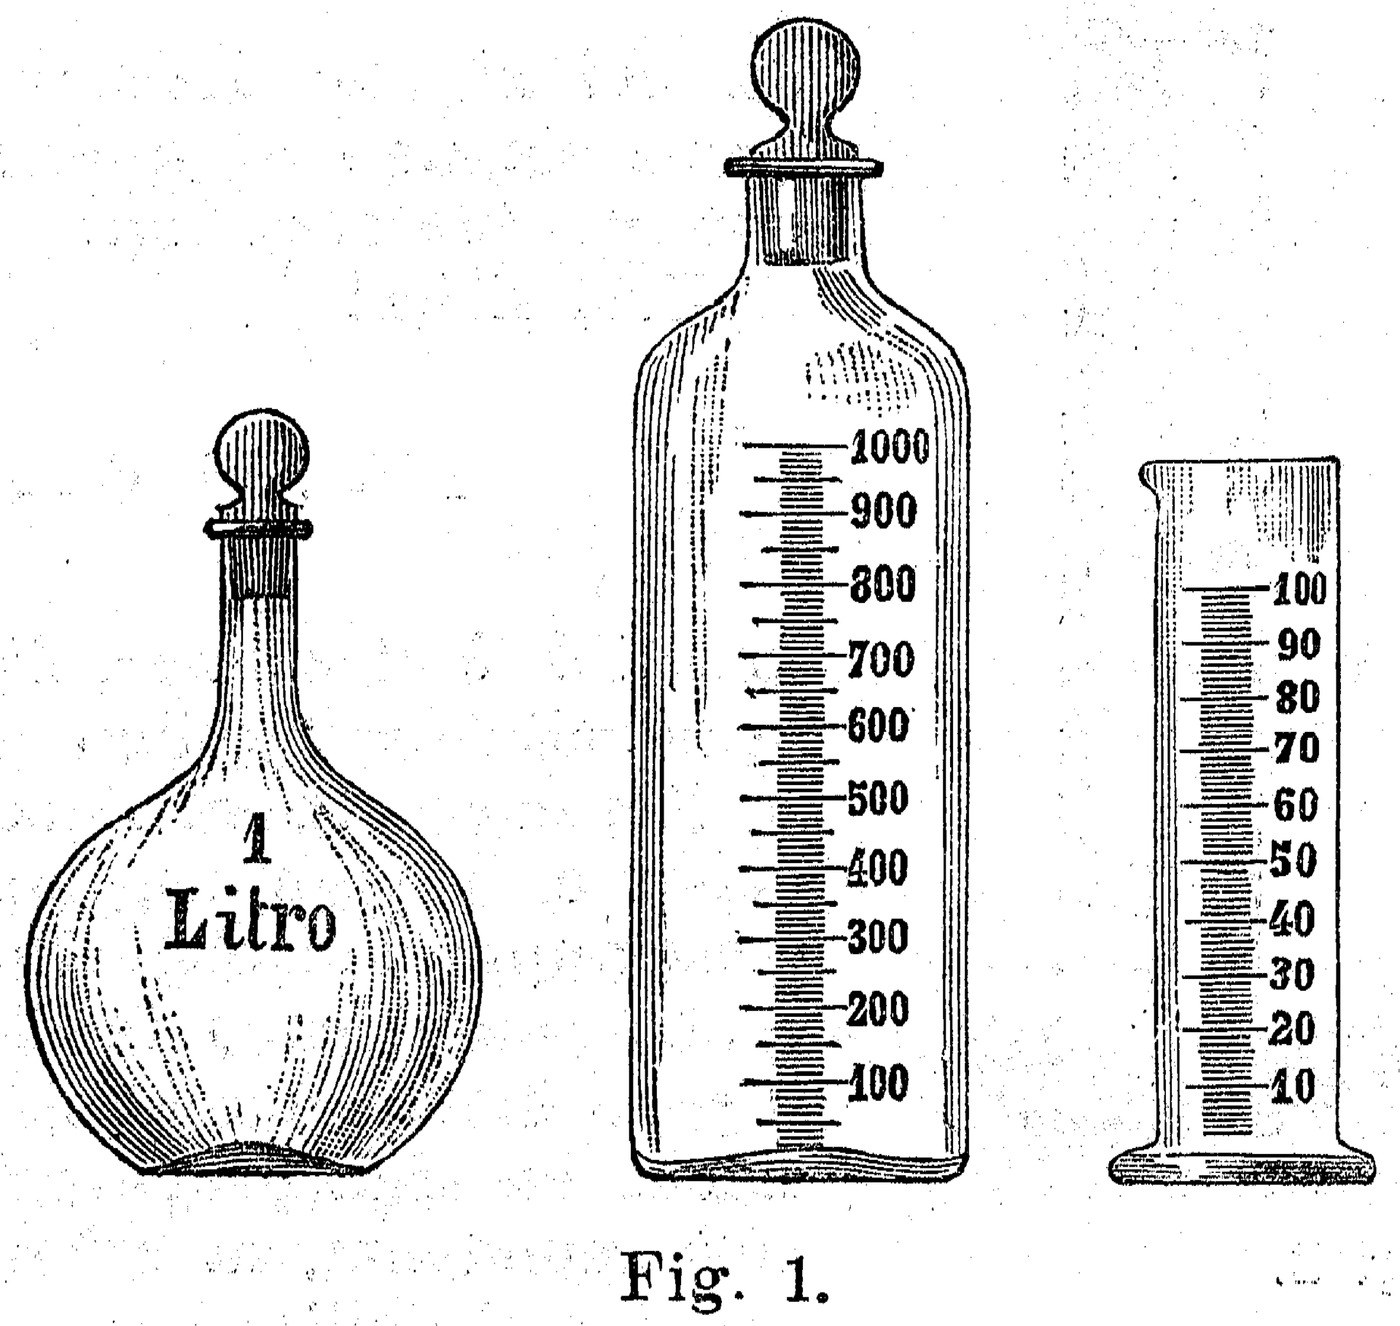


Graduated Cylinders: Glass Tube on a Foot, Marked by Weighing Water
A graduated cylinder is a narrow glass tube standing on a foot, with a lip to pour and lines for volume; it measures more closely than a beaker. Guyton de Morveau introduced it in 1784. Close a straight tube flat, fuse a glass foot under it, pull a lip, anneal, then mark it by weighing in water.
The picture: graduated laboratory glassware engraved in 1895 (Alessandri): a litre flask, a graduated bottle and, on the right, a footed graduated cylinder with a lip.
Advanced
An hour per cylinder, plus annealing
Instructions
1
1
Close the bottom
Close the bottom
Cut a straight, even tube to length, close one end in the flame and press it flat on the marver.
Materials for this step:
 Glass Tubing Kit1 piece
Tools needed:
 Diamond Scriber
 Bench Glassblowing Torch
 Marver
 Safety Glasses
 Heat-Resistant Gloves
2
2
Fuse on a foot
Fuse on a foot
Melt a gather of rod, press it into a flat disc wider than the tube and, while both are hot, fuse it centred under the bottom so the cylinder stands.
Materials for this step:
 Borosilicate Glass Rod1 piece
Tools needed:
Bench Glassblowing TorchMarverHeat-Resistant Gloves3
3
Rim and lip
Rim and lip
Fire-polish and slightly flare the rim with the jacks and push out a small pouring lip.
Tools needed:
Bench Glassblowing Torch Jacks
Jacks4
4
Anneal
Anneal
Anneal in the kiln at the glass's annealing temperature and cool slowly.
Tools needed:
 Kiln
Kiln5
5
Graduate by weighing water
Graduate by weighing water
Stand the cylinder on the balance, add water a few grams at a time (1 g is about 1 mL near room temperature) and scratch a line at the bottom of the meniscus at each step with the diamond scriber. Number the main lines.
Materials for this step:
 Water0.5 liter
Tools needed:
 Balance ScaleDiamond Scriber
 Digital Caliper 6-Inch
6
6
Spacing of the marks
Spacing of the marks
Loading Jupyter Notebook...
Materials
3- 1 piecePlaceholder
- 1 piecePlaceholder
- 0.5 literPlaceholder
This blueprint makes
Related Blueprints
These blueprints share knowledge with this one — techniques, materials, or principles that connect them in the learning graph.
CC0 Public Domain
This blueprint is released under CC0. You are free to copy, modify, distribute, and use this work for any purpose, without asking permission.
Support the Maker by purchasing products through their Blueprint where they earn a Maker Commission set by Vendors, or create a new iteration of this Blueprint and include it as a connection in your own Blueprint to share revenue.