Collaboration
ART
BEAUTY & WELLNESS
CRAFT
CULTURE & HISTORY
ENTERTAINMENT
ENVIRONMENT
FOOD & DRINKS
REVERSE ENGINEERING
SCIENCES
SPORTS
TECHNOLOGY
WEARABLES
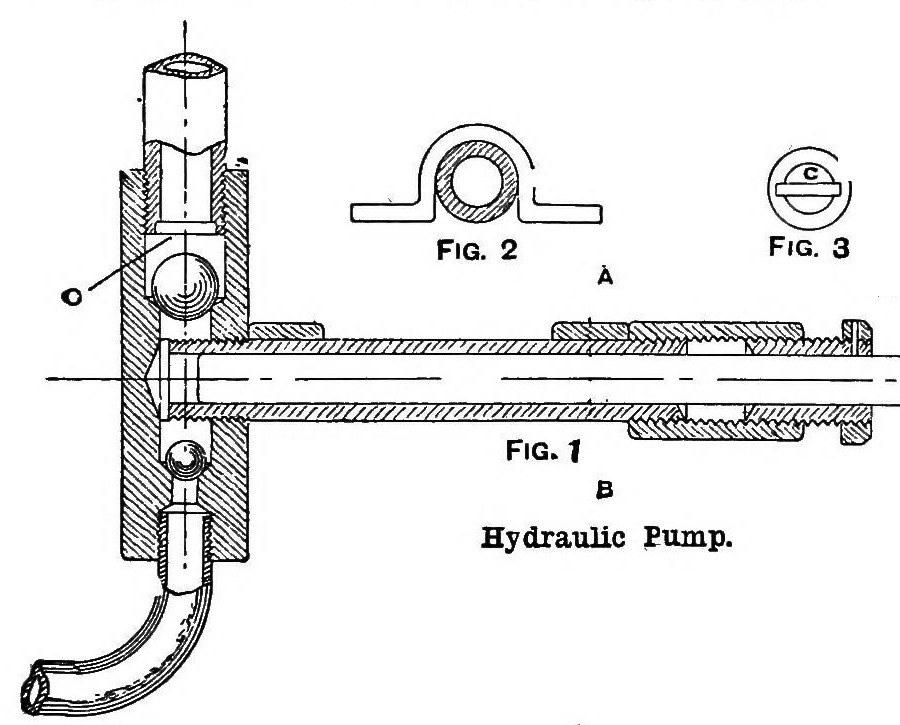


Hydraulic Test Pump: Brass Valve Box with Glass Marble Valves and a Gas-Barrel Plunger (Cassell's, 1903)
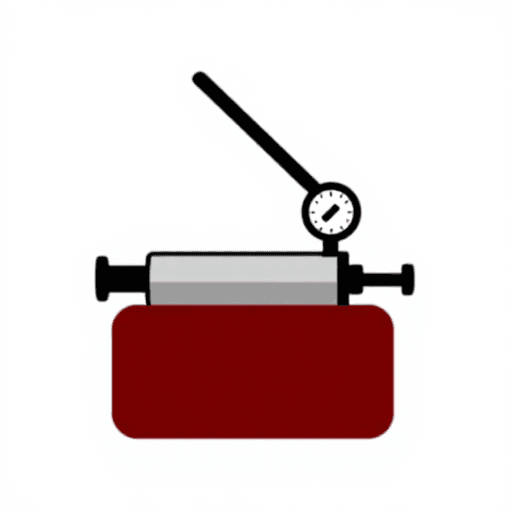
A hand pump for testing a small boiler, a pipe or a fitting with water under pressure. Cassell's Cyclopaedia of Mechanics (1903) drills a brass rod into a valve box, uses two glass playing marbles as the valves, and works a plunger in a short length of gas or steam pipe through a gland made from an ordinary socket and nipple.
The source says it "would stand a pressure of 250 lb. per square inch easily". It has no gauge of its own: read the pressure on the work being tested.
Source: P. N. Hasluck (ed.), Cassell's Cyclopaedia of Mechanics, Third Series (1903), p. 291, "Simple Hydraulic Testing Pump". Picture: its Figs. 1-3.
Intermediate
Unknown
Instructions
1
1
Read Cassell's
Read Cassell's
"The pump here illustrated is designed for use in testing a small boiler, and for similar purposes; it will fulfil the purpose of pumps of costly design and workmanship, and can be built for a few pence. It consists of a rod of solid brass or gun-metal drilled out to the required sizes as shown in Fig. 1, and fitted with ordinary iron gas or steam bends at the top and bottom of valve box."
2
2
Drill the valve box
Drill the valve box
Drill a rod of solid brass (or gun-metal) lengthwise from both ends to the sizes in Fig. 1, so that each glass marble drops into a seating made by the drill: the suction valve below, the discharge valve above. Drill and tap both ends for the iron gas or steam pipe bends, and drill and tap the centre of the side to take the pump barrel. No sizes are given (unknown).
Materials for this step:
 Brass Rod1 valve box
Tools needed:
 Bench Vise
 Drill Press
 Drill Bit Set
 Tap and Die Set
 Unknown Dimensions
3
3
Fit the valves and bends
Fit the valves and bends
Drop a glass marble into each seating (glass is preferred: it is far rounder than clay marbles). Screw an iron gas or steam pipe bend into the bottom (the suction) and another into the top (the delivery). The upper pipe carries a small cross-bar that stops the discharge marble from blocking the outlet (Fig. 3); its material is not given (unknown).
Materials for this step:
 Glass Marbles2 pieces
 Threaded Pipe Fitting2 pipe bends
 Unknown Material1 cross-bar
Tools needed:
 Pipe Wrench
4
4
Make the barrel and gland
Make the barrel and gland
Cut a short length of gas or steam pipe for the barrel: its length is set by the stroke the pump is to have. Screw one end into the valve box. Countersink the other (gland) end, screw an ordinary socket over it, and screw into the socket an ordinary nipple, also countersunk, as the gland. Fit a back nut on the nipple for screwing up the gland and fix it with a rivet so it cannot turn.
Materials for this step:
 Water Pipe1 short lengthThreaded Pipe Fitting2 socket and nipple
 Lock Nut1 piece
 Iron Rivets1 piece
Tools needed:
 Hacksaw
 Countersink Drill Bit SetPipe Wrench
 Ball Peen Hammer
5
5
Make the plunger
Make the plunger
File out the inside of the barrel roughly to remove scale and unevenness left by the pipe mandrel. Turn a plunger to fit it loosely, file two flats on one end and drill a hole there for a pin. The plunger's material and what the pin holds are not given (unknown).
Materials for this step:
Unknown Material1 plungerTools needed:
 Files (Hand File)
 Metal LatheDrill PressDrill Bit Set
6
6
Mount and use
Mount and use
Fix the pump down with two ordinary bent clips over the barrel near its ends (Fig. 2). Put the suction bend in water, connect the delivery to the work and work the plunger. Cassell's: the pump "would stand a pressure of 250 lb. per square inch easily". The clip material is not given (unknown).
Materials for this step:
Unknown Material2 bent clipsTools needed:
Pipe WrenchMaterials
7- 1 valve boxPlaceholder
- 2 piecesPlaceholder
- 2 socket and nipplePlaceholder
- 2 bent clipsPlaceholder
- 1 short lengthPlaceholder
- 1 piecePlaceholder
- 1 piecePlaceholder
Tools Required
11- Placeholder
- Placeholder
- Placeholder
- Placeholder
- Placeholder
- Placeholder
- Placeholder
- Placeholder
- Placeholder
- Placeholder
- Placeholder
This blueprint makes
CC0 Public Domain
This blueprint is released under CC0. You are free to copy, modify, distribute, and use this work for any purpose, without asking permission.
Support the Maker by purchasing products through their Blueprint where they earn a Maker Commission set by Vendors, or create a new iteration of this Blueprint and include it as a connection in your own Blueprint to share revenue.