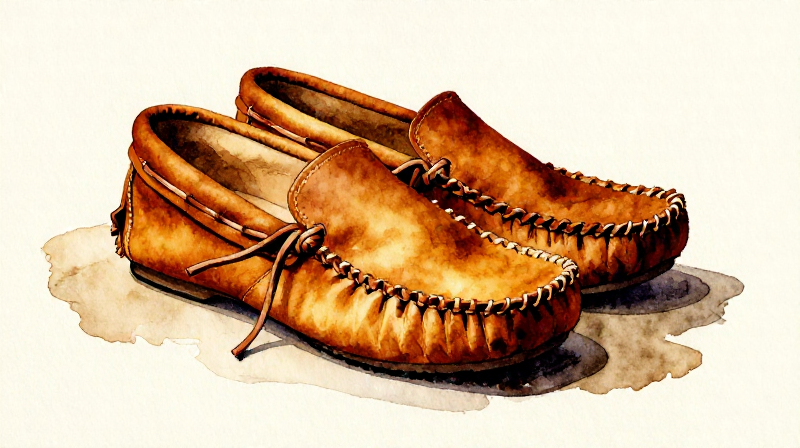
Sewing Leather Moccasins from Brain-Tanned Hide — One-Piece Wraparound Pattern
The moccasin is the oldest known shoe pattern — archaeological finds from the American Southwest, Scandinavia, and Central Asia show the same basic construction: a single piece of soft leather wrapped around the foot, gathered at the toe, and sewn up the heel. No last, no sole stitching, no separate upper. The entire shoe is cut from one hide piece and shaped directly on the wearer's foot.
Brain-tanned buckskin is the ideal material because it remains supple even after repeated wetting and drying — unlike bark-tanned leather, which stiffens when wet. The animal brain oils worked into the hide during tanning act as a permanent conditioner. A single deer hide yields enough leather for 3-4 pairs of moccasins.
This blueprint follows the center-seam pucker-toe pattern, the simplest and most widespread moccasin design. The toe is gathered into a seam running from toe to instep, and the heel is folded up and stitched. The entire construction requires only a sharp knife, an awl, a bone needle, and sinew thread — all tools available in the Stone Age.
Instructions
Select and inspect the hide
Select and inspect the hide
Choose a piece of brain-tanned buckskin at least 40 x 50 cm per moccasin. The leather should be uniformly soft and supple with no stiff spots, holes, or thin areas. Deer, elk, or moose hide all work — thicker hides (elk, moose) produce more durable soles, while thinner deer hide is easier to sew. Avoid areas near the belly where the hide is thinnest.
Materials for this step:
 Brain-Tanned Hide1 piece
Trace the foot pattern
Trace the foot pattern
Stand barefoot on the hide with your weight evenly distributed. Using marking chalk, trace around the foot leaving a 2-3 cm margin on all sides. This margin provides material for the side walls and seam allowances. Mark the centerline of the foot from heel to longest toe. Cut out the traced shape with a sharp knife — cut on a hard surface, pulling the knife toward you in smooth strokes.
Tools needed:
 Marking Chalk
 Sharp Knife
Cut the T-shaped heel flaps
Cut the T-shaped heel flaps
At the heel end of the pattern, cut two vertical slits from the edge inward, each about 5 cm long, positioned at the sides of the heel. These cuts create a central heel flap and two side flaps that will fold up and overlap to form the back of the moccasin. The central flap should be roughly the width of your heel (7-8 cm).
Tools needed:
Sharp KnifeFold the leather up around the foot
Fold the leather up around the foot
Place your foot on the cut-out leather. Fold the side margins up around the foot, pulling the leather snug against the sole of the foot. The leather should wrap up past the ankle bone on both sides. At the toe, the excess material will bunch up — this is intentional and forms the characteristic puckered toe seam. Pin or hold the leather in position while you assess the fit.
Gather and pinch the toe pucker
Gather and pinch the toe pucker
Gather the excess leather at the toe into a central ridge running from the toe tip back toward the instep. Pinch this ridge together firmly — the gathered folds should be even on both sides. The pucker creates the rounded toe shape. The gathered seam should extend about 5-8 cm from the toe tip. Mark the sewing line with chalk while the leather is held in shape.
Tools needed:
Marking ChalkPunch awl holes along the toe seam
Punch awl holes along the toe seam
Remove the foot and flatten the pinched toe seam. Using an awl, punch stitch holes along both sides of the gathered seam, spacing them 3-4 mm apart and 3 mm from the edge. Punch through all layers of the gathered leather. Consistent hole spacing produces a clean, even seam. Work from the toe tip backward toward the instep.
Tools needed:
 Awl
AwlSew the toe seam with sinew thread
Sew the toe seam with sinew thread
Thread a bone needle with a length of sinew thread (about 60 cm). Sinew is ideal because it swells when wet, sealing the stitch holes watertight, and the natural adhesive on the fibers locks each stitch in place. Sew the toe seam using a whip stitch — pass the needle through both layers from the same side each time, wrapping over the seam edge. Pull each stitch tight. The finished seam should form a neat raised ridge along the top of the toe.
Materials for this step:
 Sinew Thread1 meter
Tools needed:
 Bone Sewing Needle
Fold and stitch the heel
Fold and stitch the heel
Fold the central heel flap straight up. Fold the two side flaps inward to overlap the central flap, creating a cupped heel shape. The side flaps should overlap by at least 1 cm. Punch awl holes through the overlapping layers and sew with sinew using a whip stitch, working from the bottom of the heel upward. The heel seam runs vertically up the back of the moccasin.
Materials for this step:
Sinew Thread1 meterTools needed:
AwlBone Sewing NeedleTrim the ankle cuff
Trim the ankle cuff
Put the sewn moccasin on your foot and check the fit. The leather should wrap comfortably around the ankle with 2-3 cm of excess above the ankle bone. Trim the top edge to an even height all around, cutting away any excess material. A lower cut (just below the ankle bone) gives a summer moccasin; a higher cut (5 cm above the ankle) gives a winter boot-style moccasin.
Tools needed:
Sharp KnifeCut and attach the ankle lacing
Cut and attach the ankle lacing
Cut a thin leather thong (3-4 mm wide, 60 cm long) from a scrap of the same hide. Punch two small holes on each side of the moccasin opening, just below the ankle cuff. Thread the thong through these holes to create a drawstring closure. The lacing wraps around the ankle once and ties at the front or side. This holds the moccasin snug against the foot during walking.
Materials for this step:
Sinew Thread1 meterTools needed:
AwlSharp KnifeSmoke the finished moccasins for waterproofing
Smoke the finished moccasins for waterproofing
Smoking brain-tanned leather is essential — unsmoked buckskin reverts to rawhide when soaked and dried. Suspend the moccasins over a small smoky fire (punk wood or rotted wood produces thick smoke without excessive heat) for 20-30 minutes per side. The smoke deposits aldehydes and phenols into the leather fibers that cross-link with the collagen, permanently preventing the tanning from washing out. The leather turns from white to golden-brown or dark amber depending on smoking time.
Repeat for the second moccasin
Repeat for the second moccasin
Trace and cut a mirror-image pattern for the other foot. The construction is identical — trace, cut heel flaps, gather toe, sew toe seam, fold and stitch heel, trim cuff, add lacing, smoke. With practice, the second moccasin goes faster. A well-made pair of brain-tanned moccasins conforms to the foot like a second skin and lasts 6-12 months of daily wear on natural ground.
Connected Blueprint Materials
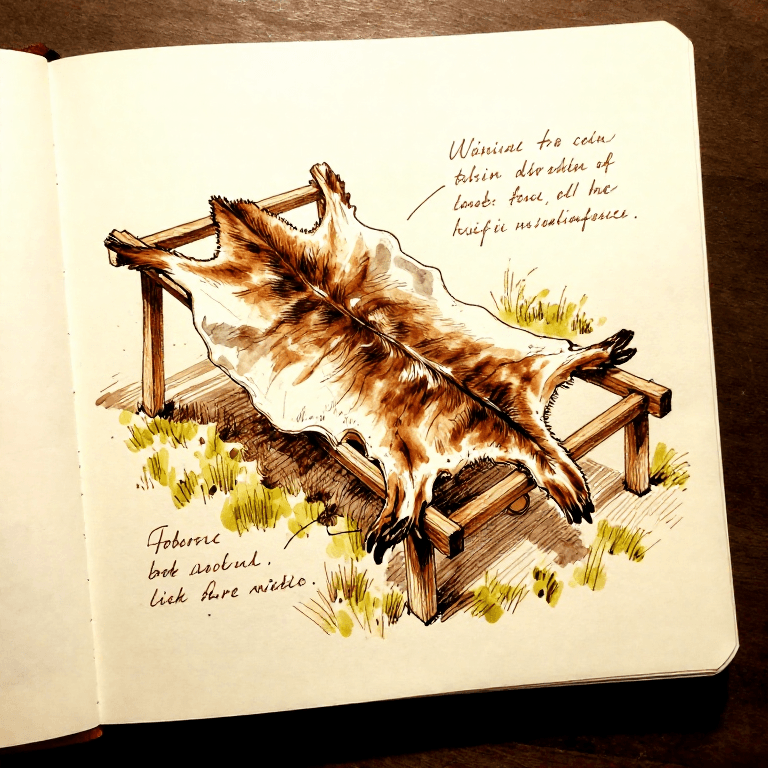
Brain Tanning a Hide — Primitive Leather from Scratch
by Mary![]()
Wilderness

Making a Bone Sewing Needle — Splinter and Polish Technique
by Tex![]()
Textile & Leather

Processing Animal Sinew into Thread — Tendon Fiber Preparation
by Bob![]()
Textile & Leather
Related Blueprints
These blueprints share knowledge with this one — techniques, materials, or principles that connect them in the learning graph.

CC0 Public Domain
This blueprint is released under CC0. You are free to copy, modify, distribute, and use this work for any purpose, without asking permission.
Support the Maker by purchasing products through their Blueprint where they earn a Maker Commission set by Vendors, or create a new iteration of this Blueprint and include it as a connection in your own Blueprint to share revenue.