ART
BEAUTY & WELLNESS
CRAFT
CULTURE & HISTORY
ENTERTAINMENT
ENVIRONMENT
FOOD & DRINKS
REVERSE ENGINEERING
SCIENCES
SPORTS
TECHNOLOGY
WEARABLES
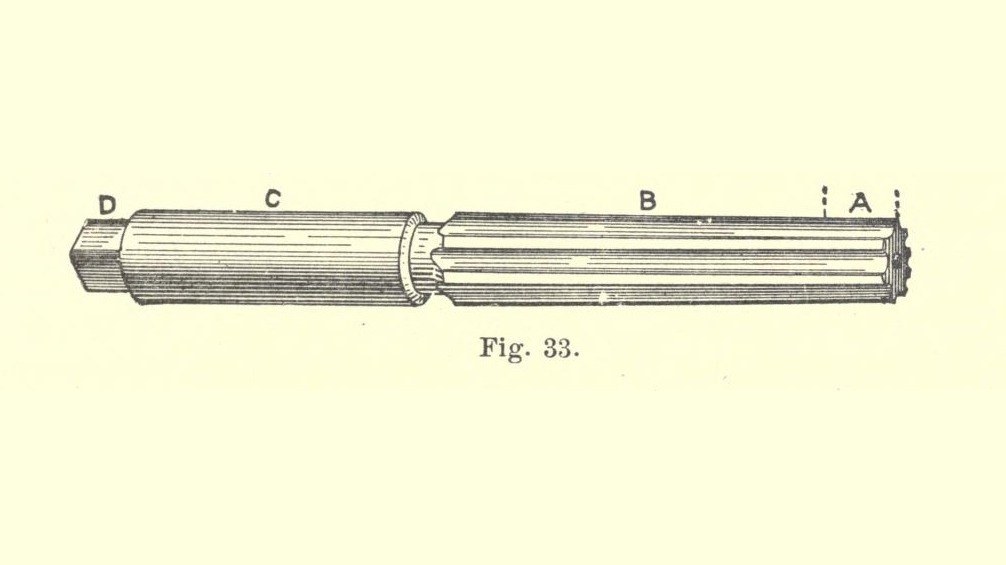


Reamer: a Fluted Hand Reamer Turned, Fluted, Hardened and Stoned (Markham, 1908)
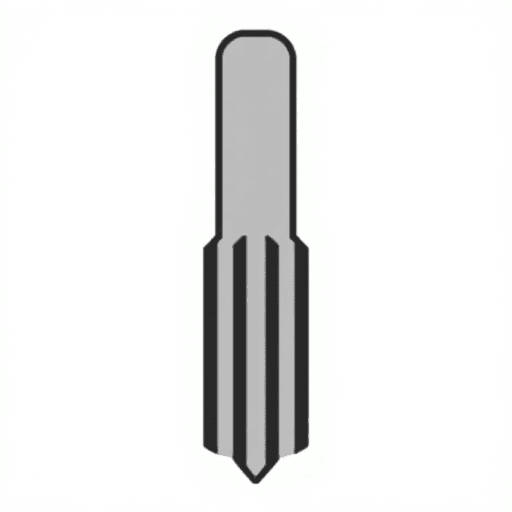
A reamer finishes a drilled hole smooth and to an exact size. E. R. Markham's Tool Making (1908) gives the fluted hand reamer step by step: turn it a little over size, cut an even number of flutes spaced slightly unevenly, harden it without letting it spring, then grind and stone the teeth to size.
His tables give the number of teeth and the fluting cutter for each diameter. The 1/2 in example is ours, and so is plain steel bar for his "steel"; he does not name the hardening bath.
Source: E. R. Markham, Tool Making (1908), pp. 30-35. Picture: his Fig. 33.
Advanced
Two days
Instructions
1
1
Read Markham
Read Markham
"Fluted reamers designed to remove but a small amount of stock, and intended to cut holes to an accurate size are rarely given less than six flutes."
2
2
Turn the blank
Turn the blank
Take steel 3/32 to 1/8 in larger than the finished size (5/8 in for a 1/2 in reamer). Turn a chip 1/32 in deep off the outside and anneal it. Then turn the cutting part (B) and the short entering end (A) .010 to .015 in over the finished size, turn the shank (C) to finished size, and mill the end (D) square for a wrench. The end A is left slightly tapered so the reamer can enter the hole.
Materials for this step:
 Steel Bar Stock1 bar
Tools needed:
 Metal Lathe
 Lathe Cutting Tool
 Micrometer
 Milling Machine
 Muffle Furnace
 Safety Glasses
3
3
Choose teeth and cutter
Choose teeth and cutter
Markham's numbers of teeth:
- 1/8 to 7/16 in: 6
- 1/2 to 11/16 in: 6 to 8
- 3/4 to 1 in: 8
- 1 1/16 to 1 1/2 in: 10
- 1 9/16 to 2 1/8 in: 12
- 2 1/4 to 3 in: 14
His fluting cutters: No. 1 for 1/8 to 3/16 in, No. 2 for 1/4 to 5/16, No. 3 for 3/8 to 7/16, No. 4 for 1/2 to 11/16, No. 5 for 3/4 to 1, No. 6 for 1 1/16 to 1 1/2, No. 7 for 1 9/16 to 2 1/8, No. 8 for 2 1/4 to 3. A 1/2 in reamer gets 8 teeth and the No. 4 cutter. The cutter puts the tooth ahead of the centre with about 5 degrees negative rake, so it takes a smooth scraping cut.
Tools needed:
 Reamer Fluting Cutter
4
4
Cut the flutes
Cut the flutes
Hold the reamer in the spiral (dividing) head of the milling machine. Cut one flute, turn the head half round (twenty turns of the index pin) and cut the opposite flute, so every tooth has one diametrically opposite for calipering. Space each neighbouring pair a few degrees (2, 3 or 4) off even spacing by moving the index pin a different number of holes. Cut to a depth that leaves a land about 1/5 of the distance between cutting edges: deeper makes weak, springy teeth, shallower leaves no room for chips.
Tools needed:
Milling Machine Dividing HeadReamer Fluting Cutter
5
5
Harden without springing
Harden without springing
Heat the reamer evenly, in a muffle furnace if you have one (in a forge, inside a tube so the fire does not touch it, turned often). Quench it held upright, working it up and down in the hardening bath; the bath is not named. A reamer 1 in across or larger comes out of the bath when it stops singing and goes into oil until cold. Draw the temper to a light straw colour, heating evenly so it does not spring.
Tools needed:
Muffle Furnace Unknown Material
 Quench Tank with OilSafety Glasses
6
6
Grind and stone to size
Grind and stone to size
On clean, true centres, grind the reamer to run true and to within .001 to .002 in of size. Back off each tooth for clearance with an emery wheel as large as will clear the next tooth, the tooth resting on an adjustable finger set so the edge is below centre; take light cuts all the way round, with a free-cutting wheel kept free of glaze, or the temper will draw. Grind the clearance to within .01 to .015 in of the edge, then bring the teeth to an edge and to size with oilstones, a medium stone then a fine one, never used dry.
Tools needed:
 Cylindrical Grinder
 Sharpening StoneMicrometerSafety Glasses
7
7
History and honest limits
History and honest limits
Markham taught machine-shop work at Harvard and the Rindge Manual Training School, and wrote Tool Making for the American School of Correspondence. He notes that odd numbers of teeth were once thought necessary, but an even number unevenly spaced works as well and is easier to caliper and grind.
He says only "steel" and "the bath": the plain steel bar, the hardening bath and the 1/2 in example are ours.
Materials
1- 1 barPlaceholder
Tools Required
12- Placeholder
- Placeholder
- Placeholder
- Placeholder
- Placeholder
- Placeholder
- Placeholder
- Placeholder
- Placeholder
- Placeholder
- Placeholder
- Placeholder
This blueprint makes
CC0 Public Domain
This blueprint is released under CC0. You are free to copy, modify, distribute, and use this work for any purpose, without asking permission.
Support the Maker by purchasing products through their Blueprint where they earn a Maker Commission set by Vendors, or create a new iteration of this Blueprint and include it as a connection in your own Blueprint to share revenue.