Collaboration
ART
BEAUTY & WELLNESS
CRAFT
CULTURE & HISTORY
ENTERTAINMENT
ENVIRONMENT
FOOD & DRINKS
REVERSE ENGINEERING
SCIENCES
SPORTS
TECHNOLOGY
WEARABLES
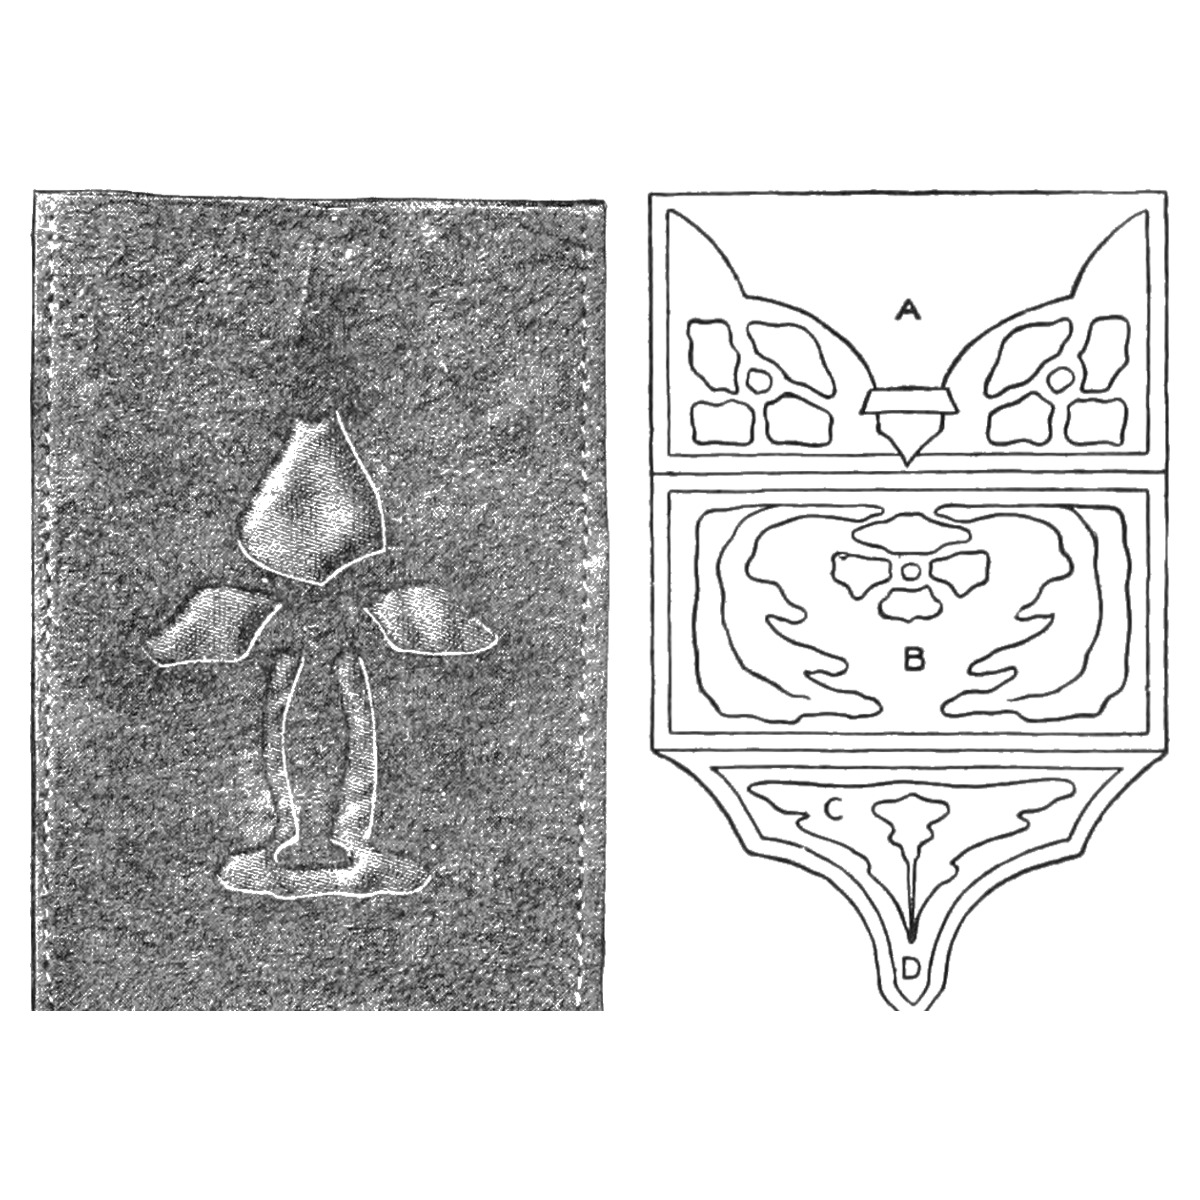


Tooled Stamp Case or Needle Book: Three-Part Fold With a Tongue-and-Slit Closure (Boy Mechanic, 1915)
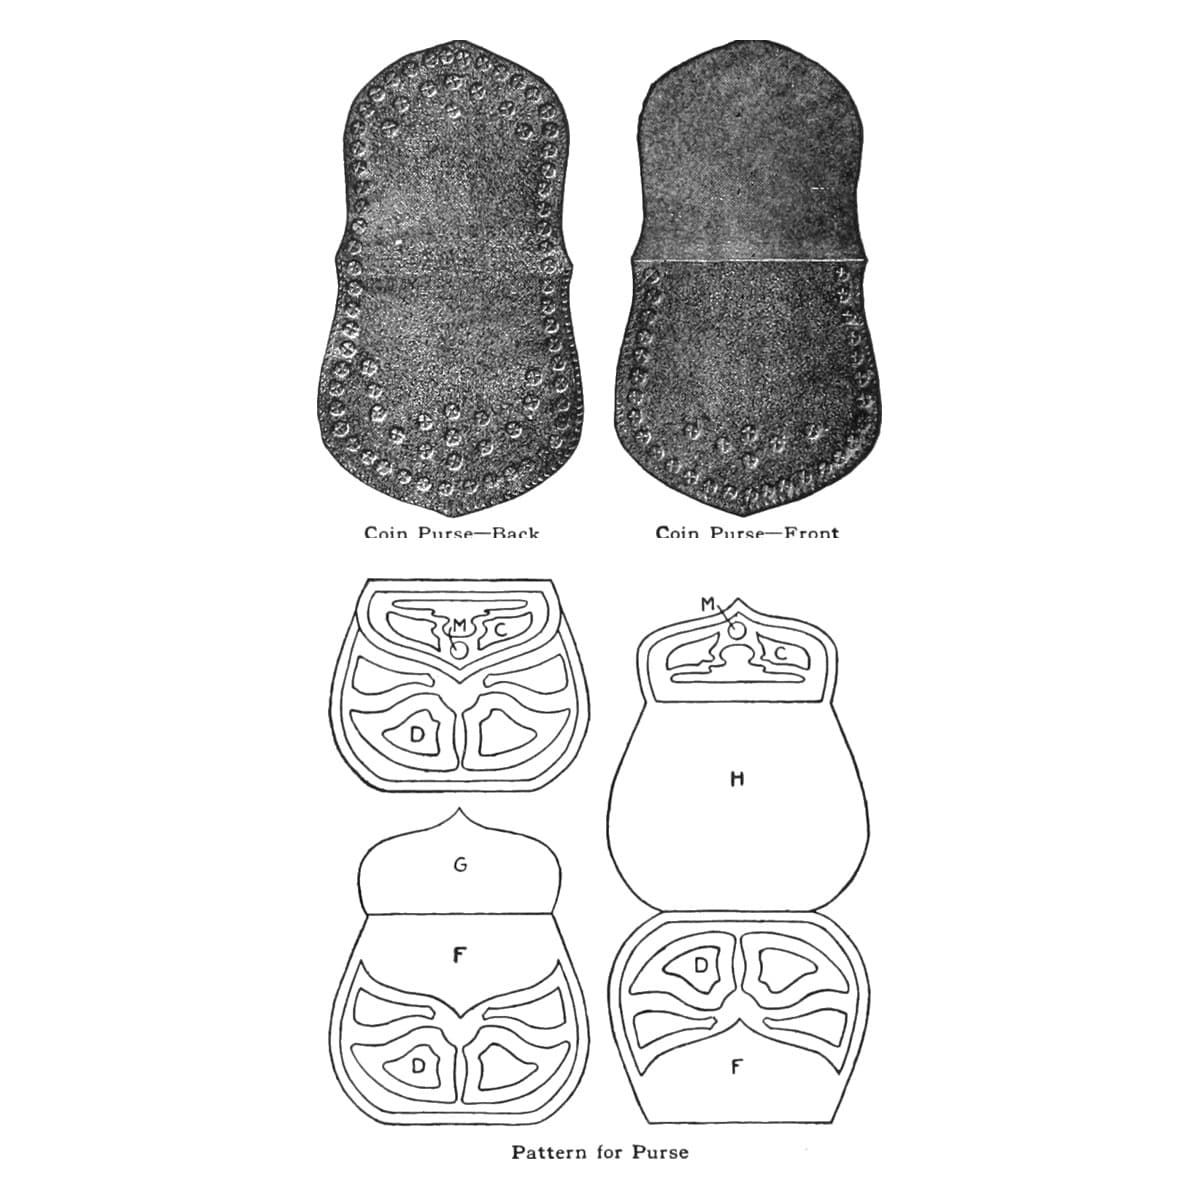
Mary C. Scovel's needle book or stamp case (The Boy Mechanic, Book 2, 1915): a 6-1/4 by 3-3/4 in piece of Russian calf folded in three, the flap ending in a long narrow tongue that slips through two slits in the front.
Beginner
About 2 hours
Instructions
1
1
Her sizes in centimetres
Her sizes in centimetres
Loading Jupyter Notebook...
2
2
Read The Boy Mechanic, Book 2
Read The Boy Mechanic, Book 2
Her outfit: "two special tools costing 50 cents each, one with a narrow edge for lining patterns, and one with broad ends for tooling; and a piece of tin, plate glass, or very smooth hard wood, which should not be smaller than 9 by 12 in. A soft sponge, a triangle, a rule, tracing paper and a hard pencil are also needed." Russian calfskin is best for tooling and stamping.
3
3
Make the paper pattern
Make the paper pattern
Cut Russian calf 6-1/4 by 3-3/4 in, which allows 1/4 in on each side and end for pinning. Fold paper into three equal parts: A the front; B the back, folded under A; C the flap, which folds up with B and over A. With the pattern open, all the design is on the same side; the design for B goes on upside down so it reads upright when folded. Shape C as you like, but keep its tongue D long and narrow.
Materials for this step:
 Calf Leather1 piece
Tools needed:
 Tracing Paper
 Pencil
 Scissors
 Ruler
4
4
Damp the leather and transfer the design
Damp the leather and transfer the design
Draw the whole design for the stamp case on tracing paper. Wet the leather on the wrong (unfinished) side with a soft sponge: pat it to moisten, not soak, it; too wet and the tool sticks and leaves an uneven background. Pin the design firmly on the leather, tack the leather down on its outer margin to the glass or board, and go over every line with a hard pencil, with firm, even pressure. Lift the paper and go over the lines with the narrow lining tool, with a strong, firm stroke. A line design can stop here.
Materials for this step:
Calf Leather1 pieceTools needed:
 SpongeTracing PaperPencil
 Drawing Pins (Thumbtacks, box of 50)
 Glass Sheet
 Leather Modeling Tool
5
5
Tool or stamp the background
Tool or stamp the background
Leave at least 1/8 in between the edge of the pattern and the design. To tool, press the background down with the broad end in even, long strokes; if it will not go down, the leather is too dry, so take it off and damp the back again. Keep the edges sharp between pressed and raised parts. To stamp instead, strike a small carpenter's nail set lightly with a wooden mallet in rows of circles; too hard a blow cuts the leather.
Tools needed:
Leather Modeling Tool Nail Set
 Wooden MalletSponge
6
6
Cut the slits and sew
Cut the slits and sew
Make two horizontal cuts in the front A about 3/16 in apart, a little wider than the tongue, as far from the bottom of A as the narrowest part of the tongue is from its end, so the tongue fits them. Sew parts A and B together. Stitch on a sewing machine with a long stitch, a large needle and silk as heavy as the needle takes; try it on a scrap first, and put tissue paper over the leather if the foot marks it. Without a machine, prick holes with an awl and sew with needle and silk, running or over-and-over; going over-and-over to the end and back gives an X stitch.
Materials for this step:
 Silk Thread1 piece
Tools needed:
 Craft KnifeRuler
 Sewing Machine
 Awl
 Two Harness Needles
7
7
Troubleshooting
Troubleshooting
Stamp case troubleshooting.
Flow
Loading...
8
8
History and honest limits
History and honest limits
From Mary C. Scovel, "Arts-Crafts Leather Work", in **The Boy Mechanic, Book 2**, Popular Mechanics, 1915 (Project Gutenberg 44585; checked on the archive.org scan boymechanicbook200chic2, pp. 432-441), Part I. Part II adds that ooze cow or calf can be used with a cut-out design lined with silk; that version is not made here. The tools and metric figures are ours.
Materials
2- 2 piecesPlaceholder
- 1 piecePlaceholder
Tools Required
14- Placeholder
- 1 vendor sell this, none ship to you yetPlaceholder
- Placeholder
- Placeholder
- Placeholder
- Placeholder
- Placeholder
- Placeholder
- Placeholder
- Placeholder
- Placeholder
- Placeholder
- Placeholder
- Placeholder
This blueprint makes
Related Blueprints
These blueprints share knowledge with this one — techniques, materials, or principles that connect them in the learning graph.
CC0 Public Domain
This blueprint is released under CC0. You are free to copy, modify, distribute, and use this work for any purpose, without asking permission.
Support the Maker by purchasing products through their Blueprint where they earn a Maker Commission set by Vendors, or create a new iteration of this Blueprint and include it as a connection in your own Blueprint to share revenue.