
Collaboration
ART
BEAUTY & WELLNESS
CRAFT
CULTURE & HISTORY
ENTERTAINMENT
ENVIRONMENT
FOOD & DRINKS
REVERSE ENGINEERING
SCIENCES
SPORTS
TECHNOLOGY
WEARABLES
16 ft Canvas-Covered Cedar Canoe: Backbone, Seven Molds, Cedar Ribs and Planking, Glued Canvas (Boy Mechanic, 1919)
Woody

Created by

Woody

13. November 2026NO
0
0
0
0
0

16 ft Canvas-Covered Cedar Canoe: Backbone, Seven Molds, Cedar Ribs and Planking, Glued Canvas (Boy Mechanic, 1919)

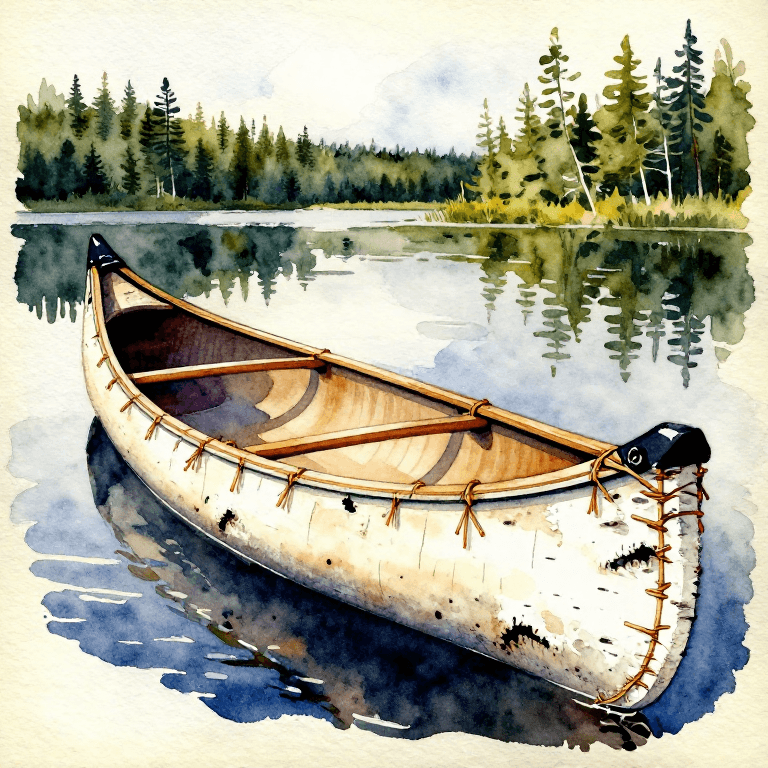
Stillman Taylor's open Canadian canoe from The Boy Mechanic, Book 3 (1919): about 16 ft long, 31 in beam, 60 to 70 lb. Built upside down over a backbone and seven paper-pattern molds, with oak or ash stems, keelson and gunwales, 1/8 in cedar ribs and planking fastened with copper clout nails, then covered with No. 6 canvas laid in melted marine glue, painted, and varnished. Every layout dot and width is his, as printed.
Advanced
Several weeks

Instructions

1

His layout data

Loading Jupyter Notebook...
2

Read The Boy Mechanic, Book 3

"Working with light materials, the canoe builder must pay particular attention to the workmanship ... the work must not be hurried, but plenty of time taken to do each and every part well."
3

Get the materials

Stem: oak or ash 6 ft x 3/4 in square. Keelson: oak or ash 14 ft x 3-1/2 x 3/8 in. Gunwales: 2 of oak or ash 16 ft x 7/8 x 1/2 in. Seat risings: 2 of oak or ash 1/2 in square. Fenderwales: 34 ft of 1/2 in half-round molding. Outside keel (optional): oak 14 ft x 1 x 1/2 in. Deck beams: 2 of oak or ash 8 x 1-1/8 x 3/8 in. Seat frames: 2 at 30 x 3 x 3/4 and 2 at 12 x 2-1/4 x 3/4 in. Planking: cedar or pine, 100 sq ft, 1/8 in (25 ft of 1 in lumber dressed to 1/8 in, in 12, 14 and 16 ft lengths). Ribs: 360 running ft of cedar 1-3/4 x 1/8 in. Breast hooks: cedar or oak 32 x 9 x 3/4 in. Backbone, molds and ribbands from any cheap stuff. Fastenings: 1 lb 2 in wire nails; 1 lb 5/8 in and 1/2 lb 3/4 in copper clout nails; 18 brass screws 1-1/4 in No. 8 and 24 brass screws 1 in No. 6; 4 lb marine glue; 3 oz No. 2 copper tacks; 11-3/4 yd No. 6 canvas; 1 lb 3/8 in copper tacks. Rock elm or fir may replace oak or ash; spruce, pine, cypress or fir may replace cedar.

Materials for this step:

White Oak BoardWhite Oak Board4 pieces
Cedar BoardCedar Board6 pieces
Pine BoardPine Board3 pieces

Tools needed:

Rip SawRip Saw
Hand SawHand Saw
Hand PlaneHand Plane
Tape MeasureTape Measure
4

Lay out the backbone and molds

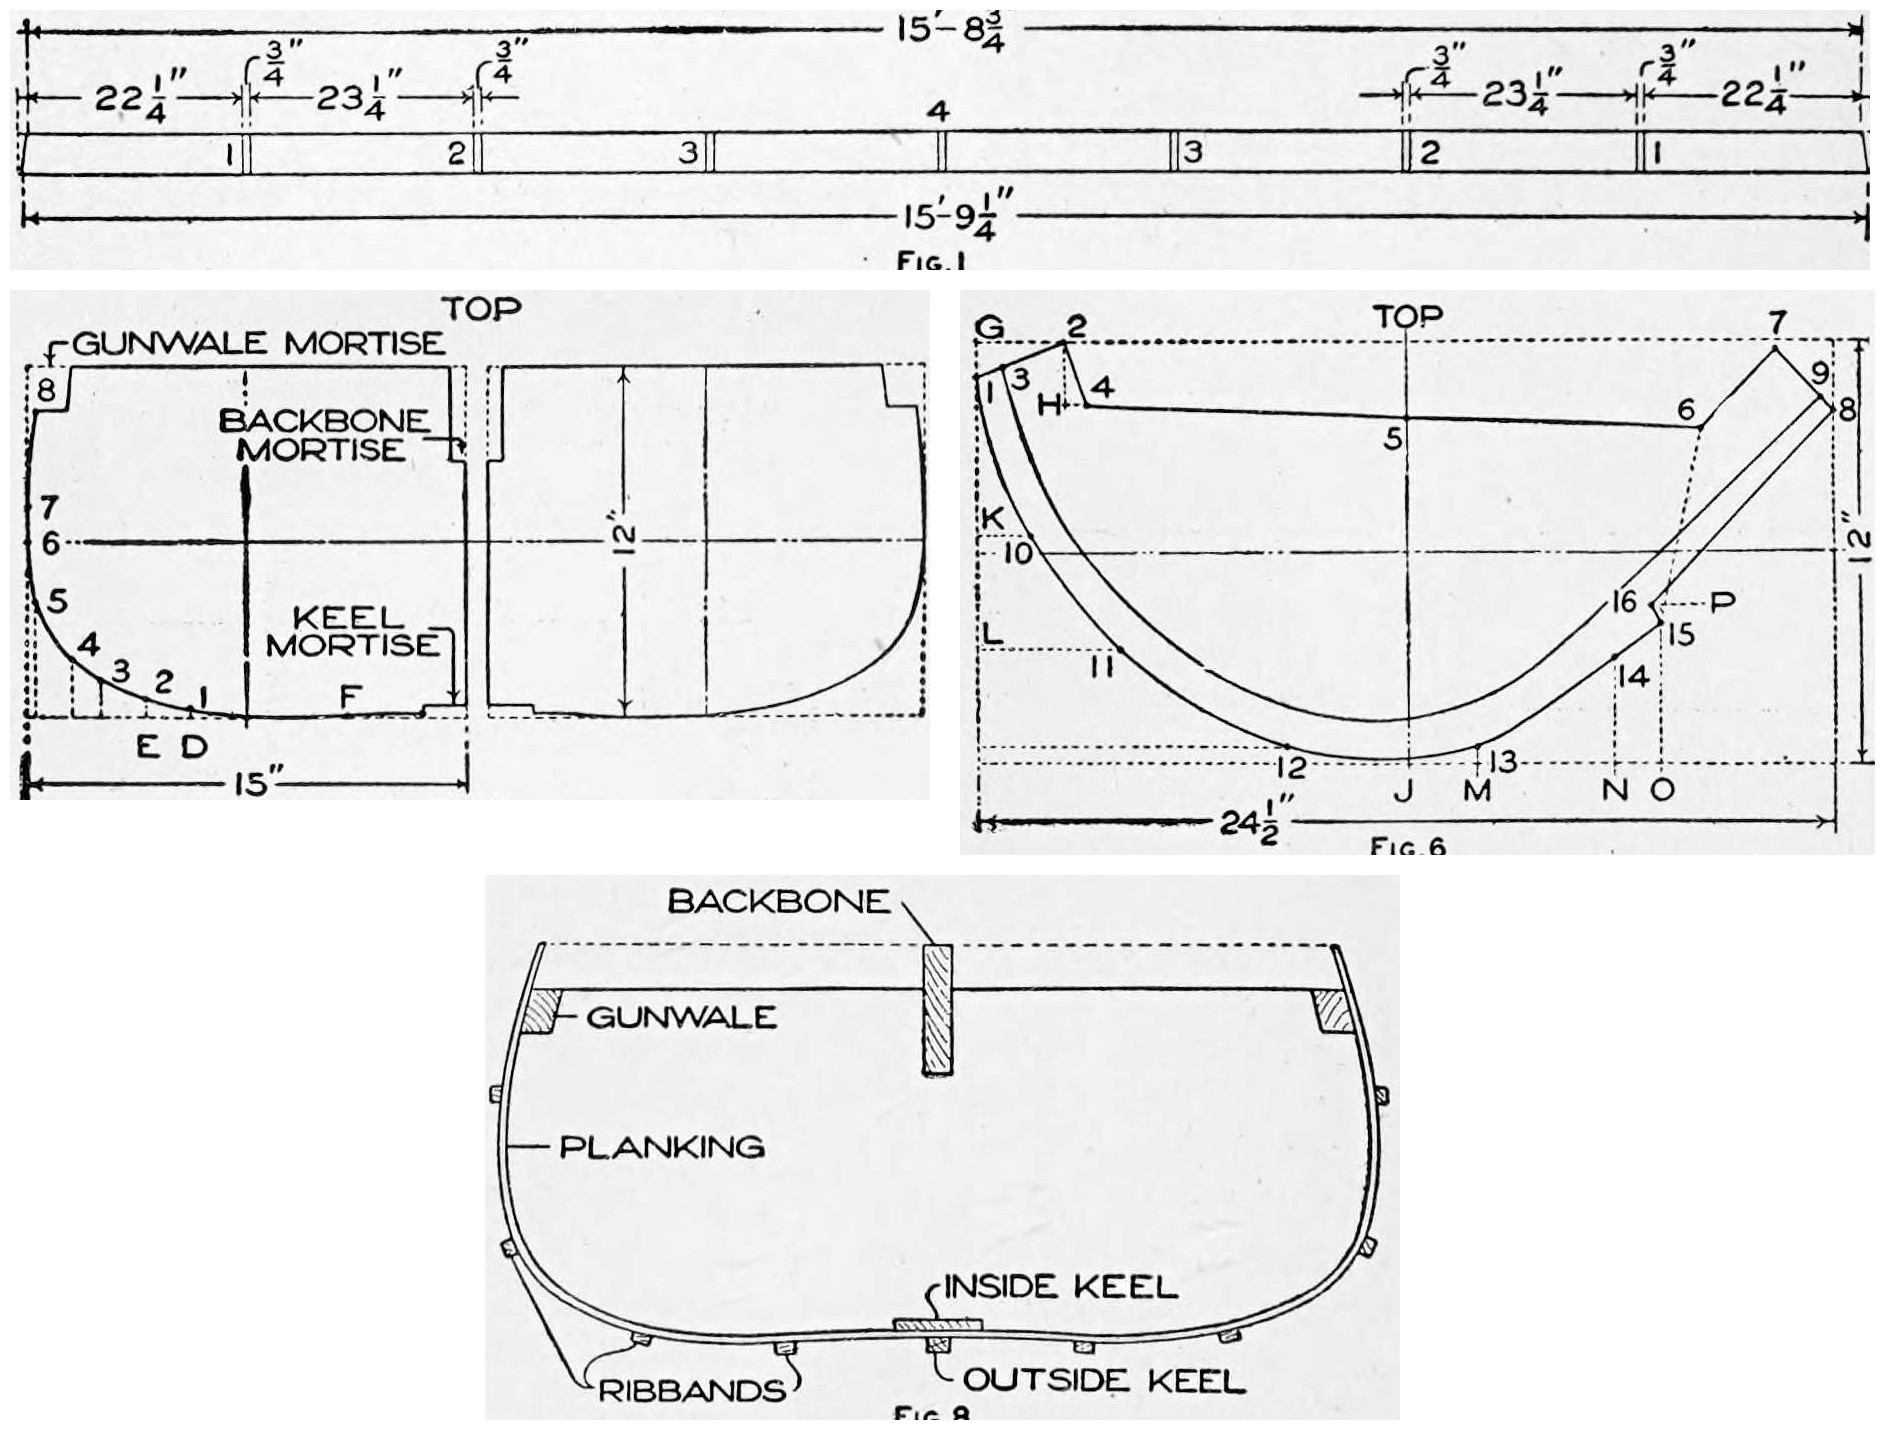
Cut the backbone from a 16 ft x 4 x 7/8 in board, top edge 15 ft 8-3/4 in, and mark the mold stations from each end: 22-1/4 in to mold 1, then 23-1/4 in to mold 2 and 23-1/4 in to mold 3, each mold space 3/4 in thick; mold 4 sits at the centre; cut the ends off on the bevel (Fig. 1). Draw each mold on stiff paper from his rectangles, mortises and dots (notebook), trace the curve through the dots, cut out the half, fold and draw the other side, and cut the molds from 7/8 in stock: seven in all, numbered alike from each end: two No. 1, two No. 2 (each in halves), two No. 3 and one No. 4; nail battens across the halves.

Materials for this step:

Pine BoardPine Board2 pieces
Heavy Paper SheetsHeavy Paper Sheets1 piece
NailsNails1 piece

Tools needed:

Hand SawHand Saw
Coping SawCoping Saw
RulerRuler
PencilPencil
ScissorsScissors
HammerHammer
5

Bend the stems and shape the keelson

Make the stem mold from his Fig. 6 pattern (24-1/2 x 12 in rectangle, dots in the notebook) and bend the straight-grained 3/4 in square oak or ash stems on it. Cut the keelson 13 ft 11 in long, tapering from 3-1/2 in at the centre: 3-1/2 in at 1 and 2 ft, 3-1/4, 2-5/8, 2 and 1-1/4 in at 3 to 6 ft, and 15/16 in at the ends (Fig. 7). Fasten each stem to the keelson with a couple of 3/4 in No. 10 screws.

Materials for this step:

White Oak BoardWhite Oak Board2 pieces
Brass Wood ScrewsBrass Wood Screws4 pieces

Tools needed:

DrawknifeDrawknife
Hand PlaneHand Plane
Hand SawHand Saw
Brace and BitBrace and Bit
Screwdriver - FlatScrewdriver - Flat
C-ClampC-Clamp
6

Set up the frame

Build it upside down: set the backbone on boxes about 1 ft or more off the floor and the molds in their numbered places, the backbone resting in their top mortises. True the molds with a square and toenail them. Lay the keelson in its mortises, fit the stems to the backbone angle and nail through the mold tops into them. Bevel the stem splice from the inside, leaving the outer edge about 1/8 in wide. Put on the gunwales at the sheer line with nails left proud, then four ribbands a side at 5 in centres from the keel, fastened with 1-1/4 in brads.

Materials for this step:

White Oak BoardWhite Oak Board2 pieces
Pine BoardPine Board1 piece
NailsNails1 piece

Tools needed:

Try SquareTry Square
HammerHammer
ChiselsChisels
Hand PlaneHand Plane
7

Rib the hull

Saw cedar ribs 1-3/4 in wide and 1/8 in thick, cut to length gunwale to gunwale over the ribbands. Space them 3 in apart on centres along the keelson, one over each mold. Fasten each rib to the outside of the keelson with two 5/8 in copper clout nails, spring it in under the ribbands and fasten it to the gunwales. Then remove the ribbands.

Materials for this step:

Cedar BoardCedar Board2 pieces
Copper Clout NailsCopper Clout Nails1 piece

Tools needed:

Hand SawHand Saw
HammerHammer
Tape MeasureTape Measure
8

Plank the hull

Plank with 1/8 in cedar, bent cold, full length stem to stem, butted edge to edge without bevel, about 3 in wide; begin with the garboard strake at the keel and end with the sheer strake level with the gunwale. Punch nail holes with an awl, staggered along the ribs; clamp the plank, drive copper clout nails and clinch them inside on a clinch iron. Trim the plank ends to the stems and gunwales, saw the backbone in two to take out the frame, tack strips across the gunwales against sagging, and nail where the molds were.

Materials for this step:

Cedar BoardCedar Board4 pieces
Copper Clout NailsCopper Clout Nails1 piece
Copper TacksCopper Tacks1 piece

Tools needed:

AwlAwl
C-ClampC-Clamp
Clinch IronClinch Iron
HammerHammer
Hand SawHand Saw
9

Fit risings, seats, decks and thwarts

Nail 1/2 in square oak or ash seat risings, 14 ft long, about 4 in below the gunwale, boring first and clinching inside. Make the seat frames as Fig. 10 and cane them or tack on canvas (a kneeling paddler may use a 4 or 5 in seat bar instead). Notch the 8 x 1-1/8 x 3/8 in deck beams to wedge about 1/2 in against the gunwales (Fig. 11) and fix each with a 1-1/4 in No. 10 screw through the gunwale. Shape the decks 16 x 8 in (Fig. 12) and fix them with three 1-1/4 in No. 10 screws into the beam and three along each gunwale. Screw a centre thwart of oak or ash, 3/8 in thick, 2 in tapering to 1 in, under the gunwales amidships; extra thwarts behind the forward seat and about 3 ft forward of the rear seat stiffen it.

Materials for this step:

White Oak BoardWhite Oak Board2 pieces
Cedar BoardCedar Board1 piece
Copper Clout NailsCopper Clout Nails1 piece
Brass Wood ScrewsBrass Wood Screws30 pieces
Canvas FabricCanvas Fabric1 piece

Tools needed:

Brace and BitBrace and Bit
Screwdriver - FlatScrewdriver - Flat
Hand SawHand Saw
ChiselsChisels
HammerHammer
10

Lay the canvas

Lay the No. 6 canvas smoothly on the hull and trim it to fold at the stems (Fig. 13). Melt the black marine glue in a can over a moderately hot fire and spread a fairly heavy coat over one side of the canvas with a stiff brush. Lay it on and iron it with a moderately hot flatiron so the glue melts into the planking. Tack the edges along the gunwales and fold the canvas smoothly at the stems, tacking exactly down the stem centre line.

Materials for this step:

Canvas FabricCanvas Fabric1 piece
Marine GlueMarine Glue1 piece
Copper TacksCopper Tacks1 piece

Tools needed:

Tin CanTin Can
Wide Paint BrushWide Paint Brush
Flat IronFlat Iron
ScissorsScissors
HammerHammer
11

Fenders, stem bands and keel

Tack 1/2 in round molding over the canvas edge (or a 1 in strip of planking with 1-1/4 in brads every 2 or 3 in). Put on stem bands of wood about 3/8 in square, rounded, with 1-1/4 in brads, or better, 3/8 in brass oval stem band with 3/4 in screws. An outside keel is optional: about 1 x 1/2 in of oak or ash tapered to the stem bands, or a flat keel about 2-1/2 in wide of 3/8 in oak or ash, which turns more easily and guards the bottom.

Materials for this step:

Half-Round MoldingHalf-Round Molding1 piece
Brass Stem BandBrass Stem Band2 pieces
Brass Wood ScrewsBrass Wood Screws12 pieces
White Oak BoardWhite Oak Board1 piece
NailsNails1 piece

Tools needed:

HammerHammer
Screwdriver - FlatScrewdriver - Flat
Hand PlaneHand Plane
Hand DrillHand Drill
12

Paint and finish

Give the canvas a coat of shellac to waterproof it, then four coats of paint to fill the fibres, rubbing down the second and third with fine sandpaper. Finish all woodwork with three coats of good outside spar varnish. A removable slatted grating of soft-pine lattice, about 1-1/8 in wide and 1-1/4 in thick as printed, screwed to curved cross strips (not the ribs), protects the bottom.

Materials for this step:

Shellac VarnishShellac Varnish1 piece
Oil PaintOil Paint1 piece
SandpaperSandpaper1 piece
Spar VarnishSpar Varnish1 piece
Pine BoardPine Board1 piece

Tools needed:

Wide Paint BrushWide Paint Brush
Screwdriver - FlatScrewdriver - Flat
13

Troubleshooting

Canoe troubleshooting.

Flow

Loading...
14

History and honest limits

From "How to Build a Canoe, Part I" by Stillman Taylor, in **The Boy Mechanic, Book 3**, Popular Mechanics, 1919 (Project Gutenberg 71856; checked on the archive.org scan boymechanic0003unse, pp. 77-84). As printed, his text differs in places: the backbone's lower edge is 1/2 in longer in one sentence and 1 in in the next; the list gives No. 8 deck screws, the text No. 10; the list's seat frames (30 x 3 and 12 x 2-1/4 in) differ from Fig. 10 (29 x 9 in); the fenders are half-round in the list and round in the text. The metric figures are ours.

Materials

16

Tools Required

21

This blueprint makes

CC0 Public Domain

This blueprint is released under CC0. You are free to copy, modify, distribute, and use this work for any purpose, without asking permission.

Support the Maker by purchasing products through their Blueprint where they earn a Maker Commission set by Vendors, or create a new iteration of this Blueprint and include it as a connection in your own Blueprint to share revenue.

Discussion

(0)

Log in to join the discussion

Loading comments...