Collaboration
ART
BEAUTY & WELLNESS
CRAFT
CULTURE & HISTORY
ENTERTAINMENT
ENVIRONMENT
FOOD & DRINKS
REVERSE ENGINEERING
SCIENCES
SPORTS
TECHNOLOGY
WEARABLES
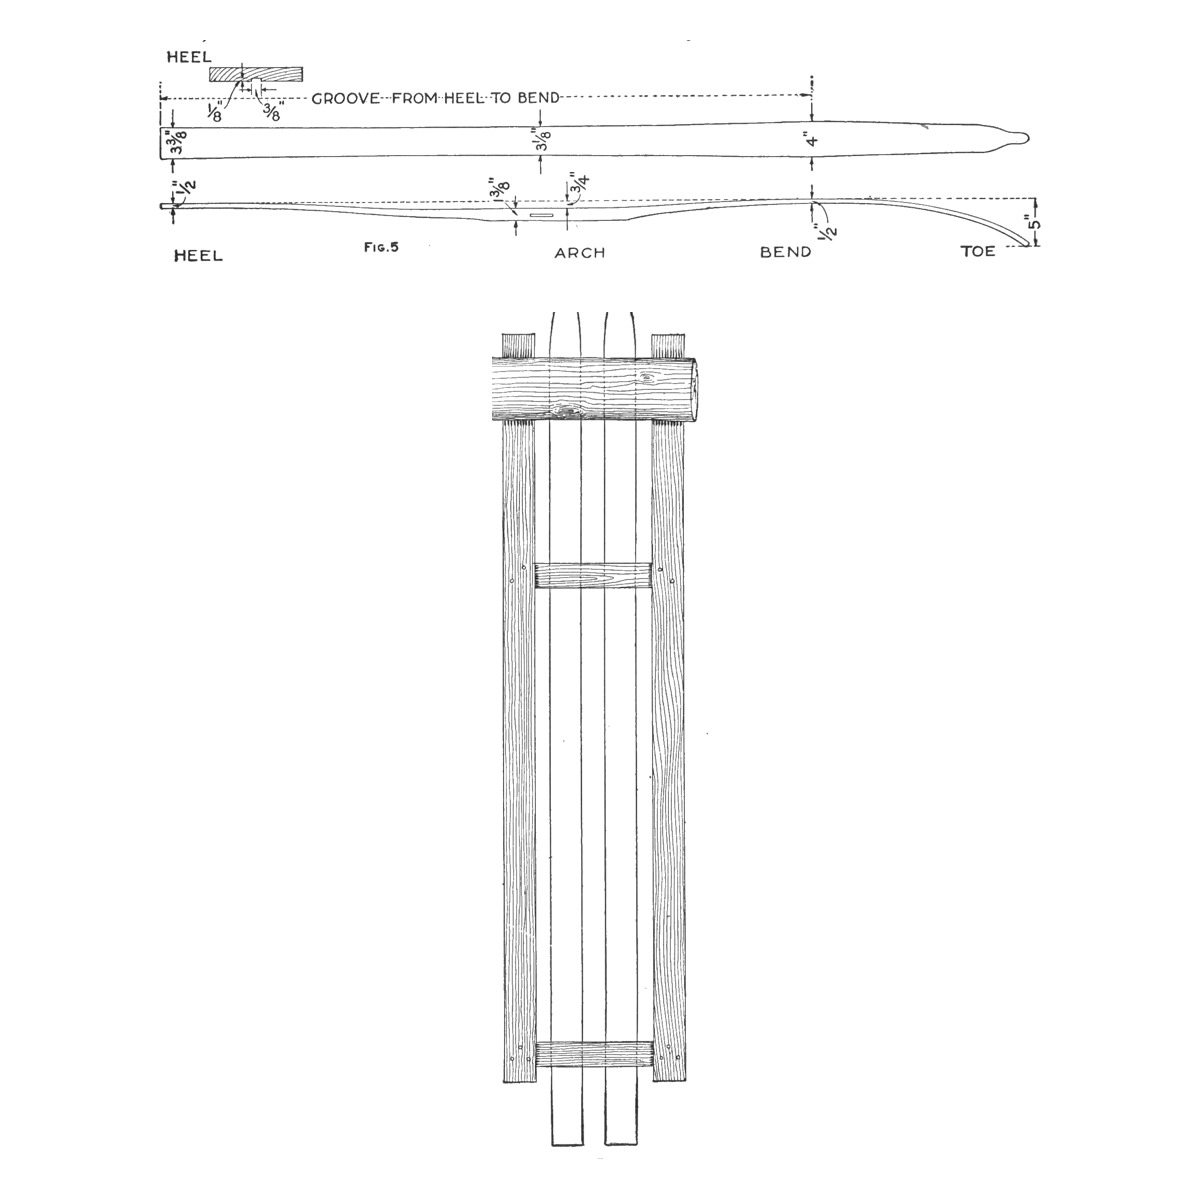


Skis: Ash or Hickory Planks Shaped to an 8 ft Pattern, Steam-Bent Tips and a Running Groove (Boy Mechanic, 1919)
Stillman Taylor's skis from The Boy Mechanic, Book 3 (1919): "far easier than snowshoe construction, since each runner is made from a single piece of plank". Ash or hickory is cut to his 8 ft pattern, thinned from the top only, the tips steamed to a 6 in bend, a centre groove cut, and the skis oiled and waxed.
Intermediate
About 1 week
Instructions
1
1
Fig. 5 in centimetres, and the wax
Fig. 5 in centimetres, and the wax
Loading Jupyter Notebook...
2
2
Read The Boy Mechanic, Book 3
Read The Boy Mechanic, Book 3
"Either hickory or ash will give satisfaction, because both are heavy woods, as well as strong and flexible." For a man of good height, 7 to 8 ft is the right length.
3
3
Get and choose the wood
Get and choose the wood
Get two ash or hickory planks about 9 ft long and 2 in thick, from the outside of the lower trunk, with the grain running as in his Fig. 6, A/D (in ash choose open, widely spaced grain). Or split a sound, straight tree about 10 in across and clear of knots for 10 ft: axe a straight groove about 1 in deep along each side and drive small wood wedges along it; hew only enough off the outside to make the flat running surface.
Materials for this step:
 Hardwood Board2 pieces
Tools needed:
 Hand Saw
 Tape Measure
4
4
Lay out and saw
Lay out and saw
Make a paper pattern from his Fig. 5 (8 ft ski): 3-3/8 in wide at the heel, 3-1/8 in at the foot, 4 in at the bend, rounding to the toe. Trace it on the plank and saw out; on green wood make the width about 1/4 in greater for shrinkage.
Materials for this step:
Hardwood Board1 pieceTools needed:
 PencilHand SawTape Measure
5
5
Plane to thickness
Plane to thickness
Plane the running surface perfectly smooth, grain straight from point to heel. Work the thickness down from the top side only, never the bottom: about 1/2 in at the heel, 3/4 in at the foot and 1/2 in at the bend.
Tools needed:
 Hand Plane
 Spokeshave
6
6
Steam the tip
Steam the tip
Lay the ski over a wash boiler of boiling water and soak the tip by mopping it with the water on a cloth tied to a stick. Bend gradually over many treatments to a good 6 in bend (it finishes near 5 in, as the wood straightens a little as it dries). Hold it in a rough frame over a short log, or lash or cleat the tips to the bench, as in his Fig. 7. The arch under the foot is easily put in, and easily straightened when cold if overdone.
Tools needed:
 Large Cooking Pot
 Mop
 Bar Clamp
7
7
Binding hole, balance and groove
Binding hole, balance and groove
Put in the hole for the foot binding. If the wood was left long, trim the heel so the ski balances when lifted by the toe straps (he sees no advantage in weighting a light heel with lead). Cut a groove in the exact centre of the running surface, about 1/8 in deep and 3/8 to 1/2 in wide, from the heel to the start of the bend, with a grooving plane or a small gouge.
Materials for this step:
 Leather Strap2 pieces
Tools needed:
 Hand Drill
 Chisels
 GougeHand Saw
8
8
Finish and wax
Finish and wax
Sandpaper top and bottom and rub down with linseed oil with a little paraffin or beeswax in it; oil and wax the running surface (spar varnish on the tops if you want gloss). For a hard wax, melt 10 oz of beeswax with 5 oz of rosin, stir in 1 oz of turpentine and pour into small boxes. Rub it on and go over it with a hot flatiron; too much wax makes climbing hard.
Materials for this step:
 Sandpaper1 piece
 Linseed Oil1 piece
 Paraffin Wax1 piece
 Beeswax1 piece
 Pine Rosin1 piece
 Turpentine1 piece
Tools needed:
Large Cooking Pot Flat Iron
 Wide Paint Brush
9
9
Troubleshooting
Troubleshooting
Ski troubleshooting.
Flow
Loading...
10
10
History and honest limits
History and honest limits
From "How to Make Skis" by Stillman Taylor, in **The Boy Mechanic, Book 3**, Popular Mechanics, 1919 (Project Gutenberg 71856; checked on the archive.org scan boymechanic0003unse, pp. 27-30). His text gives the groove as 3/8 to 1/2 in wide; Fig. 5 shows 3/8 in. He does not describe the binding. The tools and metric figures are ours.
Materials
8- 2 piecesPlaceholder
- 2 piecesPlaceholder
- 1 piecePlaceholder
- 1 piecePlaceholder
- 1 piecePlaceholder
- 1 piecePlaceholder
- 1 piecePlaceholder
- 1 piecePlaceholder
Tools Required
13- Placeholder
- 1 vendor sell this, none ship to you yetPlaceholder
- 1 vendor sell this, none ship to you yetPlaceholder
- Placeholder
- Placeholder
- Placeholder
- Placeholder
- Placeholder
- Placeholder
- Placeholder
- Placeholder
- Placeholder
- Placeholder
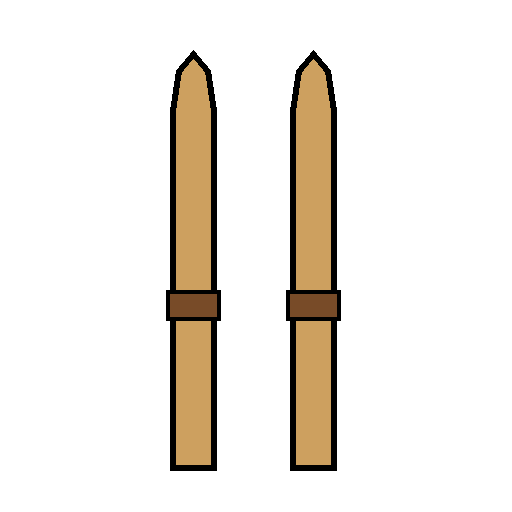
This blueprint makes
Related Blueprints
These blueprints share knowledge with this one — techniques, materials, or principles that connect them in the learning graph.
CC0 Public Domain
This blueprint is released under CC0. You are free to copy, modify, distribute, and use this work for any purpose, without asking permission.
Support the Maker by purchasing products through their Blueprint where they earn a Maker Commission set by Vendors, or create a new iteration of this Blueprint and include it as a connection in your own Blueprint to share revenue.