ART
BEAUTY & WELLNESS
CRAFT
CULTURE & HISTORY
ENTERTAINMENT
ENVIRONMENT
FOOD & DRINKS
REVERSE ENGINEERING
SCIENCES
SPORTS
TECHNOLOGY
WEARABLES
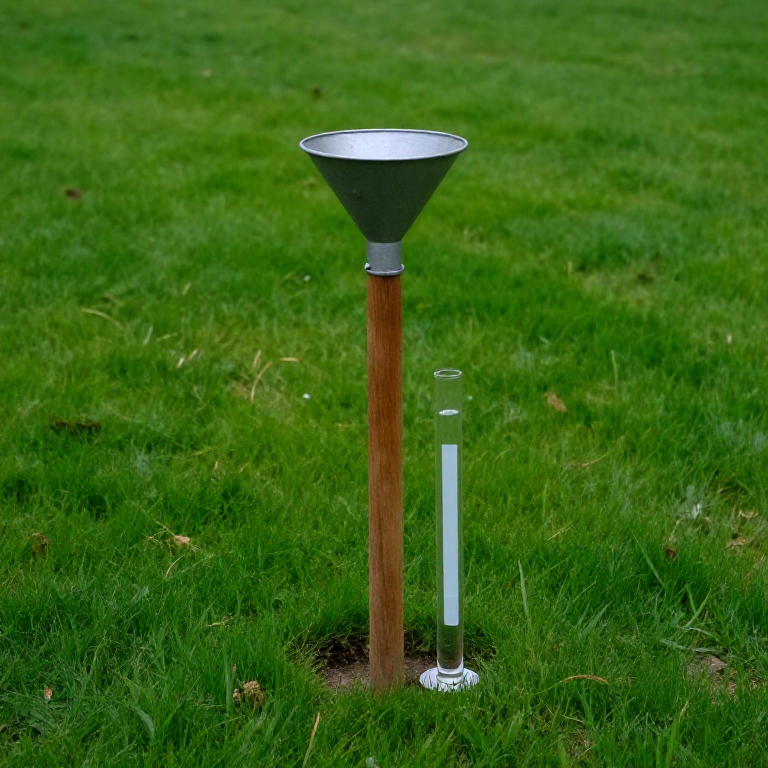


The Rain Gauge
In 1441 the Korean court under King Sejong issued a standard bronze rain gauge, the cheugugi, to every province, with a fixed diameter and a fixed height, and required officials to report the depth after every storm. It is the oldest standardised weather instrument in the world and the records it produced still run in an unbroken series.
What made it work was not the bronze. It was the standardisation: every gauge the same size, mounted the same way, read the same way, so numbers from two hundred miles apart meant the same thing. That is the whole idea of a measuring network, four centuries before anyone else built one.
A rain gauge is the easiest instrument in this batch to build and the easiest to site badly. Most of this blueprint is about the siting, because a gauge under a tree is not a less accurate gauge — it is an instrument measuring something else.
Beginner
3 hours
Instructions
1
1
Make the collector: a sharp rim and a steep funnel
Make the collector: a sharp rim and a steep funnel
Fit a funnel into the mouth of a straight-sided cylinder. The rim must be a clean, level circle with a sharp edge, and the funnel's sides must be steep — at least 45 degrees.
A thick or rounded rim catches an unpredictable extra sliver of rain and splashes drops both in and out. A shallow funnel lets raindrops bounce back out, and in heavy rain that loss is easily a tenth of the total. Measure the rim's internal diameter and write it down; every reading you take depends on it.
Materials for this step:
 Glass Funnel - Stemmed1 piece
 Measuring Cylinder1 piece
Tools needed:
 Metal Ruler
 Silicone Sealant
2
2
Read depth, not volume
Read depth, not volume
Rainfall is quoted as a DEPTH in millimetres — the depth the water would stand if none ran away — not as a volume. So either your measuring cylinder must be calibrated for your funnel's area, or you convert.
The advantage of depth is that it is independent of the gauge: 12 mm means the same thing whatever size your collector is, which is exactly why the cheugugi standard worked. A narrow measuring tube under a wide funnel multiplies the depth you can read, which is how a gauge resolves 0.2 mm without a microscope.
Tools needed:
Measuring Cylinder3
3
Site it in the open, at a standard height
Site it in the open, at a standard height
Set the rim level, 300 mm above the ground, and no closer to any obstacle than TWICE that obstacle's height — four times is better.
Too low and splash from the ground adds rain that never fell into it. Too high and the wind blowing over the rim carries drops past it. An obstacle upwind shelters the gauge and one downwind creates eddies that do the same; a gauge against a house wall can read half of true. This single rule matters more than every other decision in the build.
Materials for this step:
 Wooden Dowel2 pieces
 Galvanized Nails20 pieces
Tools needed:
 Measuring Tape
 Claw Hammer
4
4
Read at a fixed time, every day
Read at a fixed time, every day
Read and empty it at the same time each day — 09:00 is the meteorological convention — and record the reading against the day it ENDED, noting your convention in the front of the book.
Rainfall is meaningless without a period attached, and 'yesterday' is ambiguous once you read at nine in the morning. Record zero as an explicit 0.0, never as a blank: a blank means you did not read it, and a series that cannot distinguish 'no rain' from 'no observer' cannot be totalled.
5
5
Stop evaporation stealing your small readings
Stop evaporation stealing your small readings
Keep the collecting vessel narrow-necked and shaded inside the outer cylinder, and in hot weather float a little oil on the water or read more often.
A 1 mm shower in an open jar on a summer day can be gone before evening, and the record then says it did not rain. This is the error that quietly destroys long-run totals, because it only removes SMALL readings — so the record ends up biased toward heavy rain, which is exactly the wrong way round for anyone planning irrigation.
Materials for this step:
 Aluminium Foil1 roll
6
6
From depth to what it means
From depth to what it means
Loading Jupyter Notebook...
Tools needed:
Metal Ruler7
7
Keep the record where it can be used
Keep the record where it can be used
Rule a page per month: day, reading, and a column for notes such as snow, hail or a missed observation. Total each month and carry a running annual figure.
A rainfall record earns its value from LENGTH — one year tells you almost nothing, five years tells you what is normal, and only then can you say a season was dry. Note missed days explicitly rather than leaving gaps, because a month with three unrecorded days has an unknown total, not a low one.
Materials for this step:
 Graph Paper10 pieces
Materials
6- 1 piecePlaceholder
- 1 piecePlaceholder
- 2 piecesPlaceholder
- 20 piecesPlaceholder
- 1 rollPlaceholder
- 10 piecesPlaceholder
Tools Required
5- Placeholder
- Placeholder
- Placeholder
- 1 vendor sell this, none ship to you yetPlaceholder
- Placeholder
This blueprint makes
Related Blueprints
These blueprints share knowledge with this one — techniques, materials, or principles that connect them in the learning graph.
CC0 Public Domain
This blueprint is released under CC0. You are free to copy, modify, distribute, and use this work for any purpose, without asking permission.
Support the Maker by purchasing products through their Blueprint where they earn a Maker Commission set by Vendors, or create a new iteration of this Blueprint and include it as a connection in your own Blueprint to share revenue.