ART
BEAUTY & WELLNESS
CRAFT
CULTURE & HISTORY
ENTERTAINMENT
ENVIRONMENT
FOOD & DRINKS
REVERSE ENGINEERING
SCIENCES
SPORTS
TECHNOLOGY
WEARABLES


The Tank-Headed Self-Feeding Brush: Soap in the Tank, a Plate to Meter It
Scrubbing a floor means going back to the bucket every few strokes.
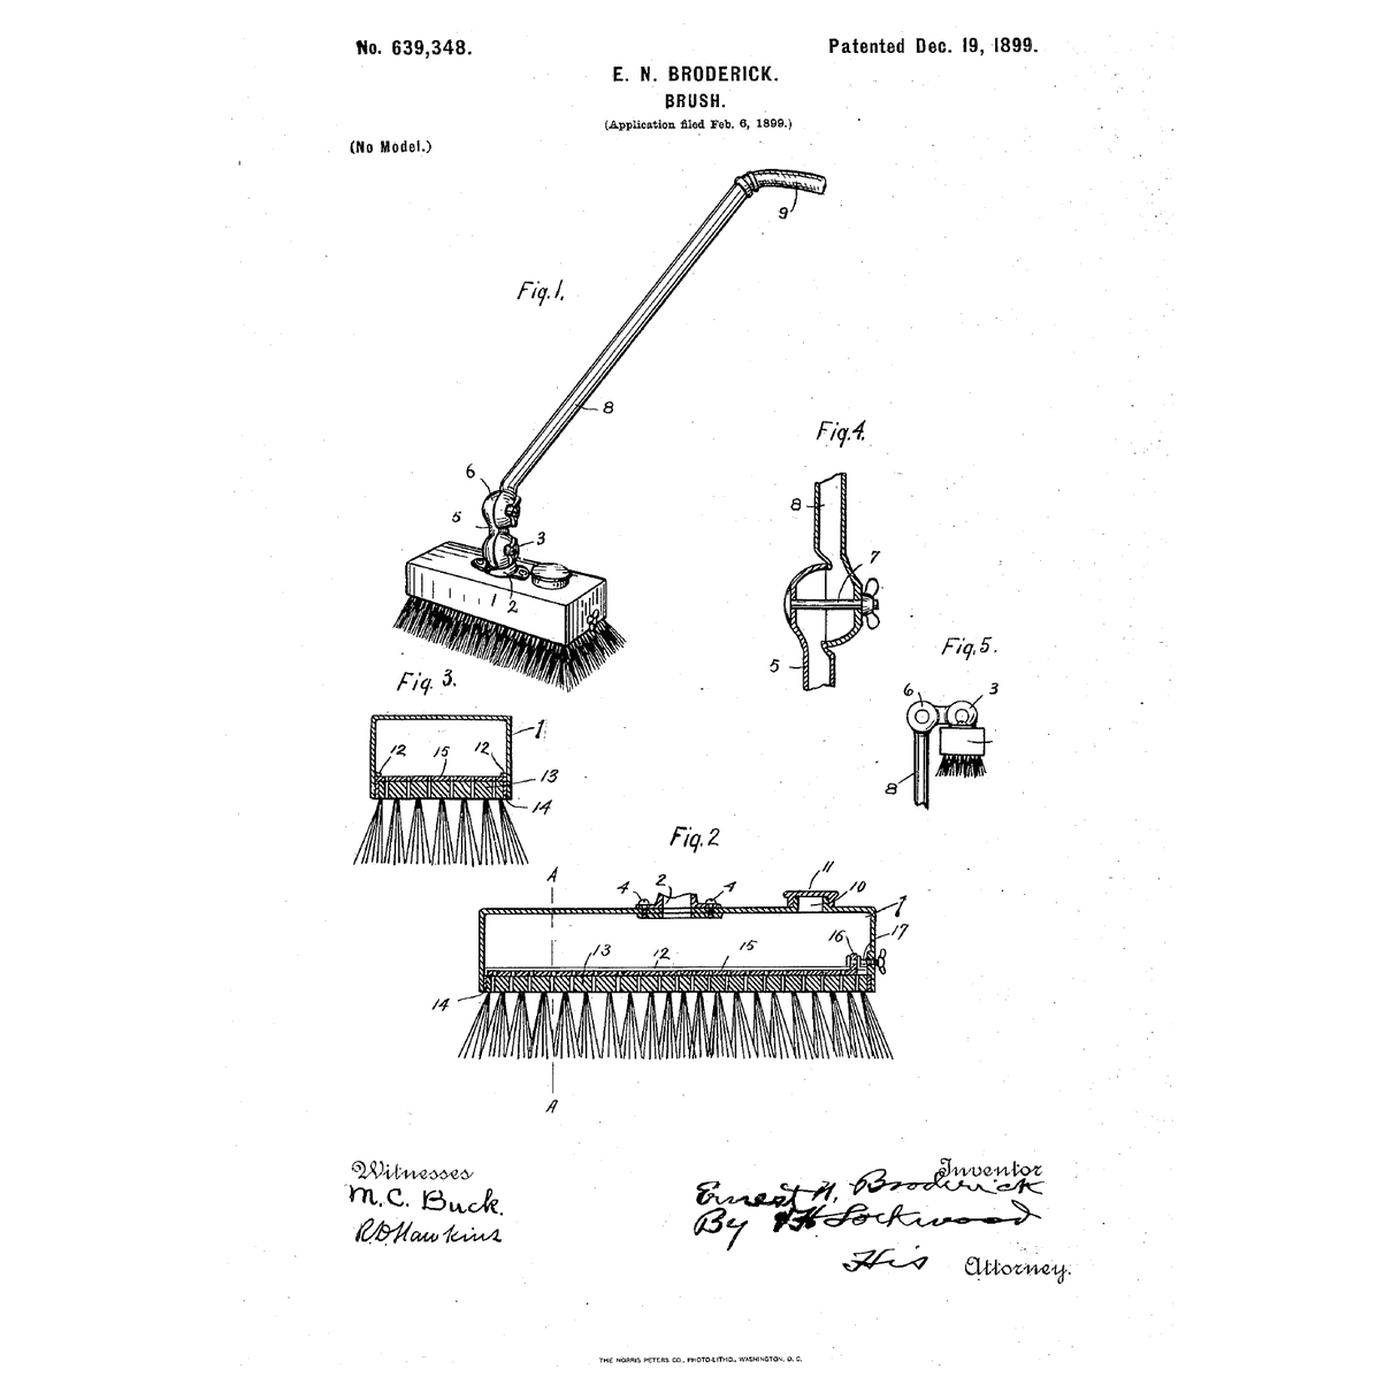
Ernest N. Broderick of Indianapolis received US 639,348, dated 19 December 1899, for a cleaning brush with a small tank on its perforated top, fed through a hollow handle from a hose; a perforated plate slid by a screw sets how far the holes open, and soap in the tank turns the water to suds — "a self-feeding brush."
This rung works out how the sliding plate opens the holes, then builds the tank on a scrub brush and measures the flow at each plate setting.
Intermediate
About 4 hours
Instructions
1
1
Open area of the plate
Open area of the plate
Loading Jupyter Notebook...
2
2
A scrubbing brush before it
A scrubbing brush before it
The embedded blueprint holds two brush heads on a sprung holder. Broderick puts a water tank on the head and feeds it through the handle.
3
3
Read US 639,348
Read US 639,348
"When used for scrubbing, the hose can be connected to a hydrant, and thus supply the desired amount of water to the brush, making it unnecessary to dip the brush into the bucket or tub of water. In other words, my device is a self-feeding brush. Should I desire to use soapy water, I can insert through the openings 10 particles of soap or soap powder. In this way I get soapsuds, which I use in scrubbing as it is needed, keeping the brush constantly supplied."
4
4
Perforate the brush back
Perforate the brush back
Drill fourteen 4 mm holes through the scrub brush's back between the tufts, in two rows 30 mm apart.
Materials for this step:
 Scrub Brush1 piece
Tools needed:
 Bench Vise
 Cordless Drill
 Drill Bit Set
 Permanent Marker
 Ruler
Ruler Clear Safety Glasses
5
5
Make the sliding plate
Make the sliding plate
Cut an aluminium plate 10 mm shorter than the back. Drill it through the back's holes, then file its end square. Rivet two guide strips to the back's top so it slides lengthwise.
Materials for this step:
 Aluminium Sheet1 piece
 Pop Rivets1 piece
Tools needed:
 Tin SnipsCordless DrillDrill Bit Set
 Files (Hand File)
 Pop Rivet Gun Kit
6
6
Build the tank
Build the tank
Fold an aluminium box 50 mm deep to the back's size with a lid. Drill the lid for a 25 mm filling hole and a handle socket. Seal it to the back with silicone and screws.
Materials for this step:
Aluminium Sheet1 piecePop Rivets1 piece Silicone Sealant1 piece
 #8 x 1" Wood Screw1 piece
Tools needed:
Tin SnipsBench VisePop Rivet Gun KitCordless DrillDrill Bit Set Leather Work Gloves
7
7
Fit the adjusting screw
Fit the adjusting screw
Run an M4 screw through a nut epoxied on the tank's end wall so its tip pushes the plate. Turn it to close or open the holes.
Materials for this step:
 Machine Screws1 piece
 Hex Nut1 piece
 Two-Part Epoxy1 piece
Tools needed:
Cordless DrillDrill Bit Set Screwdriver Set
8
8
Fit the handle
Fit the handle
Fix 1.2 m of 15 mm copper tube in the socket with brass fittings. Fit a ball valve and hose connector at its top.
Materials for this step:
 Copper Tube1 piece
 Brass Fittings1 piece
 Ball Valve1 piece
 PTFE Thread Seal Tape1 piece
Tools needed:
 Tube Cutter
 Adjustable Spanner
9
9
The patent drawing
The patent drawing
US 639,348 drawing sheet, public domain (expired patent).
10
10
Measure the flow at each setting
Measure the flow at each setting
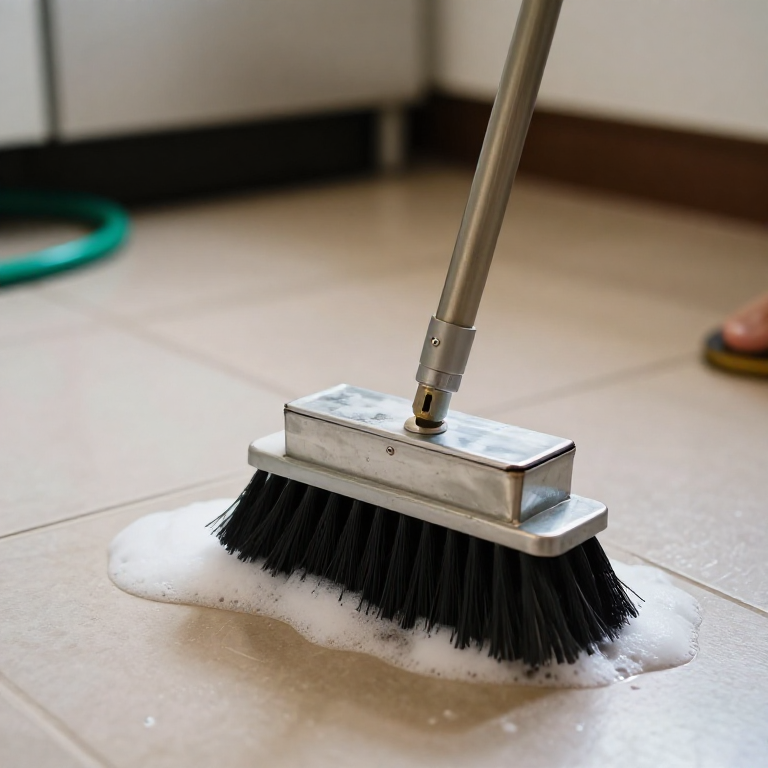
Connect the garden hose. Set the plate fully open, half and nearly shut, and catch the water for 30 s each in the jug. Then add a squirt of soap through the filling hole and scrub.
Materials for this step:
 Garden Hose1 piece
 Water1 piece
 Castile Soap (Liquid)1 piece
Tools needed:
 Measuring Jug
 Stopwatch
 Digital Caliper 6-Inch
11
11
A brush that floods, starves or leaks
A brush that floods, starves or leaks
Tank-headed self-feeding brush troubleshooting.
Flow
Loading...
12
12
History and honest limits
History and honest limits
**Ernest N. Broderick** of Indianapolis filed US 639,348 on 6 February 1899; it is dated 19 December 1899. Rubber or leather strips seal the tank to the brush-top. Two hollow adjustable joints, ground to fit and clamped by a bolt, let the handle be set at any angle, for floors, walls, windows or dusting high furniture; with compressed air instead of water it blows dust away, and a mop or duster may replace the brush.
**Honest limits.** Our handle is fixed; his joints are not built here. The notebook gives open area, not flow through a real hole. Your flows are the result.
Materials
15- 1 piecePlaceholder
- 1 piecePlaceholder
- 2 piecesPlaceholder
- 1 piecePlaceholder
- 1 piecePlaceholder
- 1 piecePlaceholder
- 1 piecePlaceholder
- 1 piecePlaceholder
- 1 piecePlaceholder
- 1 piecePlaceholder
- 1 piecePlaceholder
- 1 piecePlaceholder
- Garden Hose10% commission1 piecePlaceholder
- 1 piecePlaceholder
- 1 piecePlaceholder
Tools Required
16- Placeholder
- 1 vendor sell this, none ship to you yetPlaceholder
- Placeholder
- Placeholder
- Placeholder
- Placeholder
- Placeholder
- Placeholder
- Placeholder
- Placeholder
- Placeholder
- Placeholder
- Placeholder
- Placeholder
- Placeholder
- Placeholder
Related Blueprints
These blueprints share knowledge with this one — techniques, materials, or principles that connect them in the learning graph.



CC0 Public Domain
This blueprint is released under CC0. You are free to copy, modify, distribute, and use this work for any purpose, without asking permission.
Support the Maker by purchasing products through their Blueprint where they earn a Maker Commission set by Vendors, or create a new iteration of this Blueprint and include it as a connection in your own Blueprint to share revenue.