NGHỆ THUẬT
LÀM ĐẸP VÀ SỨC KHỎE
THỦ CÔNG
VĂN HÓA VÀ LỊCH SỬ
GIẢI TRÍ
MÔI TRƯỜNG
THỰC PHẨM VÀ ĐỒ UỐNG
KỸ THUẬT NGƯỢC
KHOA HỌC
THỂ THAO
CÔNG NGHỆ
THIẾT BỊ ĐEO
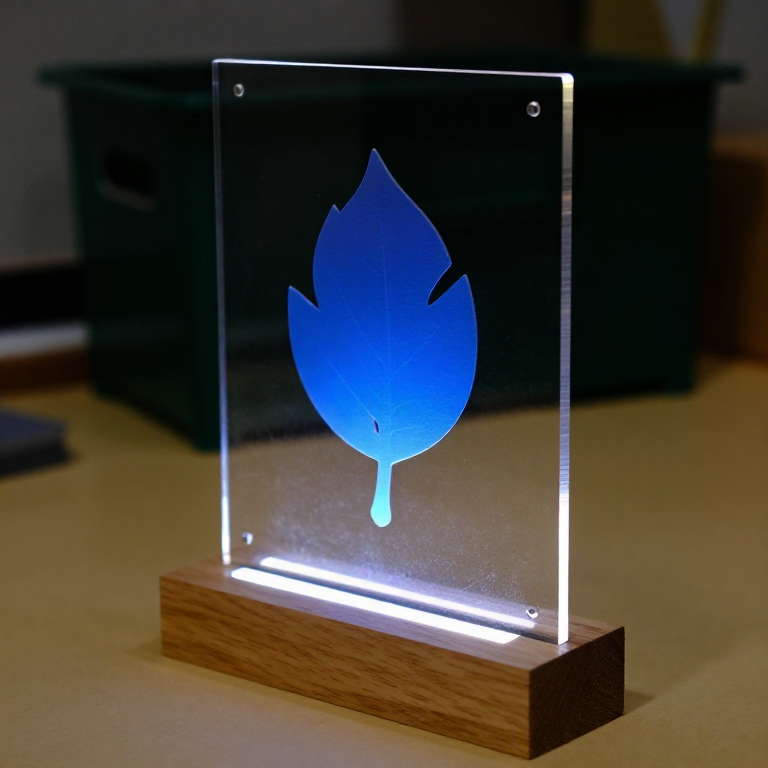


Cast Acrylic Sheet
Otto Röhm had worked on acrylic chemistry since his 1901 doctorate. His firm first used polymethacrylate as the sticky middle layer of laminated safety glass - and noticed that the polymer came away from the glass plates cleanly, leaving a clear sheet as smooth as the glass. Sold from 1933 as Plexiglas, the sheet went into aircraft canopies within the decade.
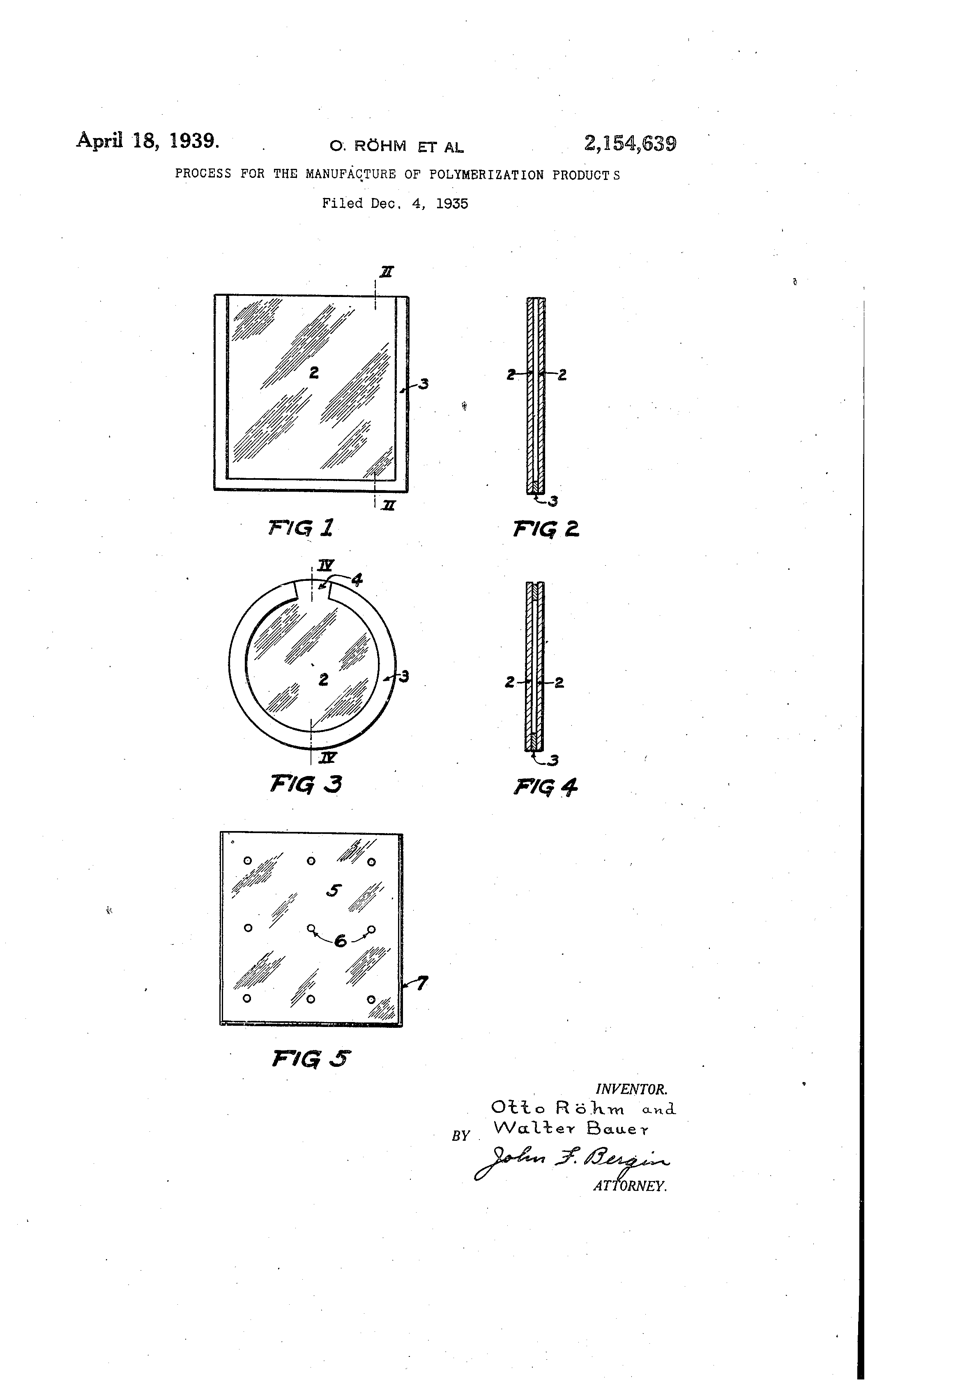
**US 2,154,639**, "Process for the manufacture of polymerization products", Röhm and Bauer, assigned to Röhm & Haas, filed 4. December 1935, granted 18. April 1939: methacrylic esters polymerised between sheets of glass and then separated from them, for "glass substitutes" whose faces are "as highly polished as the surfaces of the glass itself".
**You use that polish**: an edge-lit sign whose engraving glows while the smooth faces stay dark, and two heat-bent offcuts that show how tight a bend the light survives.
Cơ bản
3 hours
Hướng dẫn
1
1
Cut the panel
Cut the panel
Keep the protective film on. Score 3 mm cast acrylic 200 x 120 mm with the utility knife against a ruler, 8 to 10 passes, then snap it over the bench edge. Cut two 100 x 30 mm offcuts the same way.
Vật liệu cho bước này:
 Tấm acrylic1 cái
Công cụ cần thiết:
 Dao rọc giấy
 Thước kẻ
 Kính bảo hộ trong suốt
2
2
Polish the light edge
Polish the light edge
Sand the 120 mm bottom edge flat, then run the Micro-Mesh grits in order until it is clear. Light enters here; a frosted edge scatters it at the door.
Công cụ cần thiết:
 Bộ giấy nhám vi lưới (9 độ hạt)
3
3
Engrave the back
Engrave the back
Peel the back film. Draw your design on paper, tape it under the sheet, and trace it with the engraving point at medium speed, light pressure.
Công cụ cần thiết:
 Máy mài cầm tay (kiểu Dremel)
 Mũi khắcKính bảo hộ trong suốt
4
4
Slot the base
Slot the base
Cut a pine block 160 x 60 x 40 mm. Saw two parallel kerfs 3.5 mm apart, 15 mm deep, along its length and chisel out between them. Chisel a channel underneath for the LED strip to shine up into the slot.
Vật liệu cho bước này:
 Ván thông1 cái
Công cụ cần thiết:
 Cưa tay
 Bộ đục gỗ
5
5
Light it
Light it
Strip 5V, GND and DIN to the Uno's 5V, GND and D6. Install the Adafruit NeoPixel library and upload. Stand the panel in the slot.
edge_lit_panel.inocpp
Vật liệu cho bước này:
 Dải LED Neopixel1 cái
 Bộ dây Dupont (đực-cái)1 bộ
Công cụ cần thiết:
 Arduino Uno R3
 SparkFun Cerberus USB Cable - 1.8 meter
6
6
Bend two offcuts
Bend two offcuts
Heat an offcut along a line on the strip heater, turning it over every 30 seconds, until it flexes. Bend it 90° round a 6 mm dowel and hold until cool. Bend the second round a 20 mm dowel.
Vật liệu cho bước này:
 Chốt gỗ1 cái
Công cụ cần thiết:
 Máy sấy dải để uốn acrylic
 Găng tay hàn
7
7
Trace the beam
Trace the beam
In a dim room shine the laser pointer into the end of each bent strip, never towards anyone's eyes. See where light escapes at the bend, and compare with the notebook.
Công cụ cần thiết:
 Bút laser
8
8
Critical angle and bends
Critical angle and bends
Đang tải sổ tay Jupyter…
9
9
History & Context
History & Context
**What the patent specifies:** methacrylic esters polymerised between glass sheets and separated, giving a glass substitute with glass-polished faces. **Modern build (derived):** commercial cast acrylic sheet, cut and heat-bent.
Cast sheet is still made between glass plates; cheaper extruded sheet came later and is softer and more prone to crazing. The limits: acrylic scratches, cracks if drilled carelessly, crazes when solvents or stress meet, and burns.
Vật liệu
5- 1 cáiTạm thời
- 1 cáiTạm thời
- 1 cáiTạm thời
- Tạm thời
- 1 cáiTạm thời
Công cụ yêu cầu
13- Tạm thời
- Tạm thời
- Tạm thời
- Tạm thời
- Tạm thời
- Tạm thời
- Tạm thời
- Tạm thời
- 1 vendor sell this, none ship to you yetTạm thời
- SparkFun Cerberus USB Cable - 1.8 meterHoa hồng 10%$5.63
- Tạm thời
- Tạm thời
- Tạm thời
Bản thiết kế này làm ra

Blueprint liên quan
Các blueprint này chia sẻ kiến thức — kỹ thuật, vật liệu hoặc nguyên tắc

CC0 Phạm vi công cộng
Bản thiết kế này được phát hành theo CC0. Bạn tự do sao chép, sửa đổi, phân phối và sử dụng cho bất kỳ mục đích nào mà không cần xin phép.
Hỗ trợ nhà sáng tạo bằng cách mua sản phẩm qua bản thiết kế, nơi họ nhận Hoa hồng nhà sáng tạo do nhà bán hàng đặt, hoặc tạo phiên bản mới và kết nối trong bản thiết kế riêng để chia sẻ doanh thu.