
Feuerstein Sammeln und Bestimmen — Rohmaterial für Steinwerkzeuge
Hướng dẫn
Was ist Feuerstein?
Was ist Feuerstein?
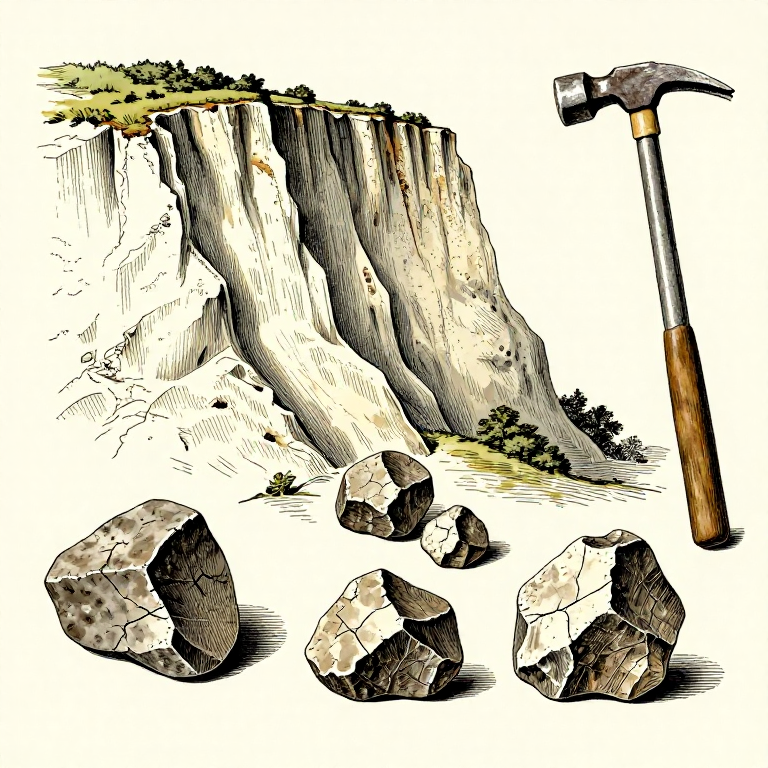
Feuerstein (auch Flint genannt) ist mikrokristalliner Quarz (SiO₂) mit einer Mohshärte von 7. Er entsteht in Kreide- und Kalksteinformationen aus gelöster Kieselsäure, die sich um organische Kerne ablagert. Feuerstein bricht muschelförmig (konchoidal) und erzeugt dabei scharfe Kanten — die Grundlage der Steinwerkzeugherstellung seit über 2,5 Millionen Jahren.
Fundorte in Norddeutschland kennenlernen
Fundorte in Norddeutschland kennenlernen
Die besten Fundstellen liegen in der Kreide-Zone: Rügen (Jasmund-Kreidefelsen), Helgoland, Schleswig-Holsteins Ostseestrände und die Moränenlandschaften Mecklenburg-Vorpommerns. Feuerstein wird durch Gletschererosion aus Kreideformationen gelöst und findet sich in Kiesgruben, an Stränden und auf frisch gepflügten Äckern.
Feuerstein an der Farbe erkennen
Feuerstein an der Farbe erkennen
Feuerstein hat eine weiße Kruste (Cortex) aus Kreide, die den dunklen Kern umgibt. Der Kern ist grau, schwarz, braun oder honigfarben — je nach Fundort. Rügener Feuerstein ist meist dunkelgrau bis schwarz. Baltischer Strandfeuerstein zeigt oft eine glatte, abgeriebene Oberfläche.
Muschelbruch überprüfen
Muschelbruch überprüfen
Der entscheidende Test: Feuerstein bricht mit glattem, muschelförmigem Bruch (konchoidaler Bruch). Wenn Sie einen Stein anschlagen und die Bruchfläche glatt, leicht gewölbt und glasig aussieht, ist es sehr wahrscheinlich Feuerstein. Körniger oder matter Bruch deutet auf anderen Stein hin.
Công cụ cần thiết:
 Búa địa chất
Funkentest durchführen
Funkentest durchführen
Schlagen Sie den Stein mit einem Stück Kohlenstoffstahl (nicht Edelstahl). Feuerstein erzeugt helle, heiße Funken — daher sein Name. Dieser Test funktioniert nur mit Kohlenstoffstahl, nicht mit Edelstahl oder einem anderen Feuerstein.
Công cụ cần thiết:
 Thanh thép cacbon đánh lửa
Ritztest zur Härtebestimmung
Ritztest zur Härtebestimmung
Feuerstein (Härte 7) ritzt Glas (Härte 5,5) mühelos. Halten Sie den Stein in festem Winkel gegen eine Glasscherbe und ziehen Sie ihn darüber. Wenn er eine sichtbare Rille hinterlässt, bestätigt das die Feuersteinidentifikation. Tragen Sie dabei Schutzhandschuhe.
Vật liệu cho bước này:
 Mảnh thủy tinh1 cái
Công cụ cần thiết:
 Găng tay da bảo hộ
Qualität beurteilen — Körnung
Qualität beurteilen — Körnung
Guter Feuerstein hat eine extrem feine Körnung — die Bruchfläche fühlt sich glatt wie Glas an. Grober Feuerstein mit sichtbarem Korn oder eingeschlossenen Fossilien bricht ungleichmäßig und eignet sich schlecht für feine Werkzeuge. Homogene, feinkörnige Stücke sind am wertvollsten.
Công cụ cần thiết:
 Kính lúp cầm tay 10x
Auf Risse und Frostschäden prüfen
Auf Risse und Frostschäden prüfen
Klopfen Sie leicht auf den Feuerstein und hören Sie auf den Klang. Ein heller, klingender Ton zeigt intaktes Material an. Ein dumpfer, matter Ton deutet auf innere Risse hin — oft durch Frost verursacht. Rissiger Feuerstein bricht unkontrolliert und ist für Werkzeuge unbrauchbar.
Passende Größe auswählen
Passende Größe auswählen
Für Werkzeugherstellung sammeln Sie Knollen von mindestens Faustgröße (8-15 cm Durchmesser). Kleinere Stücke reichen für Pfeilspitzen und Schaber. Für große Klingen und Beile brauchen Sie Stücke von 15-25 cm. Transportieren Sie nicht mehr als 5-8 kg pro Ausflug — Feuerstein ist schwer.
Vật liệu cho bước này:
 Cục đá lửa5 kilogram
Sicher einsammeln
Sicher einsammeln
Tragen Sie feste Schuhe und Handschuhe. Frisch gebrochener Feuerstein hat rasiermesserscharfe Kanten. Wickeln Sie jeden Stein einzeln in Zeitungspapier oder Stoff, bevor Sie ihn in den Rucksack legen. Steine, die direkt aneinanderschlagen, können splittern.
Vật liệu cho bước này:
 Giấy gói10 cái
Công cụ cần thiết:
 Ba lô chắc chắnGăng tay da bảo hộ
Kreidekruste entfernen (optional)
Kreidekruste entfernen (optional)
Die weiße Kreidekruste (Cortex) kann belassen oder entfernt werden. Zum Entfernen weichen Sie den Stein 24 Stunden in Wasser ein und bürsten die weiche Kreide ab. Für die Werkzeugherstellung muss die Kruste nicht vorher entfernt werden — sie wird beim Bearbeiten ohnehin abgeschlagen.
Vật liệu cho bước này:
 Nước5 lít
Công cụ cần thiết:
 Bàn chải lông cứng
Fundstücke waschen und trocknen
Fundstücke waschen und trocknen
Waschen Sie gesammelten Feuerstein unter fließendem Wasser, um Erde und Sand zu entfernen. Lassen Sie die Steine an der Luft trocknen — nicht in der prallen Sonne, da schnelle Temperaturänderungen Risse verursachen können. Feuerstein trocknet in 2-3 Stunden vollständig.
Feuerstein beschriften und lagern
Feuerstein beschriften und lagern
Beschriften Sie jeden Stein mit einem Bleistift oder Wachsmarker auf der Cortex-Seite: Fundort und Datum. Lagern Sie Feuerstein trocken und frostfrei — Feuchtigkeit, die in Risse eindringt und gefriert, zerstört den Stein. Ein Regal in der Werkstatt ist ideal.
Công cụ cần thiết:
 Bút đánh dấu
Fundort dokumentieren
Fundort dokumentieren
Notieren Sie GPS-Koordinaten, Gesteinsart der Umgebung (Kreide, Moräne, Strand), Qualität und Menge des gefundenen Feuersteins. Gute Fundstellen liefern über Jahre hinweg Material. Beachten Sie lokale Sammelvorschriften — in Naturschutzgebieten ist das Sammeln oft verboten.
Công cụ cần thiết:
 Sổ ghi thực địa
Fundort aufräumen
Fundort aufräumen
Füllen Sie ausgehobene Löcher wieder auf, nehmen Sie allen Müll mit und hinterlassen Sie den Fundort so, wie Sie ihn vorgefunden haben. Verantwortungsvolles Sammeln sichert den Zugang für andere und erhält die Natur.
Vật liệu
4- 1 cáiTạm thời
- 5 kilogramTạm thời
- 10 cáiTạm thời
- 5 lítTạm thời
Công cụ yêu cầu
8- Tạm thời
- Tạm thời
- Tạm thời
- Tạm thời
- Tạm thời
- Tạm thời
- Tạm thời
- Tạm thời
Bản thiết kế này làm ra

CC0 Phạm vi công cộng
Bản thiết kế này được phát hành theo CC0. Bạn tự do sao chép, sửa đổi, phân phối và sử dụng cho bất kỳ mục đích nào mà không cần xin phép.
Hỗ trợ nhà sáng tạo bằng cách mua sản phẩm qua bản thiết kế, nơi họ nhận Hoa hồng nhà sáng tạo do nhà bán hàng đặt, hoặc tạo phiên bản mới và kết nối trong bản thiết kế riêng để chia sẻ doanh thu.