Constructing a Pointed Gothic Arch — Medieval Masonry
Hướng dẫn
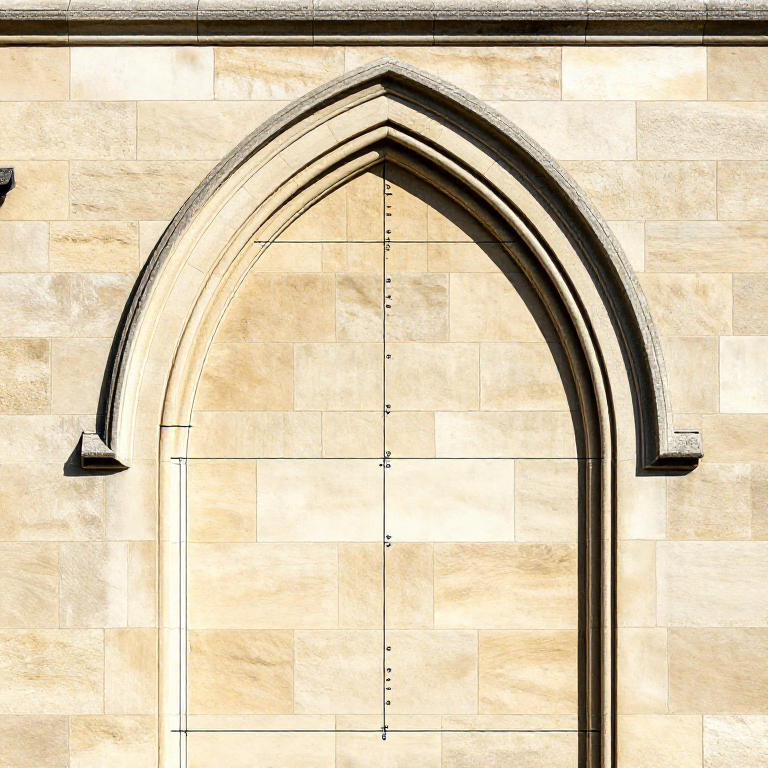
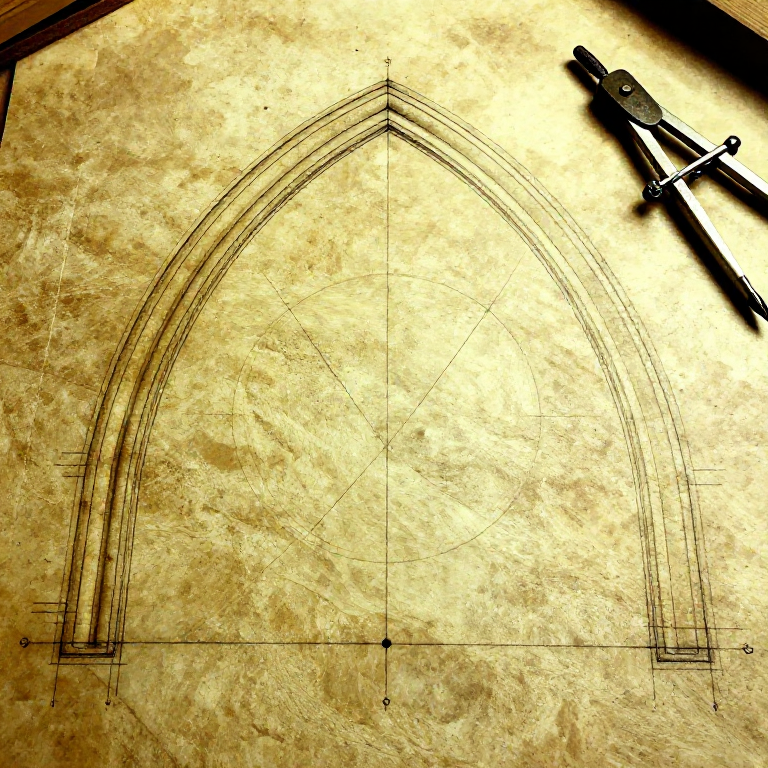
Lay Out the Two-Centred Geometry
Lay Out the Two-Centred Geometry
Determine the span (width) and desired rise (height) of the arch. For a standard equilateral pointed arch, the two centre points are located at the base of the arch, at the springer level, each at the position of the opposite springer stone. Mark these two centre points on a full-size layout on a flat floor or tracing floor. Using a compass or trammel beam set to a radius equal to the full span, draw an arc from each centre point — the two arcs will intersect at the apex of the arch, forming the characteristic point. This intersection defines the shape of the intrados (inner curve) of the arch. For a steeper (lancet) arch, move the centre points closer together (inside the span); for a flatter (depressed) arch, move them further apart (outside the span). Divide each arc into an equal number of voussoir sections — typically 7 to 10 voussoirs per side plus one keystone at the apex.
Cut the Voussoirs
Cut the Voussoirs
Each voussoir must be cut as a truncated wedge, but unlike a semicircular arch where all bed joints radiate to a single centre, a pointed arch has bed joints that radiate to two different centres — the voussoirs on the left half of the arch have bed joints radiating to the right-hand centre point, and vice versa. This means the voussoir shapes are mirror-images between the two halves of the arch. Cut templates from the full-size layout for each voussoir position and use them to mark the cutting lines on the stone blocks. Cut the stones with point and flat chisels, ensuring the bed faces are perfectly flat and the taper angles match the templates precisely. The keystone at the apex is a special piece whose bed faces radiate to both centre points simultaneously, creating a V-shaped cross section.
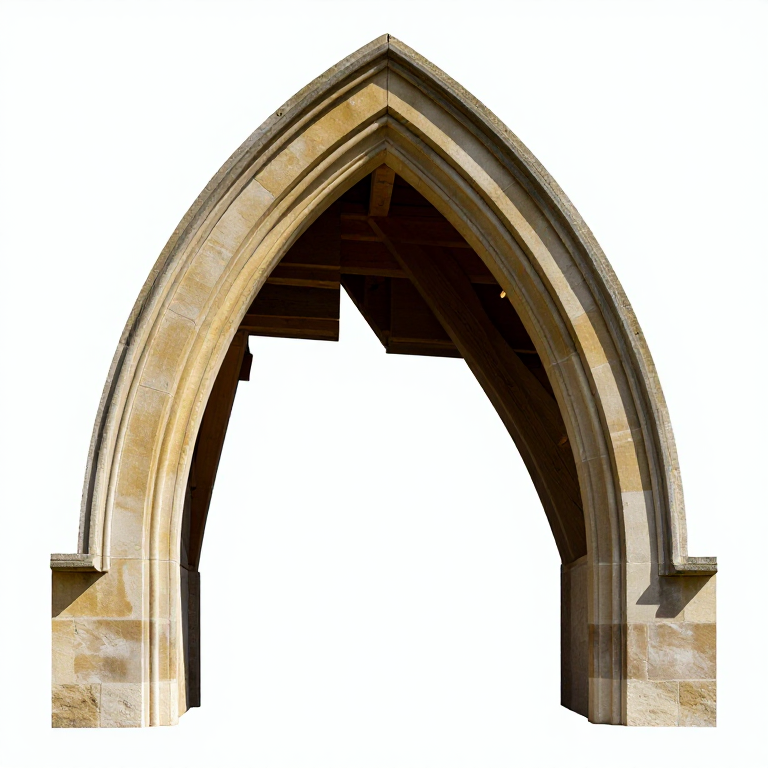
Build the Timber Centring
Build the Timber Centring
Construct a timber centring (temporary formwork) that matches the pointed arch profile. Unlike a semicircular centring made from a single curved rib, a pointed arch centring requires two curved sections that meet at the apex. Cut each rib from planks or laminated timber strips to the appropriate arc. Join the two ribs at the apex with a strong gusset or lap joint. Brace the ribs with cross-members and cover with lagging boards to create a smooth support surface. Mount the centring on temporary posts between the supporting piers, with wedges at the base for adjustment and later removal. The centring must be strong enough to support the weight of all the voussoirs until the keystone is set and the arch becomes self-supporting.
Vật liệu cho bước này:
 Sandstone (Abrasive)15-21 wedge-shaped blocks cái
 Lime (Calcium Hydroxide)as needed cái
Set the Voussoirs
Set the Voussoirs
Begin by setting the springer stones at the base of the arch on each side, bedded in lime mortar on top of the supporting piers. Work upward from both sides simultaneously, laying voussoirs on the centring with thin mortar joints (no more than 10 mm). Verify each voussoir's alignment using a straightedge pivoted at the appropriate centre point — bed joints on the left side should radiate to the right-hand centre, and vice versa. The two halves of the arch must rise at equal rates to keep the centring evenly loaded. Continue until only the keystone gap remains at the pointed apex.
Set the Keystone and Strike the Centring
Set the Keystone and Strike the Centring
Mortar and set the keystone at the pointed apex — this is the most critical stone, as its V-shaped bed faces must lock against both halves of the arch simultaneously. Tap it firmly into place with a mallet through a wooden pad. Once the keystone is seated, the pointed arch becomes a self-supporting compression structure, with forces flowing through the voussoirs down to the piers. Allow the mortar to cure for at least two weeks before carefully lowering the centring by knocking out the support wedges. The structural advantage of the pointed arch over the semicircular arch is that it directs thrust more vertically downward into the piers, reducing the lateral (outward-pushing) force that thick walls or buttresses must resist. This property enabled medieval builders to construct taller, thinner walls with larger window openings — the hallmark of Gothic architecture.
Vật liệu
3- 15-21 wedge-shaped blocks cáiTạm thời
- as needed cáiTạm thời
Công cụ yêu cầu
5- Tạm thời
- Tạm thời
- Tạm thời
Related blueprints
Other builds that share materials, tools, or techniques with this one.
CC0 Phạm vi công cộng
Bản thiết kế này được phát hành theo CC0. Bạn tự do sao chép, sửa đổi, phân phối và sử dụng cho bất kỳ mục đích nào mà không cần xin phép.
Hỗ trợ nhà sáng tạo bằng cách mua sản phẩm qua bản thiết kế, nơi họ nhận Hoa hồng nhà sáng tạo do nhà bán hàng đặt, hoặc tạo phiên bản mới và kết nối trong bản thiết kế riêng để chia sẻ doanh thu.