Making a Bone Sewing Needle — Splinter and Polish Technique
Hướng dẫn
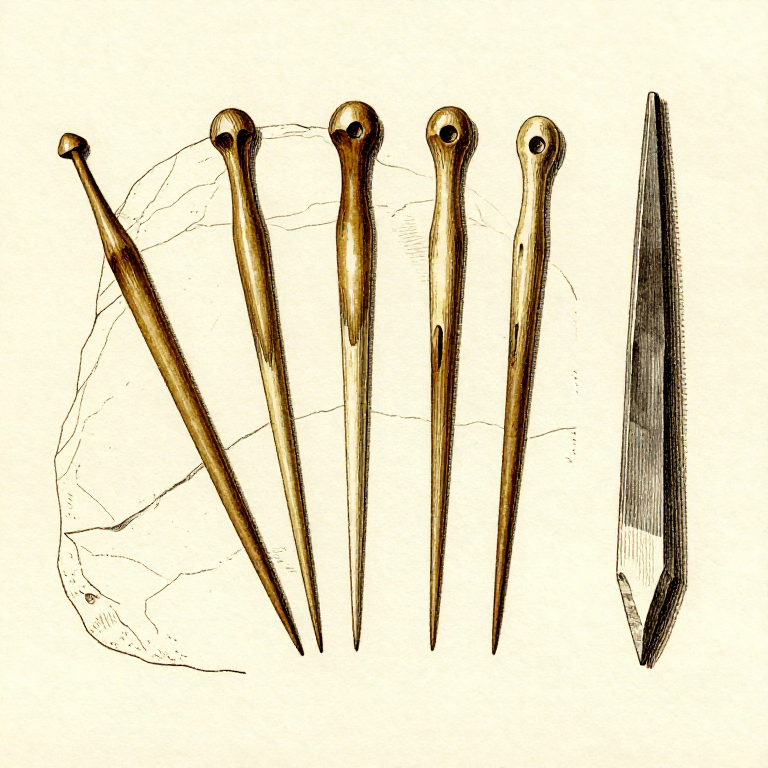
Select and Splinter the Bone
Select and Splinter the Bone
Choose a dense, straight bone — the fibula of a rabbit, the wing bone of a large bird, or a splinter from the long bone of a deer. Rabbit fibulae are ideal because they are naturally narrow and straight, requiring minimal shaping. For larger bones, score two parallel lines 3-5 mm apart along the length using a flint burin, then carefully snap out the splinter between the score lines. Fresh bone is easier to work than dry bone. The splinter should be at least 5-8 cm long and narrow enough to taper into a needle.
Vật liệu cho bước này:
 Sandstone Slab1 flat piece cái
 Watersmall amount cái
Công cụ cần thiết:
 Sandstone (Abrasive)
Grind to Shape
Grind to Shape
Grind the bone splinter on a flat sandstone slab using water as a lubricant. Shape the body into a smooth, elongated taper — round or slightly oval in cross-section, about 2-3 mm diameter at the thickest point. The point should taper to a fine, sharp tip. Keep the proximal end (where the eye will be drilled) slightly thicker to prevent it from splitting when the eye is pierced. Grind both sides evenly, rotating the needle frequently to maintain a uniform cross-section. A single needle takes 20-30 minutes of grinding to achieve a smooth, polished surface.

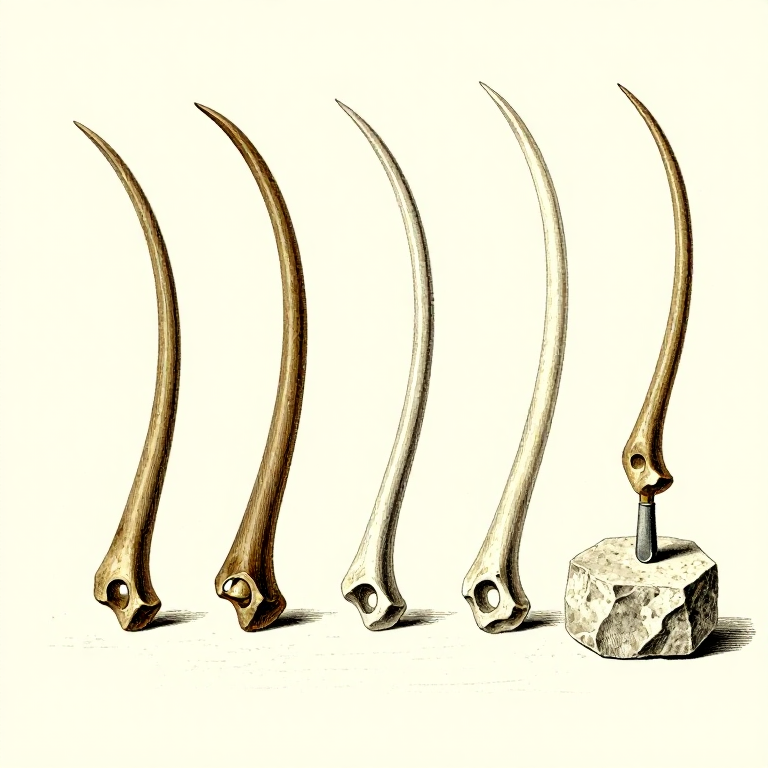
Drill the Eye
Drill the Eye
The eye is the most delicate step — a poorly drilled eye cracks the needle and requires starting over. Use the tip of a flint burin to drill from both sides of the flat end, rotating the burin between your palms like a tiny bow drill. Work slowly, removing only a small amount of bone per rotation. Drilling from both sides ensures the holes meet in the middle without the exit hole blowing out a chip. The eye should be just large enough to pass a thread of sinew or plant fiber through — about 1-2 mm diameter. Smooth any rough edges inside the eye with the tip of the burin to prevent thread abrasion.
Final Polish
Final Polish
Give the needle a final polish on the finest-grained sandstone available, using water. This removes any remaining scratches or rough spots that could snag on leather or fabric. A highly polished surface dramatically reduces friction when pushing the needle through hide. Some prehistoric needles show a high-gloss polish from extended use — the natural oils in leather and sinew gradually burnish the bone surface. Test the point by pushing it through a piece of leather — it should penetrate with moderate pressure without bending or breaking.
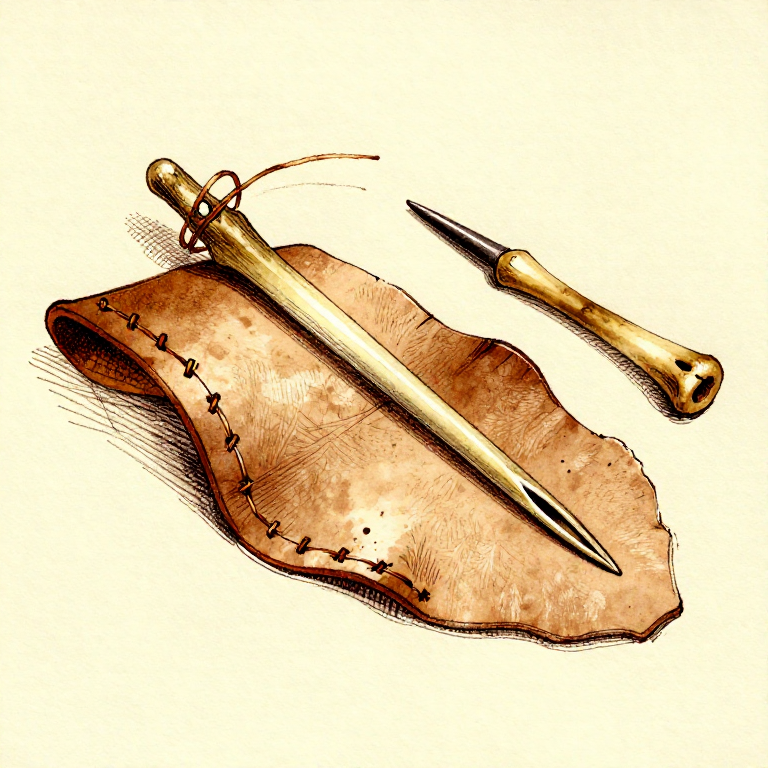
Thread and Use
Thread and Use
Thread the needle with sinew (animal tendon fiber) or fine plant fiber cordage. Sinew is the ideal prehistoric sewing thread because it swells when wet and shrinks when dry, pulling stitches tight. Split a length of dried sinew from a deer leg tendon, moistening the end to stiffen it for threading through the eye. To sew leather, pre-punch holes with a bone awl at regular intervals, then pass the needle through each hole. For thinner materials like gut membrane or plant-fiber cloth, the needle can pierce directly. A well-made bone needle functions as effectively as a modern steel needle for hand sewing and lasts for months of regular use.
Vật liệu
3- Tạm thời
- 1 cáiTạm thời
Công cụ yêu cầu
3- Tạm thời
- Tạm thời
- Tạm thời
Vật liệu bản thiết kế liên kết
Related blueprints
Other builds that share materials, tools, or techniques with this one.
CC0 Phạm vi công cộng
Bản thiết kế này được phát hành theo CC0. Bạn tự do sao chép, sửa đổi, phân phối và sử dụng cho bất kỳ mục đích nào mà không cần xin phép.
Hỗ trợ nhà sáng tạo bằng cách mua sản phẩm qua bản thiết kế, nơi họ nhận Hoa hồng nhà sáng tạo do nhà bán hàng đặt, hoặc tạo phiên bản mới và kết nối trong bản thiết kế riêng để chia sẻ doanh thu.