Forging Roman Square-Shanked Iron Nails — Essential Roman Fastener
Hướng dẫn
Taper the Nail Point
Taper the Nail Point
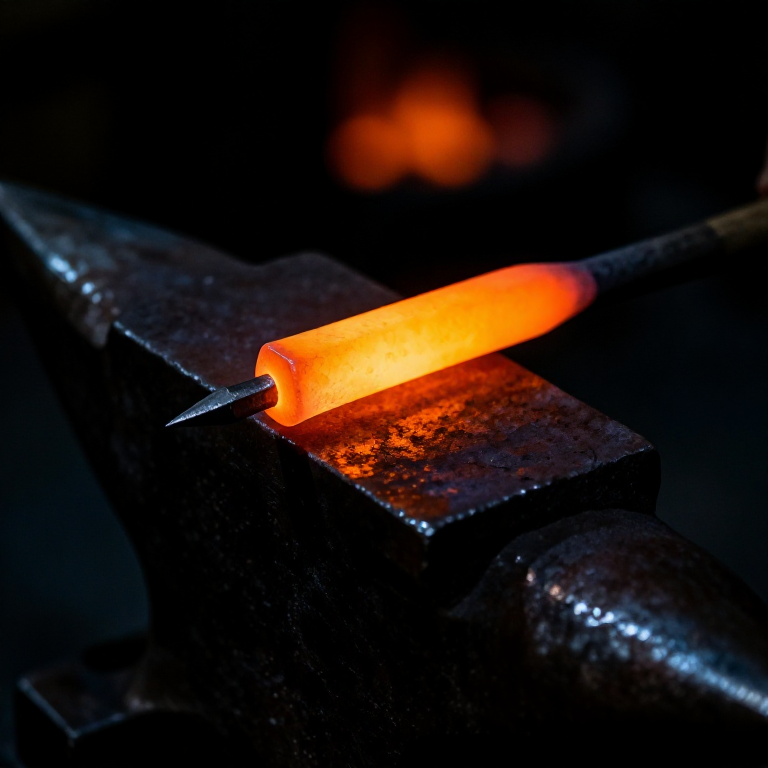
Heat the end of a square iron rod to bright orange (approximately 1000 °C) in the forge. Place the heated end on the anvil face and hammer a four-sided taper over the last 4 to 6 cm, rotating the rod 90 degrees between each set of blows to maintain the square cross-section. The taper should end in a blunt point — Roman nails were not needle-sharp but had a robust pyramidal tip that spread wood fibres apart rather than cutting them, which reduced the tendency to split the timber. Work quickly while the iron is hot, returning it to the forge if it drops below dull red. The finished taper should transition smoothly from the full-thickness shank to the point without any abrupt shoulders or cold shuts.
Vật liệu cho bước này:
Công cụ cần thiết:
 Anvil
Anvil Forge Tongs
Cut the Nail to Length
Cut the Nail to Length
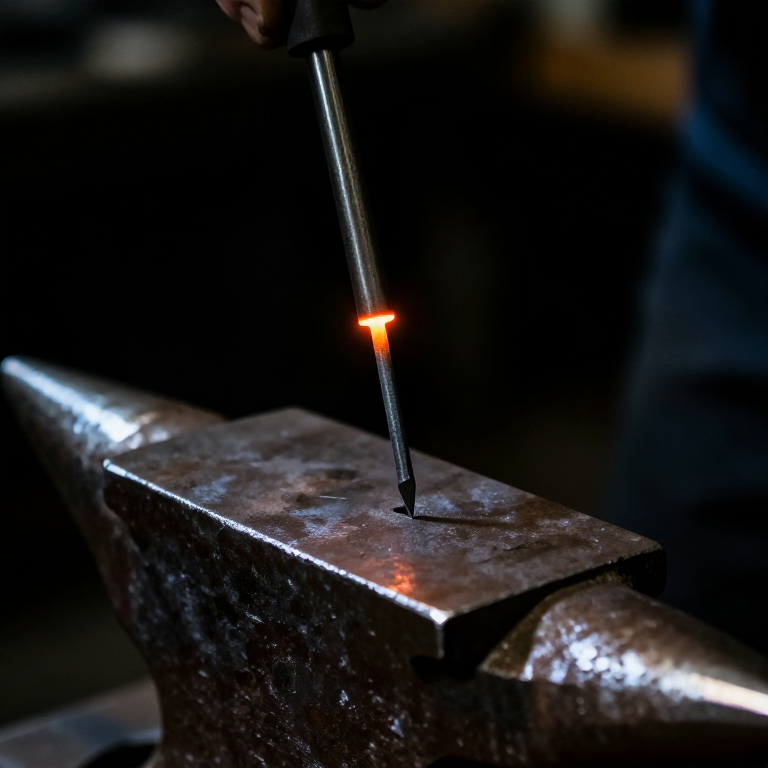
Determine the desired nail length — common Roman construction nails were approximately 7 to 12 cm long. Measure from the tip of the taper and mark the cut point by nicking the rod with the hardy (a chisel set in the anvil's hardy hole). Heat the cut area to bright orange and place the nick over the hardy edge. Strike the rod above the nick with the hammer to cut approximately three-quarters through, then bend the nail free from the parent rod with a twist. The remaining nub of metal at the cut end will be incorporated into the nail head in the next step. Leave this end slightly proud — approximately 5 to 8 mm of extra length beyond the intended shank — to provide material for forming the head.
Upset and Form the Head
Upset and Form the Head
Heat the cut end of the nail to bright orange. Insert the nail point-first through the tapered hole in a nail header plate (a thick steel plate with a hole that matches the nail shank size, placed over the pritchel hole or held in a vice). The shank should pass through until only 5 to 8 mm protrudes above the header plate. Strike the protruding end with the hammer face to upset (spread) the metal outward, forming a flat circular head. Rotate the nail slightly between blows to keep the head symmetrical. Three to five firm blows are usually sufficient to form a head approximately twice the shank width in diameter. Lift the nail out of the header by tapping it from below with a punch through the pritchel hole.
Straighten and Inspect
Straighten and Inspect
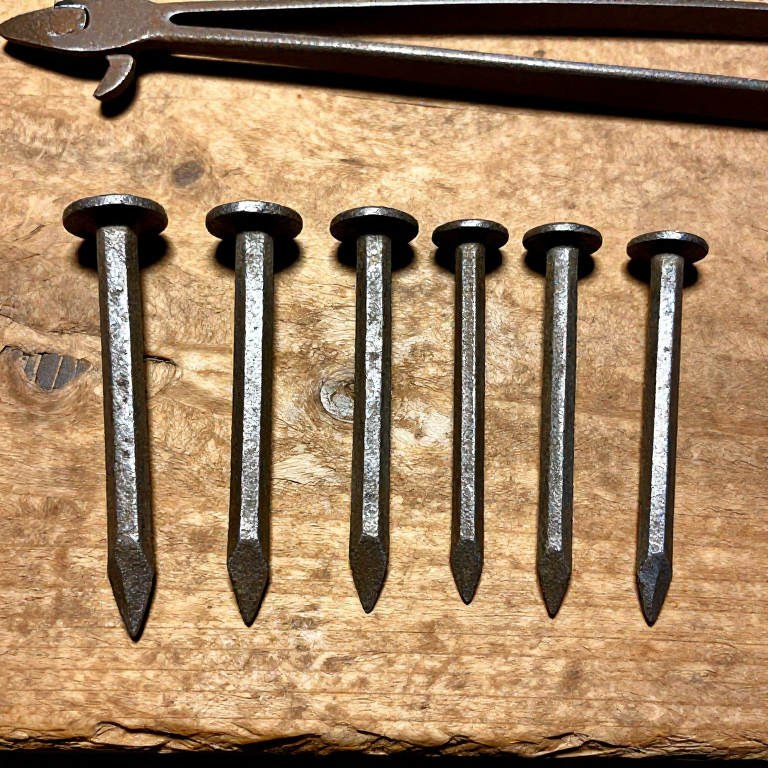
While the nail is still warm, lay it on the anvil face and check for straightness by rolling it — a straight nail will roll smoothly without wobbling. Correct any bends by placing the concave side down on the anvil and tapping the high point with light hammer blows. Inspect the head for cracks — if the metal was too cold when headed, it may have cracked around the edge. A cracked head means the nail must be reforged. Check that the taper is centred and the point is aligned with the shank axis. A well-made nail should stand upright on its head without tipping. An experienced Roman-era smith could produce several hundred nails per day using this method.
Quench and Finish a Batch
Quench and Finish a Batch
Quench the finished nail in water to cool it for handling. Mild steel and wrought iron nails do not require heat treatment — they are not hardened like tool steel. Wire-brush or lightly file any heavy scale from the surface if desired, though Roman nails were typically used as-forged with their black oxide scale intact, which actually provides some corrosion resistance. Repeat the process to forge a batch of nails. For efficiency, many smiths would taper several rods in sequence, then cut and head them in a second pass, maintaining a rhythm with the forge. The Inchtuthil hoard demonstrates the astonishing scale of Roman nail production — the nails were buried to deny them to the enemy, as iron was a strategic material in the Roman military supply chain.
Vật liệu
1- 30 cm per nail, 8-10 mm sq cáiTạm thời
Công cụ yêu cầu
6- Tạm thời
- Tạm thời
- Tạm thời
- Tạm thời
CC0 Phạm vi công cộng
Bản thiết kế này được phát hành theo CC0. Bạn tự do sao chép, sửa đổi, phân phối và sử dụng cho bất kỳ mục đích nào mà không cần xin phép.
Hỗ trợ nhà sáng tạo bằng cách mua sản phẩm qua bản thiết kế, nơi họ nhận Hoa hồng nhà sáng tạo do nhà bán hàng đặt, hoặc tạo phiên bản mới và kết nối trong bản thiết kế riêng để chia sẻ doanh thu.