
Making Synthetic Alizarin Crimson — The Coal Tar Pigment That Destroyed the Madder Industry
Alizarin (1,2-dihydroxyanthraquinone) is the red colourant that makes madder root one of humanity's oldest and most important dye plants. For millennia, the only source was the root of Rubia tinctorum, painstakingly cultivated, harvested after three years of growth, dried, and ground. Entire regional economies — southern France, the Ottoman Levant, the Dutch lowlands — depended on madder cultivation.
In 1868, German chemists Carl Graebe and Carl Liebermann determined alizarin's molecular structure and synthesised it from anthraquinone, a coal tar derivative. By 1869, three independent groups — Graebe and Liebermann (via BASF), William Henry Perkin in England, and Ferdinand Riese — filed patents for commercial synthesis within a single day of each other. Perkin's method, via sulfonation of anthraquinone followed by alkali fusion, proved the most practical and was scaled to industrial production within two years.
The effect was devastating and swift. By 1880, synthetic alizarin had collapsed the price of natural madder by 90%. The madder fields of Avignon and Alsace were abandoned. An entire agricultural way of life vanished in a decade — the first time a synthetic chemical completely replaced a natural product on a global scale.
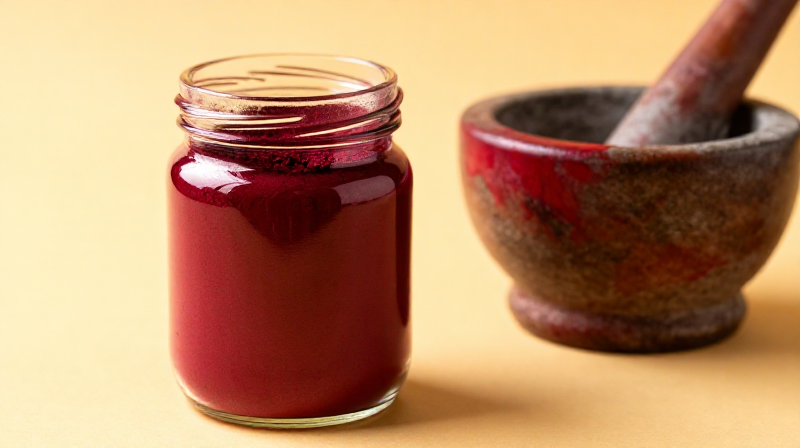
The pigment form — alizarin crimson lake — is made by precipitating synthetic alizarin onto an aluminium hydroxide substrate, creating a transparent, deep red-violet pigment beloved by painters from the Impressionists onward. Colour Index: PR83.
SAFETY WARNING: This process uses concentrated sulfuric acid (causes severe burns on contact), molten sodium hydroxide at over 200 °C (extreme burn and splash hazard), and hydrochloric acid (corrosive fumes). Work in a well-ventilated area or outdoors. Wear acid-resistant gloves, chemical splash goggles, and a lab coat at all times. Keep running water nearby for immediate decontamination.
Instructions
Don full protective equipment
Don full protective equipment
This synthesis involves concentrated sulfuric acid, molten sodium hydroxide, and hydrochloric acid. Before opening any reagent, put on acid-resistant rubber gloves over nitrile inner gloves, chemical splash goggles (not just safety glasses — acid splashes upward), and a buttoned lab coat. Set up your workspace in a well-ventilated area or outdoors. Place a basin of clean water within arm's reach for immediate decontamination of any acid or alkali splash.
Tools needed:
 Chemical Splash Goggles
 Nitrile Rubber Gloves (Thick)
 Lab Coat
Weigh anthraquinone
Weigh anthraquinone
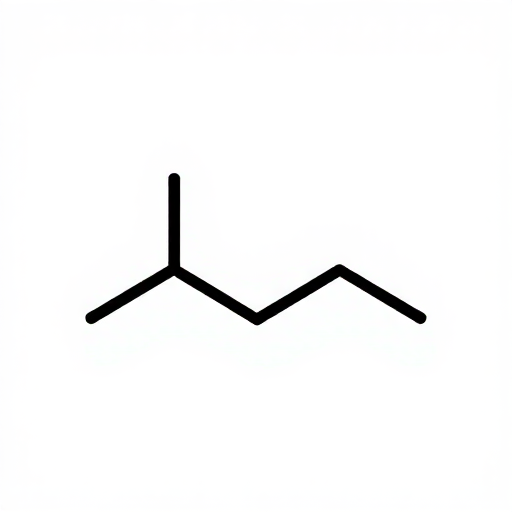
Weigh out 10 g of anthraquinone — a pale yellow crystalline powder derived from coal tar or petroleum. This is the starting skeleton of alizarin: a three-ring molecule with two ketone groups. The synthesis will add two hydroxyl groups to the central ring, converting anthraquinone into 1,2-dihydroxyanthraquinone (alizarin). Anthraquinone itself has low toxicity but avoid inhaling the dust.
Materials for this step:
 Anthraquinone10 g
Tools needed:
 Digital Precision Scale
Sulfonation — add anthraquinone to concentrated sulfuric acid
Sulfonation — add anthraquinone to concentrated sulfuric acid
In a 250 ml borosilicate round-bottom flask, measure 30 ml of concentrated sulfuric acid (96% H₂SO₄). ALWAYS add the solid to the acid, never the reverse. Slowly add the 10 g of anthraquinone in small portions over five minutes, swirling gently between additions. The solid dissolves slowly, forming a dark brown viscous solution. This is the most dangerous moment of the synthesis — concentrated sulfuric acid causes instant, deep burns on skin contact.
Materials for this step:
 Sulfuric Acid (96% concentrated)30 ml
Tools needed:
 Heat-Resistant Glass Beaker (1 liter)
Heat sulfonation mixture to 150 °C
Heat sulfonation mixture to 150 °C
Place the flask in an oil bath or sand bath on a hot plate. Heat gradually to 150 °C and hold for three hours, stirring occasionally with a glass rod. At this temperature, the sulfuric acid attacks the beta position (position 2) of the anthraquinone ring, replacing a hydrogen atom with a sulfonic acid group (—SO₃H). The mixture darkens to a deep brown-black. Do not exceed 170 °C — higher temperatures cause di-sulfonation, which produces impure alizarin.
Tools needed:
 Glass Stirring Rod (25cm)
 Thermometer (Lab)
Cool and dilute the sulfonated product
Cool and dilute the sulfonated product
Remove the flask from the heat and allow it to cool to 80 °C. Very carefully and slowly pour the thick, dark mixture into 200 ml of cold distilled water in a large beaker, stirring constantly. The mixture will heat up violently — add slowly over ten minutes. NEVER pour water into concentrated sulfuric acid — the exothermic reaction causes explosive boiling and spattering. The sulfonated anthraquinone dissolves, forming a brown-black aqueous solution of anthraquinone-2-sulfonic acid.
Materials for this step:
 Distilled Water (1 Liter)200 ml
Tools needed:
Heat-Resistant Glass Beaker (1 liter)Neutralise excess acid with sodium carbonate
Neutralise excess acid with sodium carbonate
Slowly add sodium carbonate (soda ash) to the diluted sulfonation solution, stirring well. The mixture fizzes as CO₂ is released. Continue adding until the fizzing stops and the solution is weakly acidic (pH 4–5 if you have indicator paper). This neutralises the excess sulfuric acid before the next stage. Approximately 15–20 g of sodium carbonate is needed. The solution remains dark brown.
Materials for this step:
 Sodium Carbonate (soda ash)20 g
Evaporate to thick paste
Evaporate to thick paste
Gently heat the neutralised solution on the hot plate at 100 °C, stirring regularly, until it reduces to a thick, dark paste — roughly one-quarter of the original volume. This concentrates the sodium anthraquinone-2-sulfonate for the alkali fusion step. Do not heat too aggressively or scorch the paste. The consistency should be like thick honey when ready.
Prepare the alkali fusion mixture
Prepare the alkali fusion mixture
In a separate iron or nickel crucible (never glass — molten NaOH dissolves glass), weigh out 40 g of sodium hydroxide pellets and 3 g of potassium nitrate. The potassium nitrate is the oxidising agent — it provides the oxygen atom needed to introduce the second hydroxyl group onto the anthraquinone ring (converting the monosulfonate into the 1,2-dihydroxy product). Without the oxidant, you get only 2-hydroxyanthraquinone, not alizarin.
Materials for this step:
 Sodium Hydroxide (Lab Grade, 500g)40 g
 Potassium Nitrate (saltpeter)3 g
Tools needed:
 Iron Crucible
Melt sodium hydroxide in crucible
Melt sodium hydroxide in crucible
Place the iron crucible on the hot plate or over a gas burner and heat until the sodium hydroxide pellets melt — this occurs at 318 °C. The melt is a clear, colourless, extremely corrosive liquid. A single drop on skin causes a deep, painless burn that only becomes apparent hours later. Stir with an iron rod (never wood or glass). Once the NaOH is fully molten, add the potassium nitrate and stir until dissolved.
Add sulfonated paste to molten alkali
Add sulfonated paste to molten alkali
Using an iron spatula, add the concentrated sulfonated anthraquinone paste to the molten NaOH in small portions. Each addition causes vigorous bubbling as water evaporates. Stir constantly with the iron rod. The colour changes from brown to dark purple-red as the sulfonic acid group is displaced by a hydroxyl group and the potassium nitrate oxidises the adjacent position — forming the two adjacent hydroxyl groups of alizarin. This is Perkin's key reaction: the alkali fusion at 200–220 °C.
Hold the fusion at 200–220 °C for two hours
Hold the fusion at 200–220 °C for two hours
Reduce the heat to maintain the melt at 200–220 °C — well below the NaOH melting point but above the reaction threshold. Stir every ten minutes. The melt gradually turns a deep red-violet. After two hours, the conversion is essentially complete: the product is sodium alizarinate (the sodium salt of alizarin). The melt should be a thick, dark red-violet paste. If it is still brown, continue heating for another 30 minutes.
Tools needed:
Thermometer (Lab)Cool and dissolve the melt in water
Cool and dissolve the melt in water
Remove the crucible from the heat and allow it to cool for 30 minutes until the melt solidifies to a dark red-violet mass. Transfer the crucible to a large beaker and add 500 ml of hot distilled water. Stir vigorously — the solidified melt dissolves slowly, forming a deep red-purple solution of sodium alizarinate. If lumps remain, break them up with a glass rod and continue stirring. The solution should be uniformly deep red.
Materials for this step:
Distilled Water (1 Liter)500 mlTools needed:
Heat-Resistant Glass Beaker (1 liter)Glass Stirring Rod (25cm)Acidify to precipitate crude alizarin
Acidify to precipitate crude alizarin
Slowly add dilute hydrochloric acid (10% HCl) to the dark red solution, stirring constantly. As the pH drops below 7, alizarin begins to precipitate as fine orange-red particles — the free dihydroxyanthraquinone is insoluble in acidic water. Continue adding acid until the solution is clearly acidic (pH 2–3) and no more precipitate forms. The liquid above the precipitate should be pale yellow, not red. Approximately 100 ml of 10% HCl is needed.
Materials for this step:
 Dilute Hydrochloric Acid (10% HCl)100 ml
Filter crude alizarin
Filter crude alizarin
Set up a glass funnel with filter paper over a clean beaker. Pour the acidified mixture through the filter. The crude alizarin collects on the filter paper as a reddish-orange mass, while the filtrate passes through as a pale yellow sodium sulfate solution. Rinse the precipitate on the filter with 200 ml of hot distilled water to wash out residual salts. The filtrate can be safely disposed — it contains only sodium sulfate and traces of sodium chloride.
Materials for this step:
 Filter Paper (fine pore)2 pieces
Tools needed:
 Glass Funnel (Stemmed)
 Glass Beaker (Borosilicate, 500ml)
Dry crude alizarin
Dry crude alizarin
Transfer the washed filter cake to a clean glass plate and spread into a thin layer. Dry in a warm, ventilated area for 4–6 hours or overnight. The dried crude alizarin is a reddish-orange powder. This is the pure dyestuff — identical to the molecule extracted from madder root, but produced from coal tar in a fraction of the time and cost. Expected yield from 10 g anthraquinone: approximately 8–10 g of crude alizarin.
Prepare alizarin solution for lake formation
Prepare alizarin solution for lake formation
To convert the crude alizarin into an artist's pigment, it must be precipitated onto an aluminium hydroxide substrate — forming a 'lake'. Dissolve 8 g of the dried crude alizarin in a solution of 5 g sodium carbonate in 400 ml of hot distilled water. Stir until the alizarin dissolves completely, forming a deep red-violet solution. The sodium carbonate converts alizarin back to its soluble sodium salt.
Materials for this step:
Sodium Carbonate (soda ash)5 gDistilled Water (1 Liter)400 mlPrepare alum solution
Prepare alum solution
In a separate beaker, dissolve 20 g of potassium alum (potassium aluminium sulfate) in 200 ml of warm distilled water. Stir until completely dissolved — the solution should be clear and colourless. The aluminium ions from the alum will form the aluminium hydroxide substrate onto which the alizarin molecules adsorb, creating the lake pigment structure that gives alizarin crimson its characteristic transparency and depth.
Materials for this step:
 Alum (Potassium Alum)20 gDistilled Water (1 Liter)200 ml
Tools needed:
Glass Beaker (Borosilicate, 500ml)Precipitate the alizarin lake
Precipitate the alizarin lake
Slowly pour the alum solution into the alizarin solution while stirring constantly. Then, add sodium carbonate solution (10 g in 100 ml water) drop by drop until the mixture reaches pH 6–7. As the pH rises, aluminium hydroxide precipitates — and the alizarin molecules bond to the surface of the aluminium hydroxide particles, forming the deep crimson lake. The colour shifts from red-violet to a rich, deep crimson as the lake forms. Stop adding carbonate when the mixture is neutral.
Materials for this step:
Sodium Carbonate (soda ash)10 gSettle and decant
Settle and decant
Allow the precipitated lake to settle for one hour. The heavy crimson particles sink to the bottom, leaving a nearly colourless supernatant. Carefully decant or siphon off the clear liquid. If the supernatant is still noticeably pink, more alum is needed — add 5 g dissolved in 50 ml water, re-adjust pH, and settle again. All alizarin should be bound to the aluminium hydroxide substrate.
Wash the lake pigment
Wash the lake pigment
Add 300 ml of clean distilled water to the settled lake, stir gently, and allow to settle again for 30 minutes. Decant. Repeat this washing process twice more to remove residual potassium sulfate and sodium chloride — soluble salts left in the pigment cause efflorescence (white powdery deposits) when the pigment dries. After three washes, the supernatant should be completely clear.
Materials for this step:
Distilled Water (1 Liter)1 literFilter the washed lake
Filter the washed lake
Pour the washed lake slurry through a filter paper in a glass funnel. The deep crimson pigment collects as a thick paste on the filter paper. Allow to drain completely — press gently with a clean spatula to expel excess water but do not compress the paste too hard, as this makes the dried pigment difficult to re-disperse.
Materials for this step:
Filter Paper (fine pore)1 pieceTools needed:
Glass Funnel (Stemmed)Dry the alizarin crimson lake pigment
Dry the alizarin crimson lake pigment
Spread the filter cake in a thin layer on a clean glass plate or ceramic tile. Dry at room temperature in a dust-free area for 24–48 hours. Do not oven-dry — excessive heat can darken the pigment and damage the lake structure. The colour deepens as the pigment dries, shifting from a bright pinkish-red to the characteristic deep, transparent crimson that painters know. The dried pigment should crack into thin, glassy flakes.
Grind to final pigment powder
Grind to final pigment powder
Transfer the dried flakes to a porcelain mortar and grind gently to a fine, uniform powder. Alizarin crimson is a soft, lightweight pigment — it grinds easily compared to mineral pigments. The finished powder should be a deep, transparent crimson-red with a slight blue undertone. Test by smearing a trace on white paper: you should see a transparent, glowing crimson, not opaque red. This transparency is what made alizarin crimson invaluable for glazing in oil painting.
Tools needed:
 Mortar and Pestle (Porcelain)
Store finished pigment
Store finished pigment
Transfer the ground alizarin crimson to a clean, dry glass jar with a tight-fitting lid. Label with the pigment name (Alizarin Crimson, PR83), date of synthesis, and source (synthetic, from anthraquinone). Expected yield: approximately 15–20 g of finished lake pigment from 10 g of anthraquinone. Store in a cool, dark place. Synthetic alizarin crimson has moderate lightfastness — it will fade slowly in strong direct sunlight over years, but is far more permanent than natural madder lake and more than adequate for works displayed under gallery lighting.
Tools needed:
 Glass Storage Jar with Lid
Materials
10- 10 gPlaceholder
- 30 mlPlaceholder
- 1300 mlPlaceholder
- Placeholder
- Placeholder
- Placeholder
- Placeholder
- 3 piecesPlaceholder
- Placeholder
- 1 literPlaceholder
Tools Required
12- Placeholder
- Placeholder
- Placeholder
- Placeholder
- Placeholder
- Placeholder
- Placeholder
- Placeholder
- Placeholder
- Placeholder
- Placeholder
Connected Blueprint Materials
Related Blueprints
These blueprints share knowledge with this one — techniques, materials, or principles that connect them in the learning graph.
Related blueprints
Other builds that share materials, tools, or techniques with this one.
CC0 Public Domain
This blueprint is released under CC0. You are free to copy, modify, distribute, and use this work for any purpose, without asking permission.
Support the Maker by purchasing products through their Blueprint where they earn a Maker Commission set by Vendors, or create a new iteration of this Blueprint and include it as a connection in your own Blueprint to share revenue.