Colaboração
ARTE
BELEZA E BEM-ESTAR
ARTESANATO
CULTURA E HISTÓRIA
ENTRETENIMENTO
MEIO AMBIENTE
COMIDA E BEBIDAS
ENGENHARIA REVERSA
CIÊNCIAS
ESPORTES
TECNOLOGIA
TECNOLOGIA VESTÍVEL
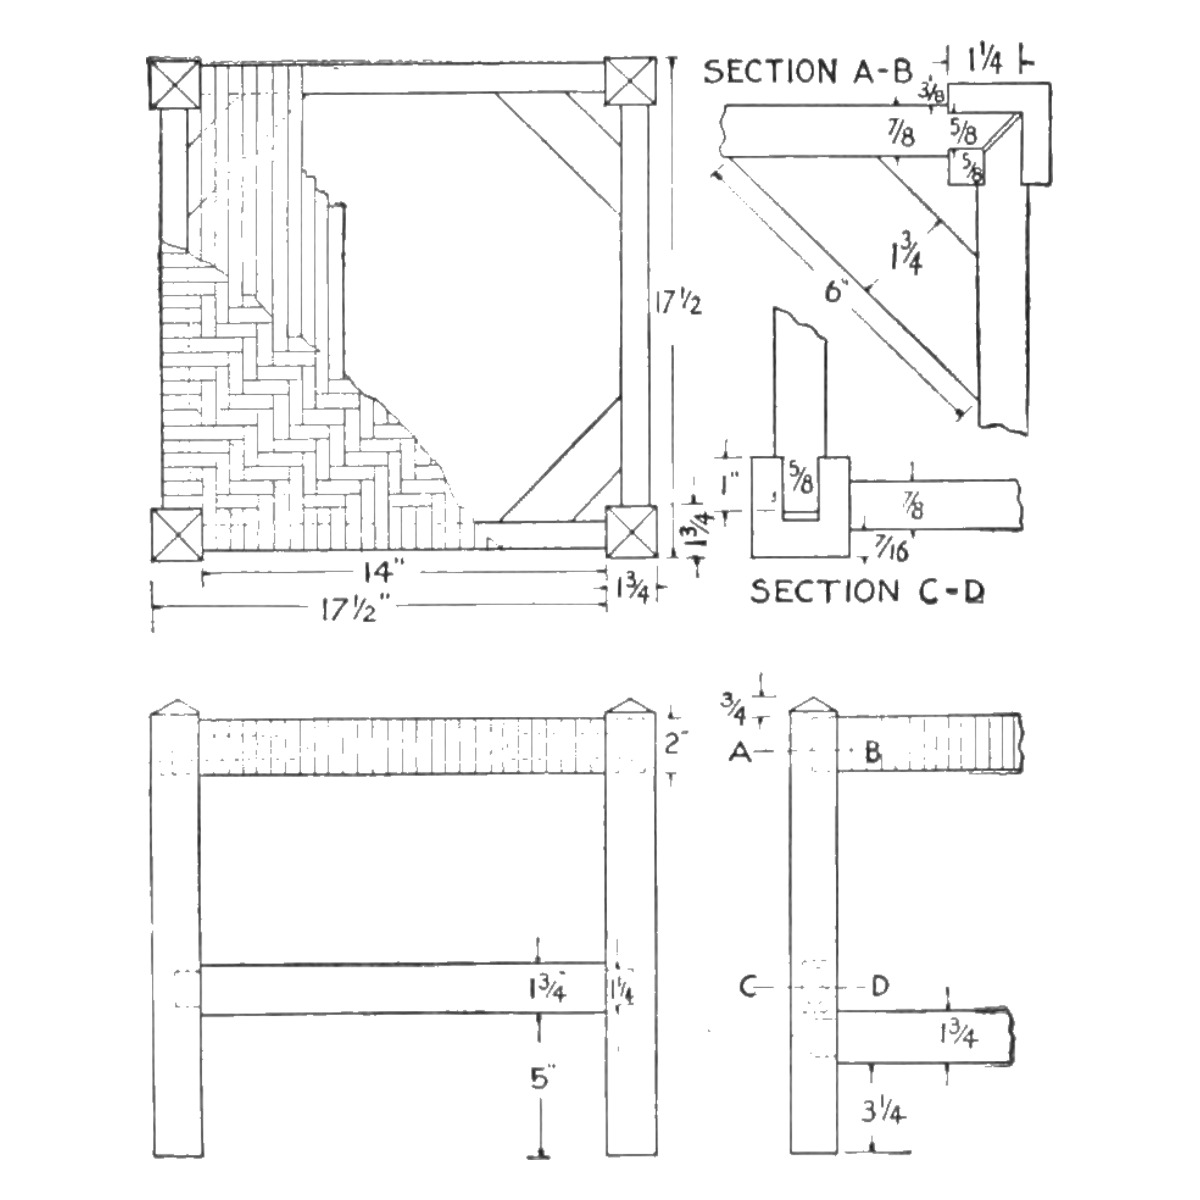


Woven-Top Stool: Mortised, Braced Frame With a Diagonal Reed Seat (Boy Mechanic, 1915)
Russel Dodsworth's stool from The Boy Mechanic, Book 2 (1915): a 17-1/2 in square mortise-and-tenon frame with corner braces, its top woven from wet reed in two layers, the second laid over-three-under-three so a diagonal pattern runs across the seat.
Intermediário
About 2 days
Instruções
1
1
His cutting list, and the weave
His cutting list, and the weave
A carregar o notebook Jupyter…
2
2
Read The Boy Mechanic, Book 2
Read The Boy Mechanic, Book 2
The material: 4 legs, 1-3/4 by 1-3/4 by 16 in; 4 bottom rails, 7/8 by 1-3/4 by 16 in; 4 top rails, 7/8 by 2 by 16-1/2 in; 4 diagonal braces, 7/8 by 1-3/4 by 6 in.
3
3
Cut and mortise the frame
Cut and mortise the frame
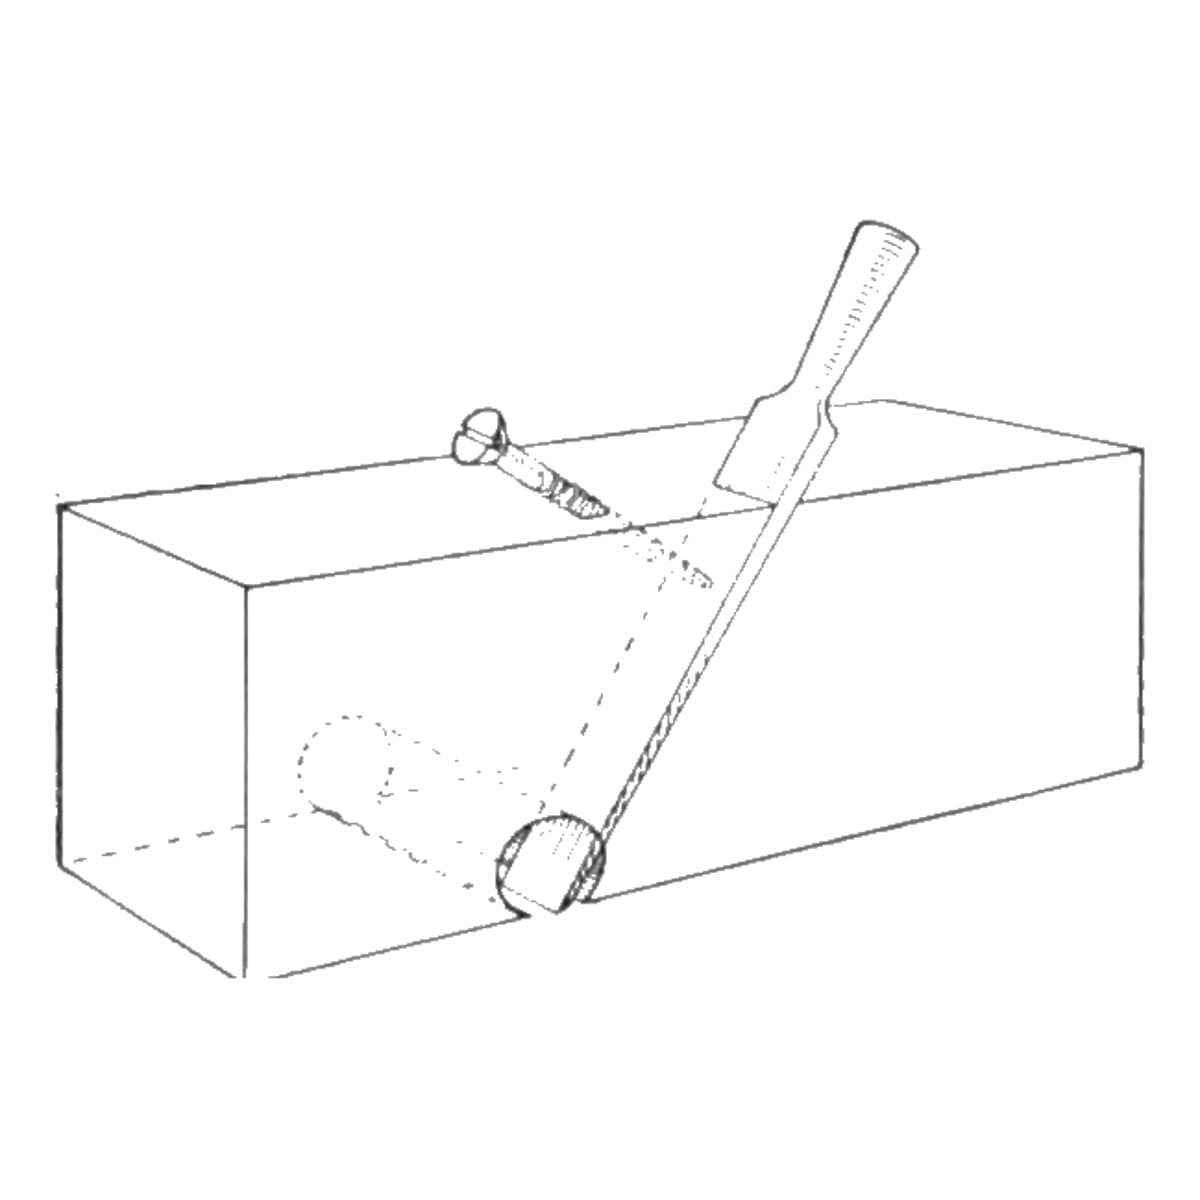
Cut the parts to his list. Mortise the legs so the top rails come level; tenon the top rails on the sides only and bevel them at the ends. For the bottom rails, cut the mortises one above the other (5 in above the floor on his drawing) and tenon the rails on all sides. Cut the braces at 45 deg on each end.
Materiais para este passo:
 Tábua de madeira de lei4 peças
Ferramentas necessárias:
 Serrote
 Formões
 Maço de madeira
 Plaina manual
 Lápis
 Fita métrica
4
4
Glue up
Glue up
Glue the frame together and glue the diagonal braces in place inside the top corners.
Materiais para este passo:
 Cola de madeira1 peça
Ferramentas necessárias:
 Sargento de barraMaço de madeira
5
5
Wrap the first layer
Wrap the first layer
Use a wet reed weaver and wrap one layer over the whole top, the strips close together and tightly wound.
Materiais para este passo:
 Rotim1 peça
Ferramentas necessárias:
 Balde de 20 litros
 Faca para couro
6
6
Weave the second layer
Weave the second layer
Start the second layer at right angles to the first. Strip 1: under one, then over three, under three, and so on by threes. Strip 2: under two, then over three, under three. Strip 3: under three, then over and under three. Strip 4: over one, then under three, over three. Strip 5: over two, then under and over three. Strip 6: over three, then by threes. Repeat the series of six across the top.
Materiais para este passo:
Rotim1 peçaFerramentas necessárias:
Balde de 20 litrosFaca para couro7
7
Finish
Finish
Good white shellac makes the best finish for the seat; finish the frame to suit.
Materiais para este passo:
 Verniz de goma-laca1 peça
Ferramentas necessárias:
 Trincha larga
8
8
Troubleshooting
Troubleshooting
Stool troubleshooting.
Flow
Loading...
9
9
History and honest limits
History and honest limits
From "Woven-Top Stool" by Russel Dodsworth, Erie, Pa., in **The Boy Mechanic, Book 2**, Popular Mechanics, 1915 (Project Gutenberg 44585; checked on the archive.org scan boymechanicbook200chic2, p. 256). His caption names the weaver as reed; he gives no reed size or tenon lengths. Rattan reed as the weaver, the tools and metric figures are ours.
Materiais
4- 4 peçasReferência
- 1 peçaReferência
- 1 peçaReferência
- 1 peçaReferência
Ferramentas necessárias
10- Referência
- Referência
- Referência
- Referência
- 1 vendor sell this, none ship to you yetReferência
- 1 vendor sell this, none ship to you yetReferência
- Referência
- Referência
- Referência
- Referência
Este projeto faz
Blueprints relacionados
Estes blueprints compartilham conhecimento — técnicas, materiais ou princípios
CC0 Domínio Público
Este blueprint é liberado sob CC0. Você é livre para copiar, modificar, distribuir e usar este trabalho para qualquer finalidade, sem pedir permissão.
Apoie o Maker comprando produtos através do Blueprint, onde ele ganha uma Comissão Maker definida pelos vendedores, ou crie uma nova versão deste Blueprint e inclua-o como conexão no seu próprio Blueprint para compartilhar receita.