
ARTE
BELEZA E BEM-ESTAR
ARTESANATO
CULTURA E HISTÓRIA
ENTRETENIMENTO
MEIO AMBIENTE
COMIDA E BEBIDAS
ENGENHARIA REVERSA
CIÊNCIAS
ESPORTES
TECNOLOGIA
TECNOLOGIA VESTÍVEL
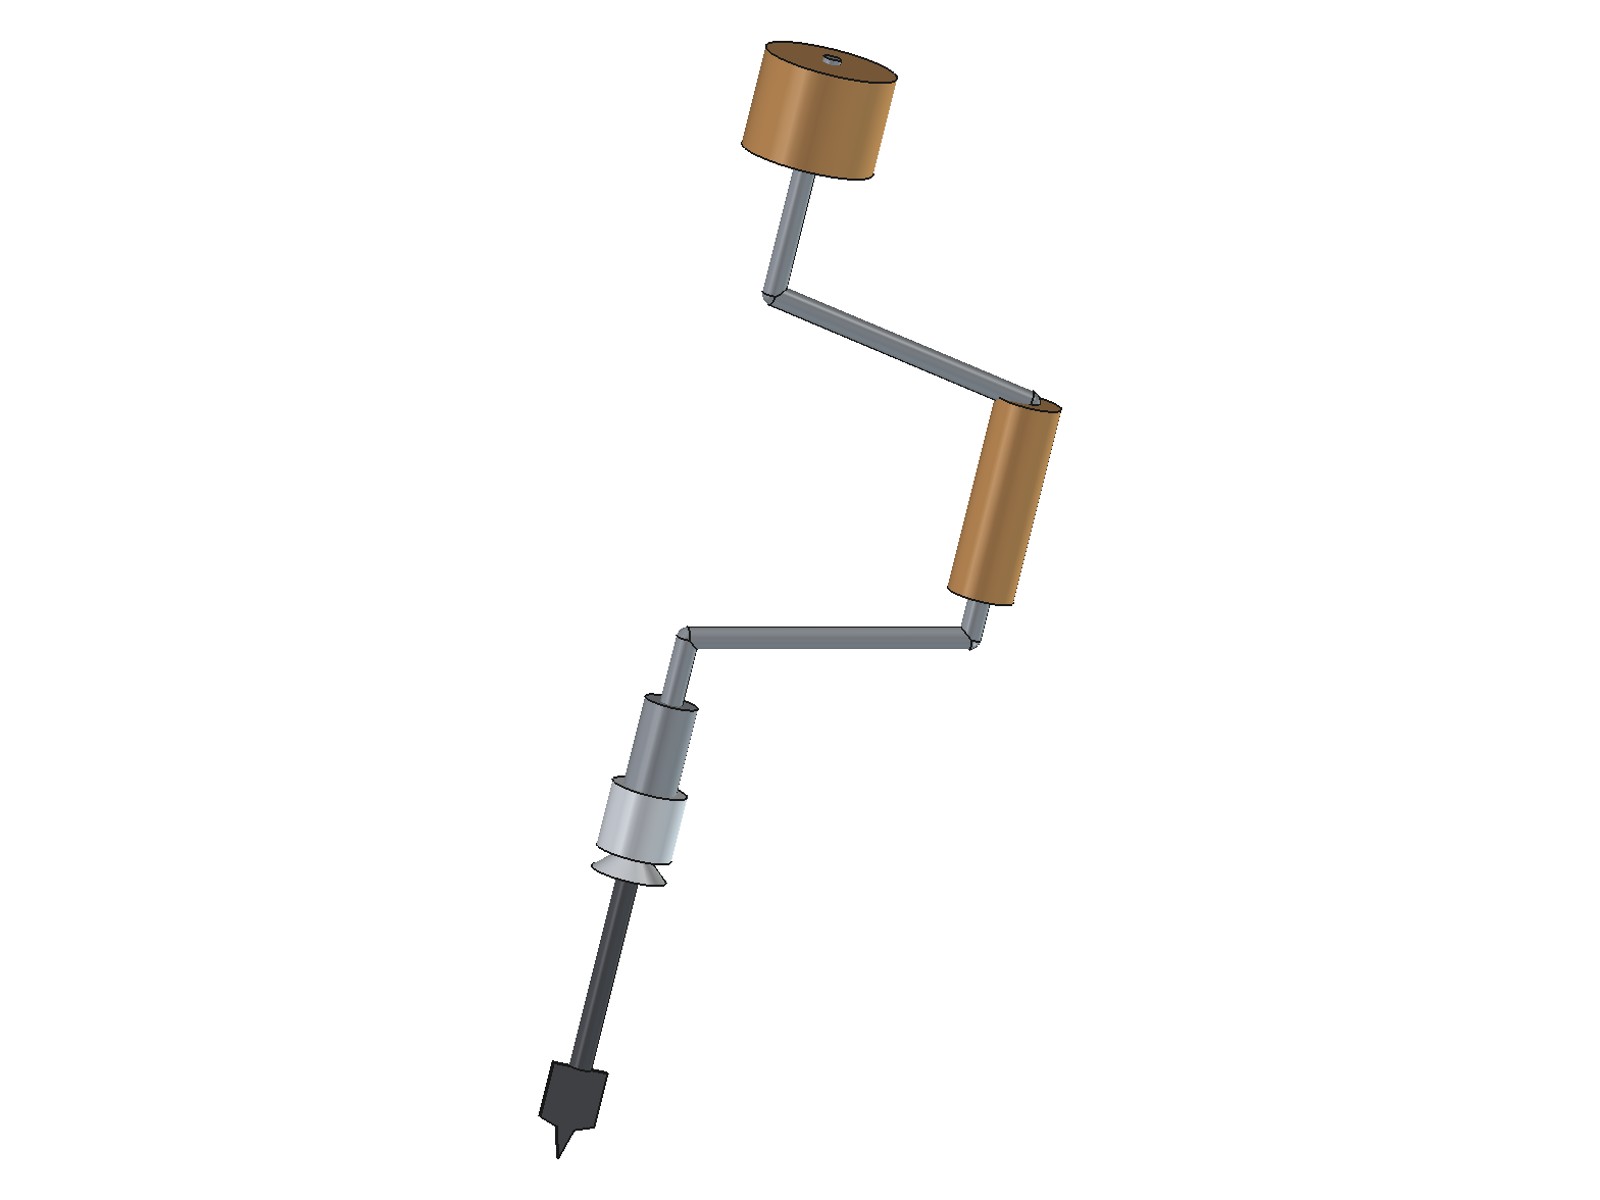
Brace and Bit: a Crank Brace with a Two-Jaw Screw-Thimble Chuck (after Amidon, 1868)
Forge

Criado por

Forge

22. novembro 2026NO
1
0
0
0
0

Brace and Bit: a Crank Brace with a Two-Jaw Screw-Thimble Chuck (after Amidon, 1868)

A carpenter's brace: a cranked steel rod with a turning wooden head, a wooden handle sleeve and a chuck that holds the bit. The chuck is Charles Amidon's of 1868: two jaws in a slotted, threaded foot, closed at both ends by a screwed thimble, so they grip a tapered or straight shank firmly. Made on a metal lathe, with a forge for the bends.
Avançado
About 2 days

Instruções

1

Watch a brace at work

Boring a square, true hole with a brace and bit (Wood By Wright Extra).
2

Amidon's chuck, 1868

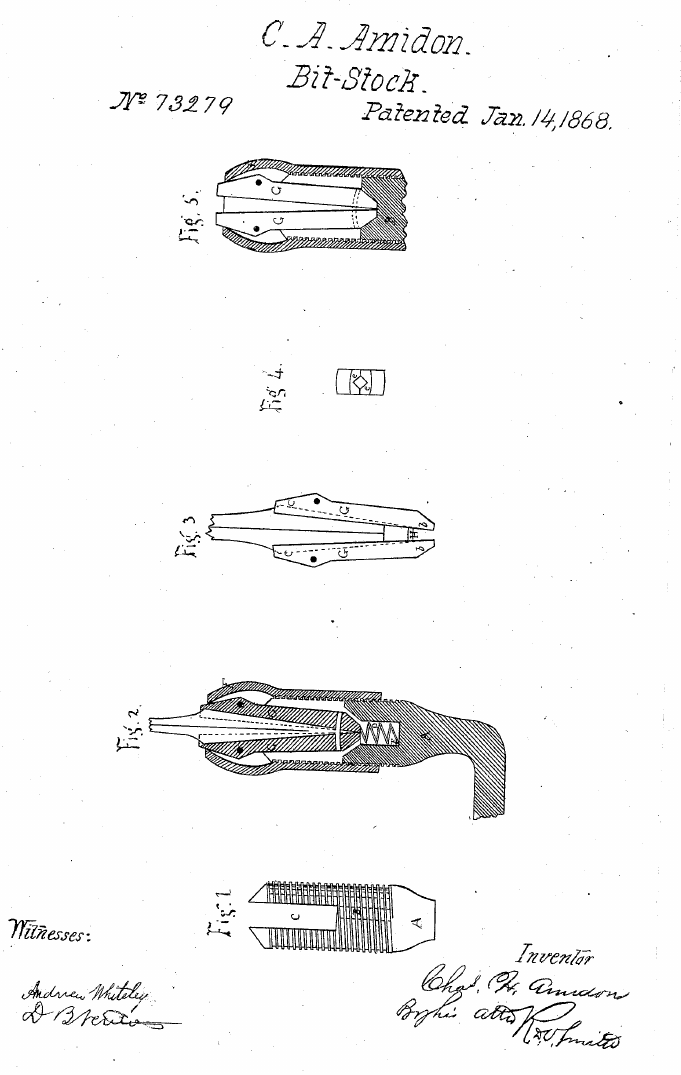
US 73,279: the foot of the stock is threaded outside and slotted through; two jaws, loosely pinned at their inner ends, sit in the slot on a spring; grooves in their faces make a tapering square recess for the bit shank. The thimble screws on and its narrowed mouth presses the jaws together at both ends, so they follow the taper of any shank.
Passo 2 - Image 1
3

Torque, grip and the rod length

A carregar o notebook Jupyter…
4

Print the drawings

Page 1: the chuck parts at 1:1; page 2: the crank layout. Print at 100 % and check the 50 x 10 mm box.
Arquivo de designPDFCC0 - Free
5

Turn the foot

From 24 mm round bar, 60 mm long: cut M24 x 1.5 over the front 30 mm; drill a 10 mm socket 22 mm deep at the back for the crank, and the 8 mm cavity with a 90 degree mouth at the front; saw and file the 8 mm slot, 32 mm deep, right through.

Materiais para este passo:

Barra redonda de aço macioBarra redonda de aço macio1 piece (24 mm x 60 mm)

Ferramentas necessárias:

Torno mecânicoTorno mecânico
Conjunto de ferramentas de torno (HSS)Conjunto de ferramentas de torno (HSS)
Jogo de brocasJogo de brocas
Serra de arco para metaisSerra de arco para metais
Lima para metalLima para metal
Paquímetro digital de 6 polegadasPaquímetro digital de 6 polegadas
6

Make the jaws

Cut two jaws 46 mm long from 7.5 mm flat bar, 8 mm wide at the pin end widening to 12 mm. File a 90 degree V-groove 3 mm deep along each inner face, bevel both ends 30 degrees, drill the 2 mm pin hole 4 mm from the inner end. Press a 2 mm pin tight into one jaw; it must slide in the other. Check they move freely in the slot.

Materiais para este passo:

Barra chata de aço macioBarra chata de aço macio1 piece (7.5 mm x 12 mm x 100 mm)
Varão de aço macioVarão de aço macio1 piece (2 mm x 12 mm, pin)

Ferramentas necessárias:

Serra de arco para metaisSerra de arco para metais
Lima para metalLima para metal
Jogo de brocasJogo de brocas
Punção de centroPunção de centro
Torno de bancadaTorno de bancada
7

Turn the thimble

From 34 mm bar, 40 mm long: bore and cut M24 x 1.5 inside, 22 mm deep, then a 60 degree cone narrowing to a 12 mm mouth. Knurl the outside. It must screw fully onto the foot.

Materiais para este passo:

Barra redonda de aço macioBarra redonda de aço macio1 piece (34 mm x 45 mm)

Ferramentas necessárias:

Torno mecânicoTorno mecânico
Conjunto de ferramentas de torno (HSS)Conjunto de ferramentas de torno (HSS)
Ferramenta de recartilharFerramenta de recartilhar
Paquímetro digital de 6 polegadasPaquímetro digital de 6 polegadas
8

Bend the crank

Cut 540 mm of 10 mm rod. Turn 50 mm at one end down to 8 mm (the head journal). Following page 2: make the foot bend, slide the hardwood sleeve (30 mm, bored 10.5 mm, 90 long) onto the rod, make the two handle bends, then the head bend. Heat to a dull red for each bend; keep all bends in one plane and the head and foot legs on one line.

Materiais para este passo:

Varão de aço macioVarão de aço macio1 piece (10 mm x 540 mm)

Bloco de madeira duraBloco de madeira dura1 piece (sleeve, 35 x 35 x 95 mm)

Ferramentas necessárias:

Forja de ferreiroForja de ferreiro
Torno de bancadaTorno de bancada
Martelo de bolaMartelo de bola
Torno de madeiraTorno de madeira
Torno mecânicoTorno mecânico
9

Turn the head and fit it

Turn a hardwood head 60 mm across and 45 mm thick, bore 8.5 mm through and counterbore the top 16 x 5 mm. Slide a washer on the journal, then the head, then a washer in the counterbore; peen the journal end over so the head turns freely but cannot come off. Oil the wood.

Materiais para este passo:

Bloco de madeira duraBloco de madeira dura1 piece (head, 65 x 65 x 50 mm)

Anilha planaAnilha plana2 piece (8 mm)
Óleo de linhaçaÓleo de linhaça20 ml

Ferramentas necessárias:

Torno de madeiraTorno de madeira
Martelo de bolaMartelo de bola
Torno de bancadaTorno de bancada
10

Assemble the chuck

Push the crank's foot end into the foot's socket, drill 4 mm through both and drive in a 4 mm pin, peened both ends. Drop the spring into the cavity, put the jaws in the slot (pinned ends in), and screw the thimble on.

Materiais para este passo:

Varão de aço macioVarão de aço macio1 piece (4 mm x 26 mm, cross pin)

Conjunto de molas de compressãoConjunto de molas de compressão1 piece (about 6 mm diameter, 15 mm long)

Ferramentas necessárias:

Jogo de brocasJogo de brocas
Martelo de bolaMartelo de bola
Torno de bancadaTorno de bancada
11

Fit a bit and bore

Back the thimble off, put the bit shank between the jaws and tighten the thimble by hand. Press on the head and turn the handle; keep the brace square to the work.

Materiais para este passo:

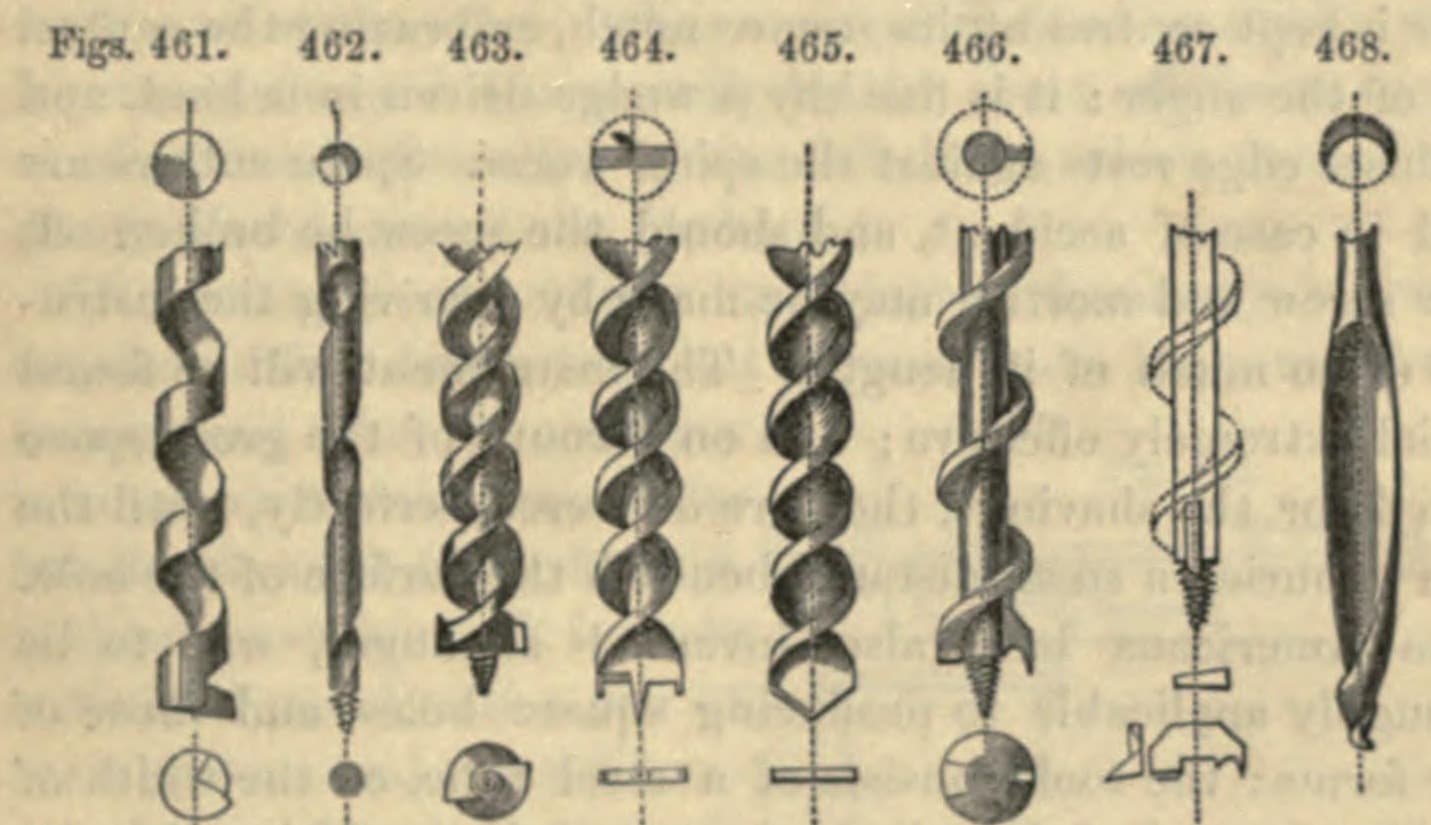
Conjunto de brocas de páConjunto de brocas de pá1 piece (one bit, 10 mm octagonal shank)
12

Troubleshooting

Brace problems and fixes.

Flow

Loading...
13

History and honest limits

Charles H. Amidon, Greenfield, Mass.: US 73,279, "Improvement in Bit-Stocks", 14 January 1868. He compared it with Barber's stock, whose solid socket had to fit the bit head exactly. His patent covers the chuck; the crank and swivel head are the ordinary ones of the time. Ours: every size and the bend order. Not built or tested by us yet.

Materiais

8

Ferramentas necessárias

12

Ficheiros de design

1

Blueprints relacionados

Estes blueprints compartilham conhecimento — técnicas, materiais ou princípios
CC0 Domínio Público

Este blueprint é liberado sob CC0. Você é livre para copiar, modificar, distribuir e usar este trabalho para qualquer finalidade, sem pedir permissão.

Apoie o Maker comprando produtos através do Blueprint, onde ele ganha uma Comissão Maker definida pelos vendedores, ou crie uma nova versão deste Blueprint e inclua-o como conexão no seu próprio Blueprint para compartilhar receita.

Discussão

(0)

Entrar para participar da discussão

Carregando comentários...