Colaboração
ARTE
BELEZA E BEM-ESTAR
ARTESANATO
CULTURA E HISTÓRIA
ENTRETENIMENTO
MEIO AMBIENTE
COMIDA E BEBIDAS
ENGENHARIA REVERSA
CIÊNCIAS
ESPORTES
TECNOLOGIA
TECNOLOGIA VESTÍVEL
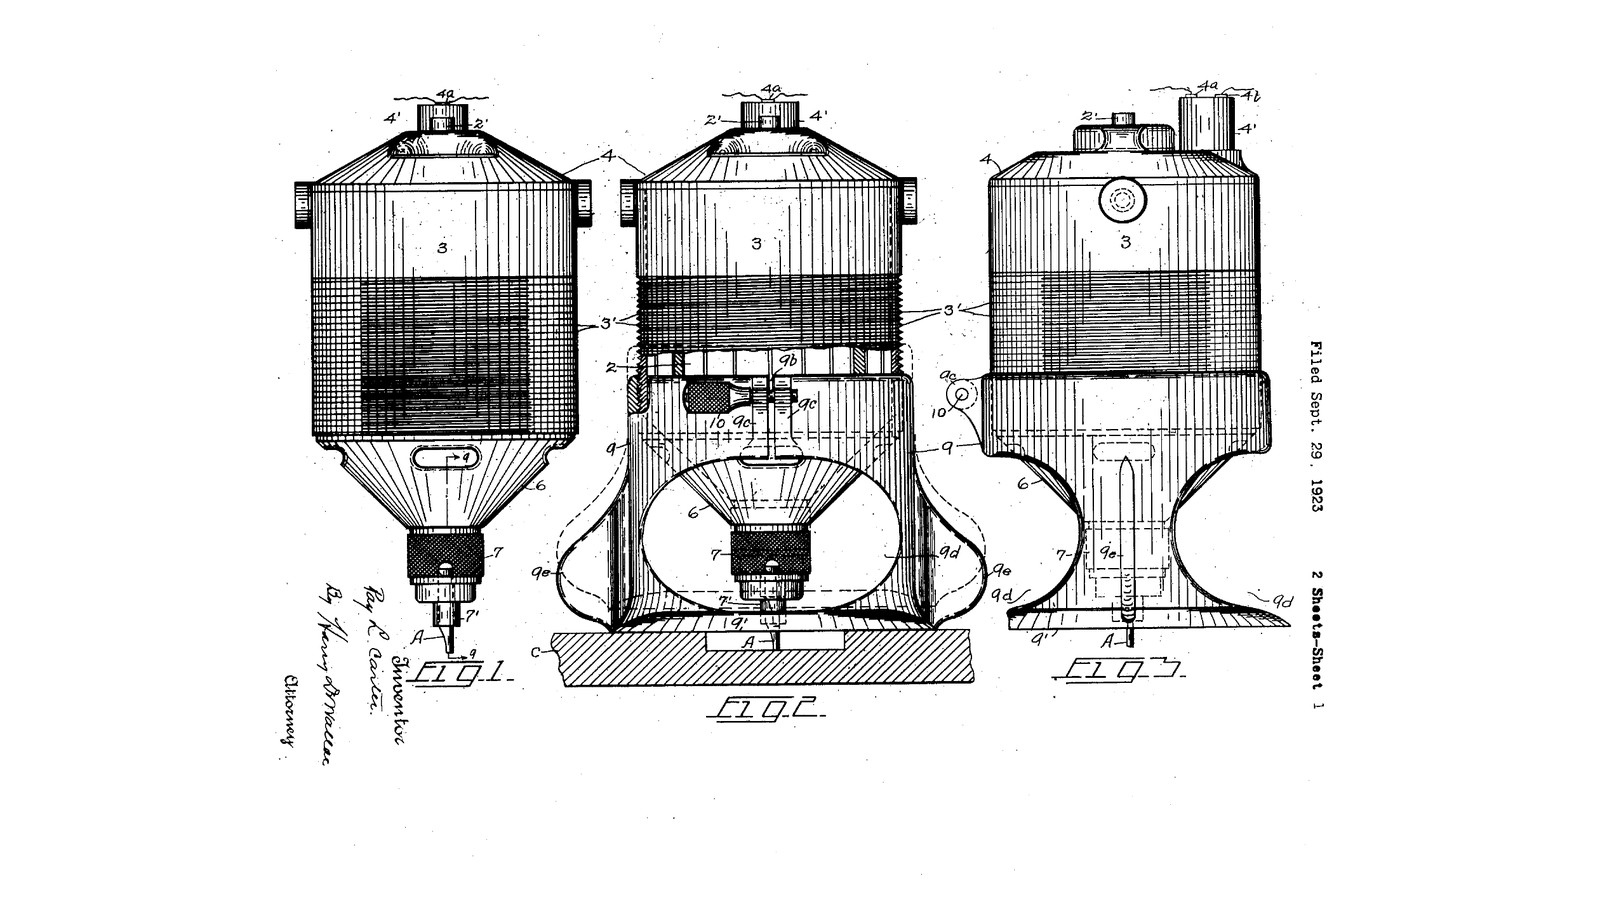


Screw-Depth Portable Router: The Motor's Threaded Casing Screws Into a Split Base, One Turn per Sixteenth (Carter, 1924)
Ray L. Carter of Syracuse, New York, received US 1,514,894, dated 11 November 1924, for the portable electric router: a small high-speed motor in an insulated casing light enough to hold in one hand, with a cutter in a chuck on its shaft. The casing is threaded outside and screws into the split, threaded top of a hollow base with a flat bottom. Each turn moves the cutter 1/16 inch, and a clamp screw across the split locks it. The base is cut away so the cutter can be seen and the chips can get out.
We print the casing and base in PETG at his pitch, round a small DC motor. The other sizes are ours.
Intermediário
About 2 days
Instruções
1
1
One turn, one sixteenth
One turn, one sixteenth
A carregar o notebook Jupyter…
2
2
Read US 1,514,894
Read US 1,514,894
"In practice, the threads of the shell 3 and support 9 are preferably about one-sixteenth inch pitch, so that each revolution of the motor or support in either direction moves the tool A correspondingly."
3
3
Print the motor casing
Print the motor casing
The casing 3: a tube for a 42 mm motor with a 60 mm thread at 1/16 inch pitch, an 18 mm hole and air slots in its bottom, and two holes 29 mm apart for the motor's face screws. Print it bottom down. PETG, 0.2 mm layers, 40 % infill, 5 walls; no supports.
4
4
Print the base
Print the base
The support 9: a hollow base with a flat plate 140 mm across and an opening 50 mm wide, its sides cut away, two wings, and the split, threaded top with clamp lugs. Print it plate down. PETG, 0.2 mm layers, 40 % infill, 5 walls; no supports.
5
5
Print and fit the parts
Print and fit the parts
Print the casing and the base in PETG. Clean the threads and screw the casing into the base by hand; it should turn smoothly all the way. If it is tight, run it in and out a few times. Check the base's bottom is flat by rubbing it on abrasive paper on a flat board.
Materiais para este passo:
 Filamento PETG1 peça
Ferramentas necessárias:
 Impressora 3D de filamento (FDM)
 Rebarbador manual
 Paquímetro digital de 6 polegadas
6
6
Motor, collet and wiring
Motor, collet and wiring
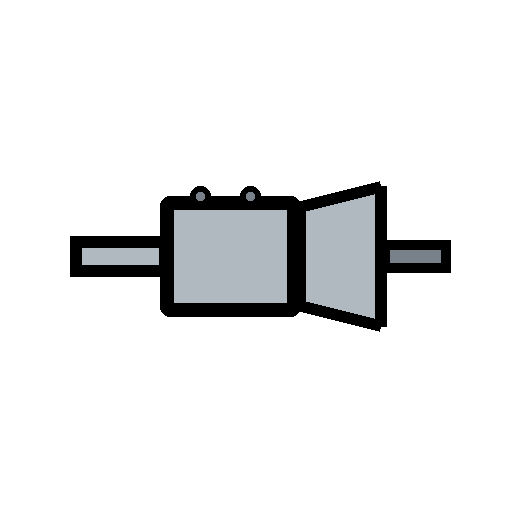
Fit the collet adapter on the motor's shaft and tighten its set screws. Push the motor down into the casing so its face sits on the casing's bottom with the collet through the hole, and screw it in with its two M4 face screws. Solder the supply leads through a toggle switch, sleeve the joints, and lead the cable out through the casing's open top. Set the DC supply to the motor's rated voltage.
Materiais para este passo:
 Motor elétrico1 peça
 Adaptador de pinça para eixo de motor1 peça
 Parafuso de cabeça cilíndrica com sextavado interior2 peças
 Interruptor de alavanca1 peça
 Fio de ligação1 peça
 Manga termorretráctil1 peça
Ferramentas necessárias:
 Fonte de alimentação de corrente contínua
 Ferro de solda elétrico
 Jogo de chaves Allen
 Chave inglesa ajustável
7
7
Set the depth and lock it
Set the depth and lock it
Fit a straight bit in the collet. Screw the casing into the base until the bit's end is level with the base's bottom on a flat board, then screw it in four more turns for a 1/4 inch (6.35 mm) deep cut. Put an M5 screw through the lugs with a wing nut and tighten it, closing the split on the thread.
Materiais para este passo:
Parafuso de cabeça cilíndrica com sextavado interior1 peça Porca borboleta1 peça
Ferramentas necessárias:
 Conjunto de fresas de tupiaJogo de chaves AllenPaquímetro digital de 6 polegadas
8
8
Rout a groove
Rout a groove
Clamp a board down. Hold the router by its casing and wings, base flat on the board, switch on, and move it along a clamped straightedge so the bit cuts a groove. Take deep grooves in two or three passes, a few turns deeper each time.
Ferramentas necessárias:
 Tábua de madeira de lei
 Sargento de barra
 Óculos de segurança
9
9
Troubleshooting
Troubleshooting
Router troubleshooting.
Flow
Loading...
10
10
History and honest limits
History and honest limits
**Ray L. Carter** of Syracuse, New York, US 1,514,894, dated 11 November 1924, filed 29 September 1923. He claimed a motor with a threaded casing, "a hollow cylinder having a split threaded portion adapted to engage the threaded portion of said casing whereby said tool may be moved relatively to the work", a plane bottom to move over the work, and means for locking. His motor ran on mains through a lamp socket at over 7,000 r.p.m.; ours is a small DC motor on a bench supply, a light-duty router. His casing was insulating material; ours is printed PETG. His fan and baffle disk are left out. The pitch is his; the other sizes are ours.
Materiais
8- 1 peçaReferência
- 1 peçaReferência
- Referência
- Referência
- Referência
- Referência
- 1 peçaReferência
- 1 peçaReferência
Ferramentas necessárias
11- Referência
- Referência
- Referência
- Referência
- Referência
- Referência
- 1 vendor sell this, none ship to you yetReferência
- Referência
- Referência
- Referência
Ficheiros de design
2Este projeto faz

Blueprints relacionados
Estes blueprints compartilham conhecimento — técnicas, materiais ou princípios

CC0 Domínio Público
Este blueprint é liberado sob CC0. Você é livre para copiar, modificar, distribuir e usar este trabalho para qualquer finalidade, sem pedir permissão.
Apoie o Maker comprando produtos através do Blueprint, onde ele ganha uma Comissão Maker definida pelos vendedores, ou crie uma nova versão deste Blueprint e inclua-o como conexão no seu próprio Blueprint para compartilhar receita.