ARTE
BELEZA E BEM-ESTAR
ARTESANATO
CULTURA E HISTÓRIA
ENTRETENIMENTO
MEIO AMBIENTE
COMIDA E BEBIDAS
ENGENHARIA REVERSA
CIÊNCIAS
ESPORTES
TECNOLOGIA
TECNOLOGIA VESTÍVEL
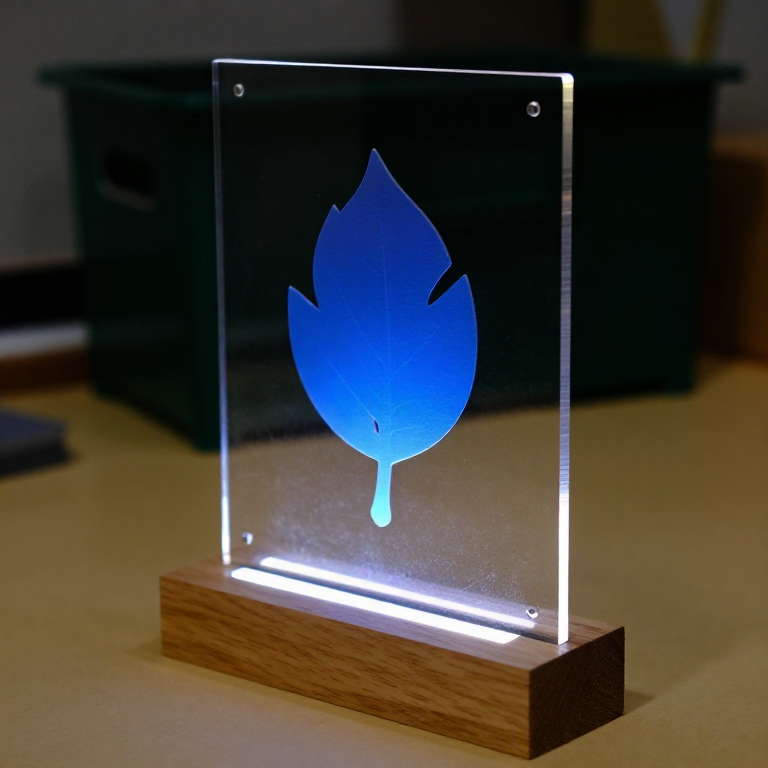


Cast Acrylic Sheet
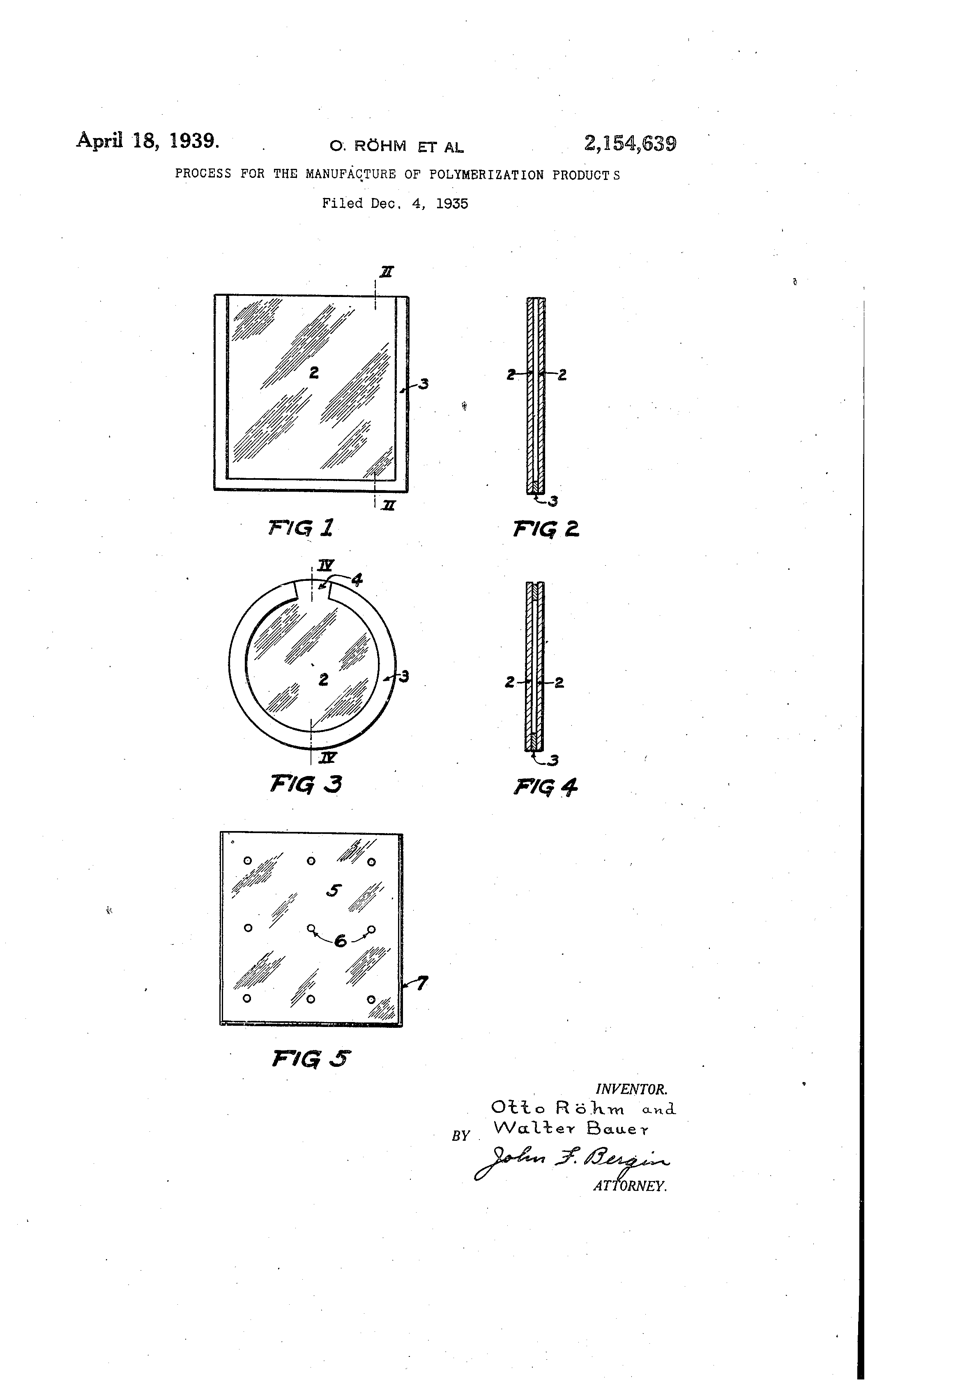
Otto Röhm had worked on acrylic chemistry since his 1901 doctorate. His firm first used polymethacrylate as the sticky middle layer of laminated safety glass - and noticed that the polymer came away from the glass plates cleanly, leaving a clear sheet as smooth as the glass. Sold from 1933 as Plexiglas, the sheet went into aircraft canopies within the decade.
**US 2,154,639**, "Process for the manufacture of polymerization products", Röhm and Bauer, assigned to Röhm & Haas, filed 4. December 1935, granted 18. April 1939: methacrylic esters polymerised between sheets of glass and then separated from them, for "glass substitutes" whose faces are "as highly polished as the surfaces of the glass itself".
**You use that polish**: an edge-lit sign whose engraving glows while the smooth faces stay dark, and two heat-bent offcuts that show how tight a bend the light survives.
Iniciante
3 hours
Instruções
1
1
Cut the panel
Cut the panel
Keep the protective film on. Score 3 mm cast acrylic 200 x 120 mm with the utility knife against a ruler, 8 to 10 passes, then snap it over the bench edge. Cut two 100 x 30 mm offcuts the same way.
Materiais para este passo:
 Chapa de acrílico1 peça
Ferramentas necessárias:
 X-ato de oficina
 Régua de aço
 Óculos de segurança transparentes
2
2
Polish the light edge
Polish the light edge
Sand the 120 mm bottom edge flat, then run the Micro-Mesh grits in order until it is clear. Light enters here; a frosted edge scatters it at the door.
Ferramentas necessárias:
 Kit de lixagem de micromalha (9 grãos)
3
3
Engrave the back
Engrave the back
Peel the back film. Draw your design on paper, tape it under the sheet, and trace it with the engraving point at medium speed, light pressure.
Ferramentas necessárias:
 Ferramenta rotativa (tipo Dremel)
 Ponta de burilÓculos de segurança transparentes
4
4
Slot the base
Slot the base
Cut a pine block 160 x 60 x 40 mm. Saw two parallel kerfs 3.5 mm apart, 15 mm deep, along its length and chisel out between them. Chisel a channel underneath for the LED strip to shine up into the slot.
Materiais para este passo:
 Tábua de pinho1 peça
Ferramentas necessárias:
 Serrote
 Conjunto de formões para madeira
5
5
Light it
Light it
Strip 5V, GND and DIN to the Uno's 5V, GND and D6. Install the Adafruit NeoPixel library and upload. Stand the panel in the slot.
edge_lit_panel.inocpp
Materiais para este passo:
 Fita de LED Neopixel1 peça
 Conjunto de cabos Dupont (macho-fêmea)1 conjunto
Ferramentas necessárias:
 Arduino Uno R3
 SparkFun Cerberus USB Cable - 1.8 meter
6
6
Bend two offcuts
Bend two offcuts
Heat an offcut along a line on the strip heater, turning it over every 30 seconds, until it flexes. Bend it 90° round a 6 mm dowel and hold until cool. Bend the second round a 20 mm dowel.
Materiais para este passo:
 Cavilha de madeira1 peça
Ferramentas necessárias:
 Aquecedor linear para acrílico
 Luvas de soldador
7
7
Trace the beam
Trace the beam
In a dim room shine the laser pointer into the end of each bent strip, never towards anyone's eyes. See where light escapes at the bend, and compare with the notebook.
Ferramentas necessárias:
 Ponteiro laser
8
8
Critical angle and bends
Critical angle and bends
A carregar o notebook Jupyter…
9
9
History & Context
History & Context
**What the patent specifies:** methacrylic esters polymerised between glass sheets and separated, giving a glass substitute with glass-polished faces. **Modern build (derived):** commercial cast acrylic sheet, cut and heat-bent.
Cast sheet is still made between glass plates; cheaper extruded sheet came later and is softer and more prone to crazing. The limits: acrylic scratches, cracks if drilled carelessly, crazes when solvents or stress meet, and burns.
Materiais
5- 1 peçaReferência
- 1 peçaReferência
- Fita de LED Neopixel10% de comissão1 peçaReferência
- 1 conjuntoReferência
- 1 peçaReferência
Ferramentas necessárias
13- Referência
- Referência
- Referência
- Kit de lixagem de micromalha (9 grãos)10% de comissãoReferência
- Referência
- Referência
- Referência
- Referência
- Arduino Uno R310% de comissãoMagento Legacy Storeships internationallyReferência
- SparkFun Cerberus USB Cable - 1.8 meter10% de comissãoR$29.21
- Referência
- Luvas de soldador10% de comissãoReferência
- Referência
Blueprints relacionados
Estes blueprints compartilham conhecimento — técnicas, materiais ou princípios

CC0 Domínio Público
Este blueprint é liberado sob CC0. Você é livre para copiar, modificar, distribuir e usar este trabalho para qualquer finalidade, sem pedir permissão.
Apoie o Maker comprando produtos através do Blueprint, onde ele ganha uma Comissão Maker definida pelos vendedores, ou crie uma nova versão deste Blueprint e inclua-o como conexão no seu próprio Blueprint para compartilhar receita.