ARTE
BELEZA E BEM-ESTAR
ARTESANATO
CULTURA E HISTÓRIA
ENTRETENIMENTO
MEIO AMBIENTE
COMIDA E BEBIDAS
ENGENHARIA REVERSA
CIÊNCIAS
ESPORTES
TECNOLOGIA
TECNOLOGIA VESTÍVEL
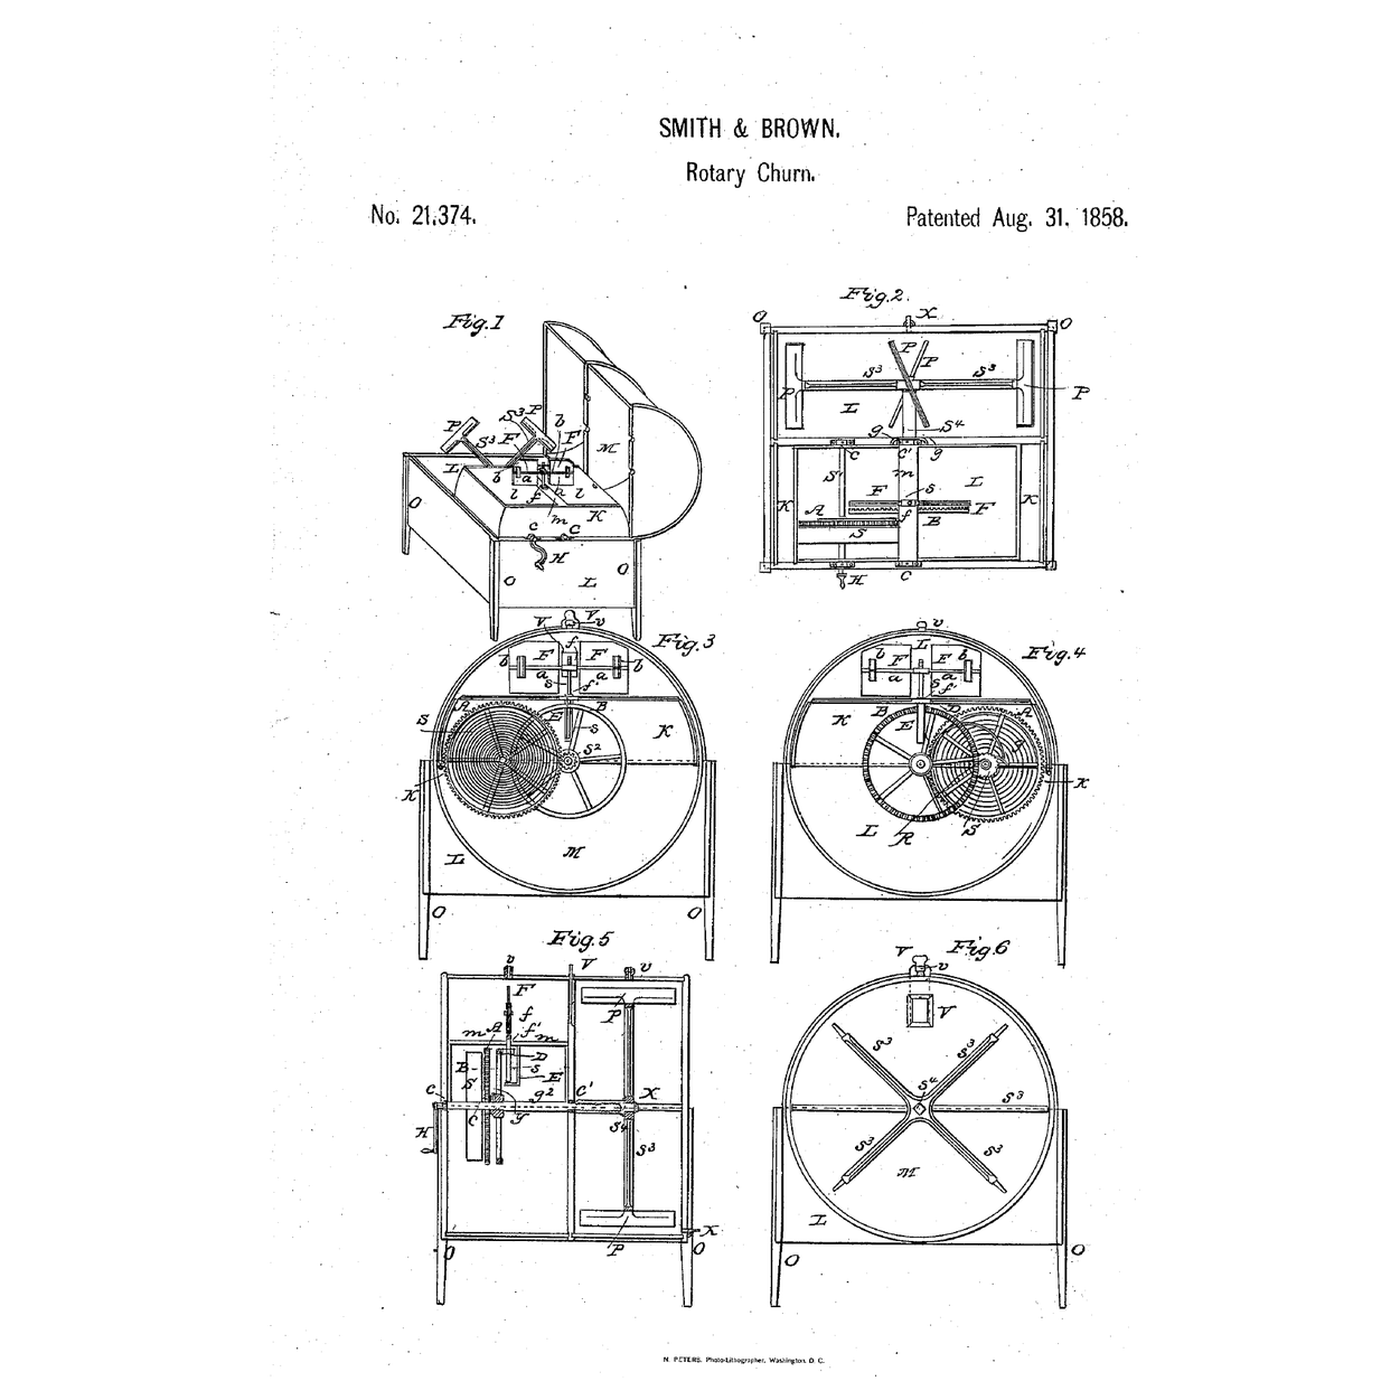


Clockwork Vane Churn: A Wound Spring Turns Oblique Beaters, a Vane Sets the Pace and Airs the Milk
John F. Smith of Galen and Wightman Brown of Rose, New York, received US 21,374, dated 31 August 1858, for a self-going churn: a wound mainspring turns beaters of oblique slats in one chamber of a cylinder, while a vane on the train both regulates the speed and blows fresh air through the partition into the milk.
This rung prints the chambers, train, ratchet, beaters and vane at tabletop scale, with a spring steel strip as the mainspring.
Avançado
About 8 hours, plus printing
Instruções
1
1
The train
The train
A carregar o notebook Jupyter…
2
2
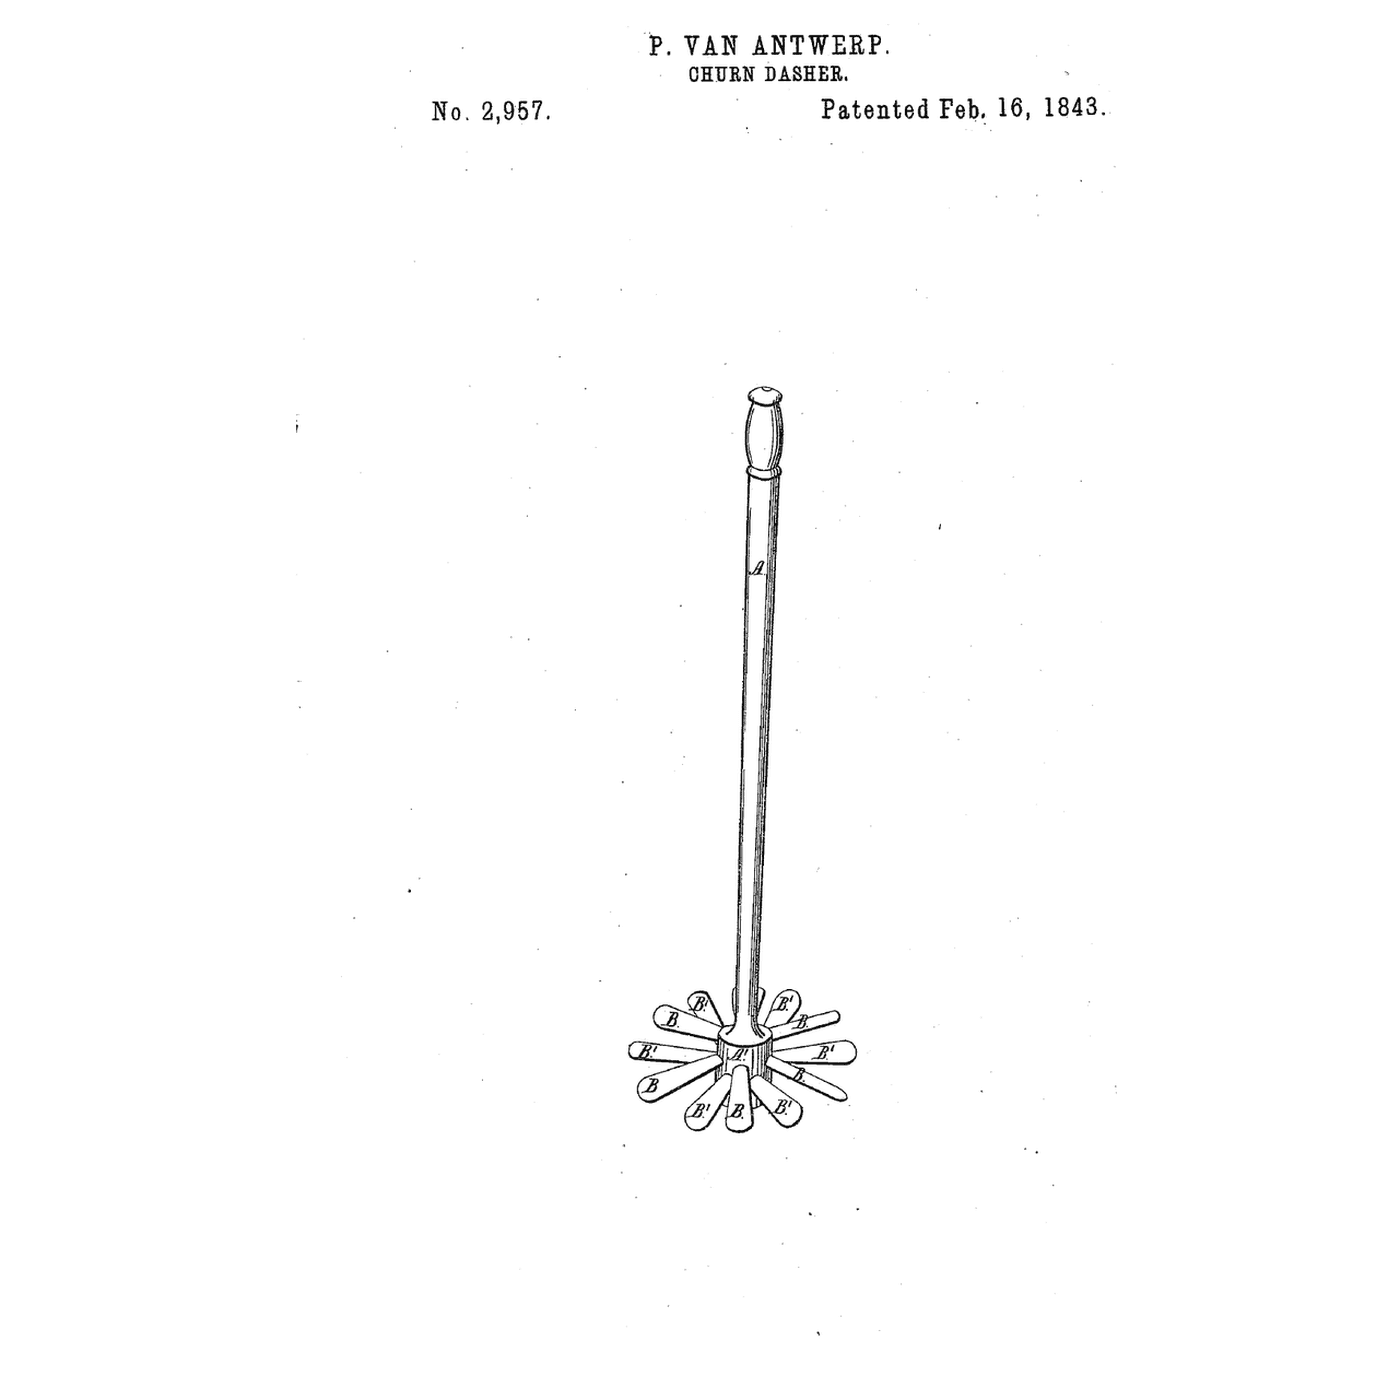
Oars pitched opposite ways, before it
Oars pitched opposite ways, before it
Those oars were turned by hand; Smith and Brown's oblique beaters are driven by a spring and paced by a vane.
3
3
Read US 21,374
Read US 21,374
"The vane F, serves at once as a regulator of the motion of the beater, as well as a means of refrigerating and supplying fresh air to the milk chamber."
4
4
Print the parts
Print the parts
Print the milk chamber (/uploads/blueprints/clockwork-vane-churn-milk-chamber.stl) closed end down, the partition (/uploads/blueprints/clockwork-vane-churn-partition.stl), the end plate (/uploads/blueprints/clockwork-vane-churn-end-plate.stl), the beaters (/uploads/blueprints/clockwork-vane-churn-beaters.stl) with supports, pinion C (/uploads/blueprints/clockwork-vane-churn-pinion-c.stl), wheel A (/uploads/blueprints/clockwork-vane-churn-wheel-a.stl), the ratchet (/uploads/blueprints/clockwork-vane-churn-ratchet-b.stl), the catch (/uploads/blueprints/clockwork-vane-churn-catch.stl), the bevel wheel (/uploads/blueprints/clockwork-vane-churn-bevel-wheel.stl), pinion E (/uploads/blueprints/clockwork-vane-churn-pinion-e.stl), the vane's hub (/uploads/blueprints/clockwork-vane-churn-vane-hub.stl), four vane wings (/uploads/blueprints/clockwork-vane-churn-vane-wing.stl) and the crank (/uploads/blueprints/clockwork-vane-churn-crank.stl). The chamber, partition and end plate need a 230 mm print bed. Print in PETG at 0.2 mm layers, 30 % infill, 4 walls; wash before first use.
Materiais para este passo:
 Filamento PETG1 peça
Ferramentas necessárias:
 Impressora 3D de filamento (FDM)
5
5
Stand and frame
Stand and frame
Cut a pine base 380 by 260 mm and three cradles with a 221 mm round cut out of each; glue and screw them across the base under the end plate, the partition and the chamber's far end. Screw the end plate's two ties to the partition.
Materiais para este passo:
 Tábua de pinho1 peça
 Cola de madeira1 peça
 Parafusos para madeira1 peça
Ferramentas necessárias:
 Serrote
 Serra tico-tico
 Berbequim sem fios
 Lixa
Lixa Conjunto de chaves de fendas
6
6
Spring and train
Spring and train
Cut 10 mm dowels 170 mm for S1 and 330 mm for S2. Wearing gloves, coil a spring steel strip about 12 mm wide, 0.4 mm thick and 650 mm long round S1, its inner end hooked in a saw cut in the dowel and its outer end bent round the post k. Thread S1 through the end plate and partition with the ratchet fixed on it by an M3 screw, wheel A loose beside it, the catch on A's post with a short piece of strip pressing it into the teeth, and the crank on its outer end. Thread S2 through both plates with pinion C pressed on to mesh A and the bevel wheel pressed on behind the partition. Put the upright shaft, a 10 mm dowel 100 mm long, in the partition's bracket with pinion E on its foot meshing the bevel wheel and the vane's hub on its top; push the four wings onto their arms.
Materiais para este passo:
 Cavilhas de madeira dura1 peça
 Fita de aço-mola1 peça
 Parafusos de máquina1 peça
Ferramentas necessárias:
SerroteBerbequim sem fiosConjunto de chaves de fendas Luvas de couro de canhão longo
7
7
Beaters and chamber
Beaters and chamber
Slide the beaters onto S2 beyond the partition and fix them with an M3 screw drilled through. Slip the milk chamber over them, S2's end in its far bearing, and bolt its flange to the partition with two M4 screws.
Materiais para este passo:
Parafusos de máquina1 peçaFerramentas necessárias:
Berbequim sem fiosConjunto de chaves de fendas8
8
The build in 3D
The build in 3D
FreeCAD model of this build: the pine stand, the end plate and partition, the mainspring on S1 with the ratchet, catch and wheel A, pinion C and the bevel wheel on S2, pinion E and the vane on the upright shaft, the opening in the partition, and the milk chamber with the oblique-slatted beaters.
9
9
Wind and churn
Wind and churn
Pour 1.5 litres of heavy cream at about 15 °C, checked with the thermometer, through the hatch. Wind the spring with the crank and let it go, timing it with the stopwatch; turn the vane's wings flatter to run faster or edgewise to run slower, and wind again whenever it stops. When the butter comes, unbolt the chamber, pour off the buttermilk, wash the butter in cold water until it runs clear, work in a pinch of salt and weigh it.
Materiais para este passo:
 Natas para bater1.5 l
 Sal marinho grosso1 peça
 Água1 peça
Ferramentas necessárias:
 Termómetro de sonda permanente
 Cronómetro
 Balança digital de cozinha
 Taça grande de aço inoxidável
10
10
Troubleshooting
Troubleshooting
Clockwork churn troubleshooting.
Flow
Loading...
11
11
History and honest limits
History and honest limits
**John F. Smith** of Galen, Wayne County, and **Wightman Brown** of Rose, New York, US 21,374, 31 August 1858. They enclosed the machinery in a case with tight sliding covers to keep its oil from the butter, covered the metal shaft with wood where it lay in the milk, and held each vane wing to its arm with a small spring. They did not claim an automatic churn as such, but the divided cylinder, the close case, the adjustable vane, the passage V and the ventilators working together. Our machinery is open and has no oil; our dowel shafts, friction-fit wings, strip spring and sizes are ours, and we have not timed how long it runs. FDM prints hold food in their layer lines, so wash well and replace when worn.
Materiais
10- 1 peçaReferência
- 1 peçaReferência
- 1 peçaReferência
- 1 peçaReferência
- 1 peçaReferência
- 1 peçaReferência
- 2 peçasReferência
- 1.5 lReferência
- 1 peçaReferência
- 1 peçaReferência
Ferramentas necessárias
11- Referência
- Referência
- 1 vendor sell this, none ship to you yetReferência
- 1 vendor sell this, none ship to you yetReferência
- Referência
- Referência
- Referência
- Referência
- Referência
- Referência
- Referência
Ficheiros de design
1Blueprints relacionados
Estes blueprints compartilham conhecimento — técnicas, materiais ou princípios

CC0 Domínio Público
Este blueprint é liberado sob CC0. Você é livre para copiar, modificar, distribuir e usar este trabalho para qualquer finalidade, sem pedir permissão.
Apoie o Maker comprando produtos através do Blueprint, onde ele ganha uma Comissão Maker definida pelos vendedores, ou crie uma nova versão deste Blueprint e inclua-o como conexão no seu próprio Blueprint para compartilhar receita.