ARTE
BELEZA E BEM-ESTAR
ARTESANATO
CULTURA E HISTÓRIA
ENTRETENIMENTO
MEIO AMBIENTE
COMIDA E BEBIDAS
ENGENHARIA REVERSA
CIÊNCIAS
ESPORTES
TECNOLOGIA
TECNOLOGIA VESTÍVEL


Cutting Leather: One Pass, Straight Down, and a Knife That Frightens You
Leather does not cut like cloth or paper. It is thick, it is tough, and it grips the blade — so a dull knife drags, wanders off the line, and tears the edge instead of severing it.
A cut edge in leather is also a finished edge. There is no hem, no seam allowance and no second chance: whatever the knife leaves is what the piece will look like for the rest of its life, which is why a ragged cut cannot be sanded out of a visible edge.
This rung covers the knives, what "sharp enough" actually means here, and the handful of techniques that make a cut straight, square and clean the first time.
Iniciante
3 hours
Instruções
1
1
The knives, and what each is for
The knives, and what each is for
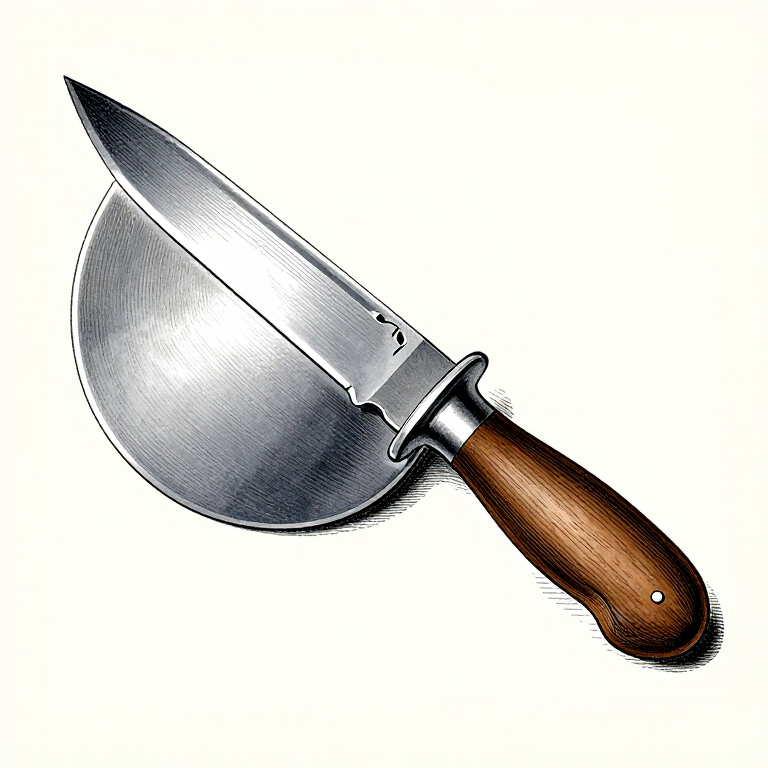
**The round knife** (or head knife) is the traditional leatherworker's tool: a half-disc blade on a short handle. The curve lets it cut straight lines with the edge, curves with the point, and skive with the belly, all without changing tools. It is the most capable and the most intimidating, and it is worth learning.
**A straight leather knife** or a stout craft knife does most of the same work more slowly. Fine for everything except heavy leather.
**A utility knife with snap-off blades** is the honest beginner's answer: always sharp, because a fresh segment costs nothing. Snap it far more often than feels necessary.
**A strap cutter** is a guide holding a blade at a set distance from a fence. It is the only practical way to cut a long strap of even width, and it is why belts made by hand without one are never quite parallel.
**Punches and dies** for holes and repeated shapes. A round hole cut with a knife is never round.
The one thing they all need is the same: a properly sharp edge, stropped between cuts. Leather dulls a blade fast because it is full of the minerals the animal lived with.
Materiais para este passo:
 Couro curtido ao vegetal1 peça
Ferramentas necessárias:
 Faca de correeiro
 Corta-tiras
 Conjunto de vazadores para couro
 Base de corte autocicatrizante
2
2
One pass, straight down, on the right surface
One pass, straight down, on the right surface
**Cut on a self-healing mat or a poly board**, never on wood or glass. Wood grabs the blade and steers it; glass and stone destroy the edge instantly.
**Hold the blade vertical.** A blade leaning even slightly leaves a bevelled edge, and a bevelled edge cannot be burnished square. On thick leather this is the commonest fault and it is visible in the finished piece.
**One pass, all the way through, if you can.** Repeated passes rarely land in the same groove, so the edge ends ragged. Press hard enough to go through in one stroke on leather up to about 6 oz; above that, make the first pass a deep scoring cut and follow it exactly.
**Pull the knife towards you, with the offcut away.** The hand holding the work stays behind the blade, always.
**Use a steel rule, never a plastic or wooden one.** A blade that wanders takes a slice out of a soft rule and then follows the notch.
**Cut with the grain of the hide where it matters.** Along the backbone for straps, as the previous rung showed.
Materiais para este passo:
Couro curtido ao vegetal2 peçasFerramentas necessárias:
Faca de correeiro Régua de açoBase de corte autocicatrizante
3
3
Curves, corners and holes
Curves, corners and holes
**Curves.** Turn the work, not the knife. Keep the blade going in the direction it is sharpened for and rotate the leather under it. A round knife cuts a curve with the tip of its arc; a straight blade needs a series of short tangential cuts, which is why curves look better cut with a round knife or punched.
**Inside corners.** Cut both lines beyond the corner rather than stopping short and tearing the last fibres. On a visible piece, punch a small round hole at the corner first and cut into it — a rounded inside corner does not tear in use, and a sharp one eventually will.
**Holes.** Punch them, do not cut them. A punch of the right size gives a clean round hole in one blow on a poly board; anything else gives an oval.
Strike a punch **once, hard**, with a mallet — not a steel hammer, which mushrooms the punch. Several light taps let the punch wander and leave a ragged hole.
**Slots for buckles and straps.** Punch a round hole at each end of the slot, then cut between them with a knife against a rule. The rounded ends are both neater and far stronger than cut corners.
Materiais para este passo:
Couro curtido ao vegetal2 peçasFerramentas necessárias:
Faca de correeiroConjunto de vazadores para couro Vazador para couro
 Maço de madeiraBase de corte autocicatrizante
4
4
Marking out, and the order of operations
Marking out, and the order of operations
**Mark on the flesh side wherever possible.** A scratch or a pen line on the grain is permanent.
**Use an awl or a scratch line, not a pencil.** Pencil sits on top of the grain and rubs off or smudges; a light scratch from an awl point is precise and disappears under burnishing. On dark leather, a bone folder or a blunt stylus leaves a visible crease without cutting.
**Make a card or paper pattern first**, and keep it. Leather is expensive, and the second of anything is always better than the first.
**The order that saves rework:**
1. Mark and cut the outline
2. Punch all holes and slots while the piece is flat and still easy to hold
3. Skive anything that needs thinning
4. Tool or stamp, if it is being decorated
5. Dye and let it dry
6. Bevel and burnish the edges
7. Stitch
8. Set hardware last
Nearly every beginner's difficulty comes from doing one of these out of order — trying to punch a hole through a stitched assembly, or to burnish an edge that has already been sewn shut.
Materiais para este passo:
Couro curtido ao vegetal1 peçaFerramentas necessárias:
 SovelaRégua de açoBase de corte autocicatrizante
Blueprints relacionados
Estes blueprints compartilham conhecimento — técnicas, materiais ou princípios

CC0 Domínio Público
Este blueprint é liberado sob CC0. Você é livre para copiar, modificar, distribuir e usar este trabalho para qualquer finalidade, sem pedir permissão.
Apoie o Maker comprando produtos através do Blueprint, onde ele ganha uma Comissão Maker definida pelos vendedores, ou crie uma nova versão deste Blueprint e inclua-o como conexão no seu próprio Blueprint para compartilhar receita.