Blowing a Glass Bottle by Hand — Free-Blown Vessel Shaping
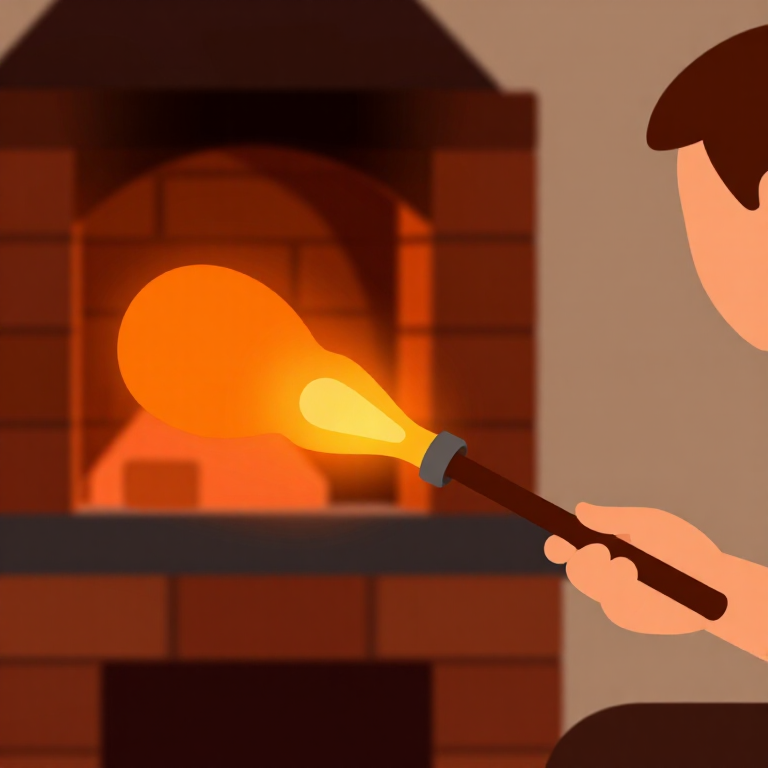
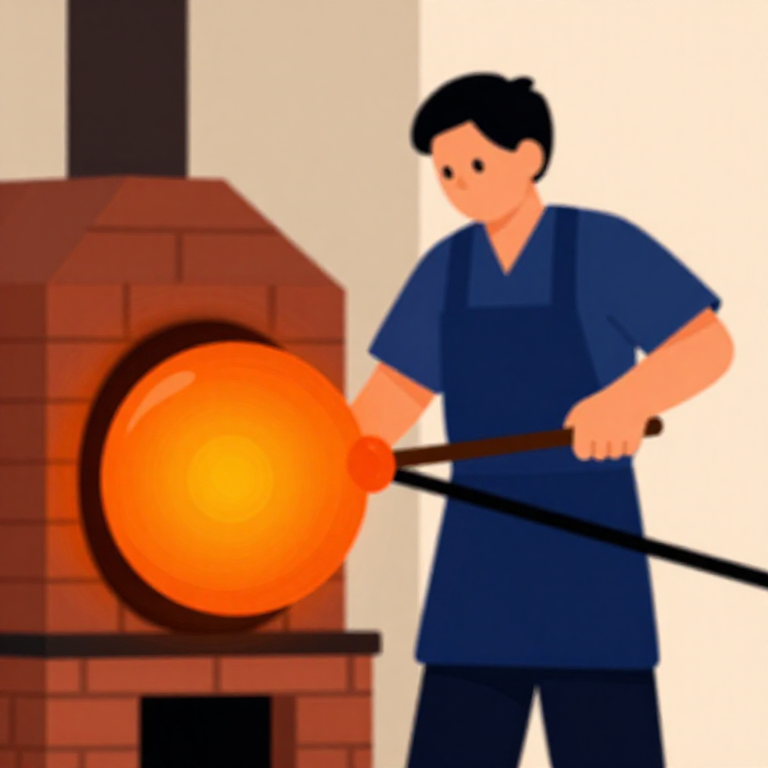
Free-blowing a glass bottle is one of the foundational skills in glassworking. The glassblower gathers molten soda-lime glass on a blowpipe, inflates it into a bubble, and shapes the body, neck, and lip using a combination of gravity, centrifugal force, and simple hand tools. Unlike mould-blown glass, free-blown bottles are shaped entirely by the maker's skill — every piece is unique. This technique has been used continuously since Roman times and remains the basis of all studio glassblowing today.
Instruções
Heat the furnace and prepare the bench
Heat the furnace and prepare the bench
Ferramentas necessárias:
 Brick Furnace
Mix and charge the glass batch
Mix and charge the glass batch
Materiais para este passo:
 Quartz Sand2 kg
 Sodium Carbonate (soda ash)800 g
 Calcium Carbonate (limestone, crushed)500 g
Ferramentas necessárias:
 Clay Crucible (refractory)
Pre-heat and gather on the blowpipe
Pre-heat and gather on the blowpipe
Ferramentas necessárias:
 Glassblowing Blowpipe
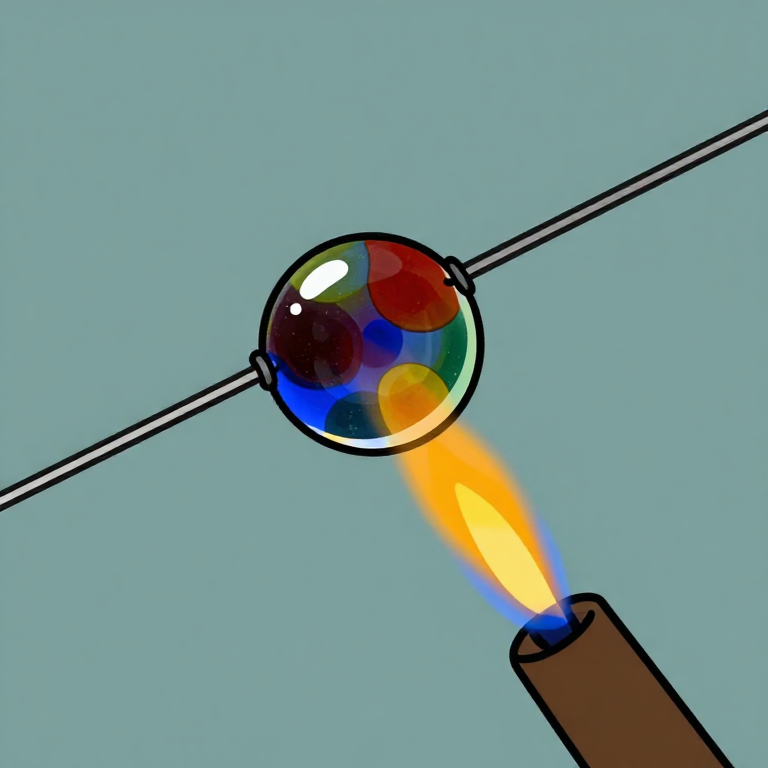
Marver the gather
Marver the gather
Ferramentas necessárias:
 Granite Slab
Blow the initial bubble
Blow the initial bubble
Reheat and expand the bubble
Reheat and expand the bubble
Shape the body with the jacks
Shape the body with the jacks
Ferramentas necessárias:
 Glassmaker's Jacks
 Folded Wet Block (cherry wood or soaked newspaper)
Form the base
Form the base
Attach the pontil rod
Attach the pontil rod
Ferramentas necessárias:
 Pontil Rod
Crack off the blowpipe
Crack off the blowpipe
Form the lip and finish the neck
Form the lip and finish the neck
Ferramentas necessárias:
 Long-Handled Fire Tongs
Crack off the pontil
Crack off the pontil
Transfer to the annealing oven
Transfer to the annealing oven
Anneal overnight
Anneal overnight
Grind the pontil scar smooth
Grind the pontil scar smooth
Materiais
3- Referência
- Referência
- Referência
Ferramentas necessárias
8- Referência
- Referência
- Referência
- Referência
- Referência
- Referência
- Referência
- Referência
Materiais de Blueprints conectados
Blueprints relacionados
Estes blueprints compartilham conhecimento — técnicas, materiais ou princípios
Related blueprints
Other builds that share materials, tools, or techniques with this one.
CC0 Domínio Público
Este blueprint é liberado sob CC0. Você é livre para copiar, modificar, distribuir e usar este trabalho para qualquer finalidade, sem pedir permissão.
Apoie o Maker comprando produtos através do Blueprint, onde ele ganha uma Comissão Maker definida pelos vendedores, ou crie uma nova versão deste Blueprint e inclua-o como conexão no seu próprio Blueprint para compartilhar receita.