Colaboração
ARTE
BELEZA E BEM-ESTAR
ARTESANATO
CULTURA E HISTÓRIA
ENTRETENIMENTO
MEIO AMBIENTE
COMIDA E BEBIDAS
ENGENHARIA REVERSA
CIÊNCIAS
ESPORTES
TECNOLOGIA
TECNOLOGIA VESTÍVEL
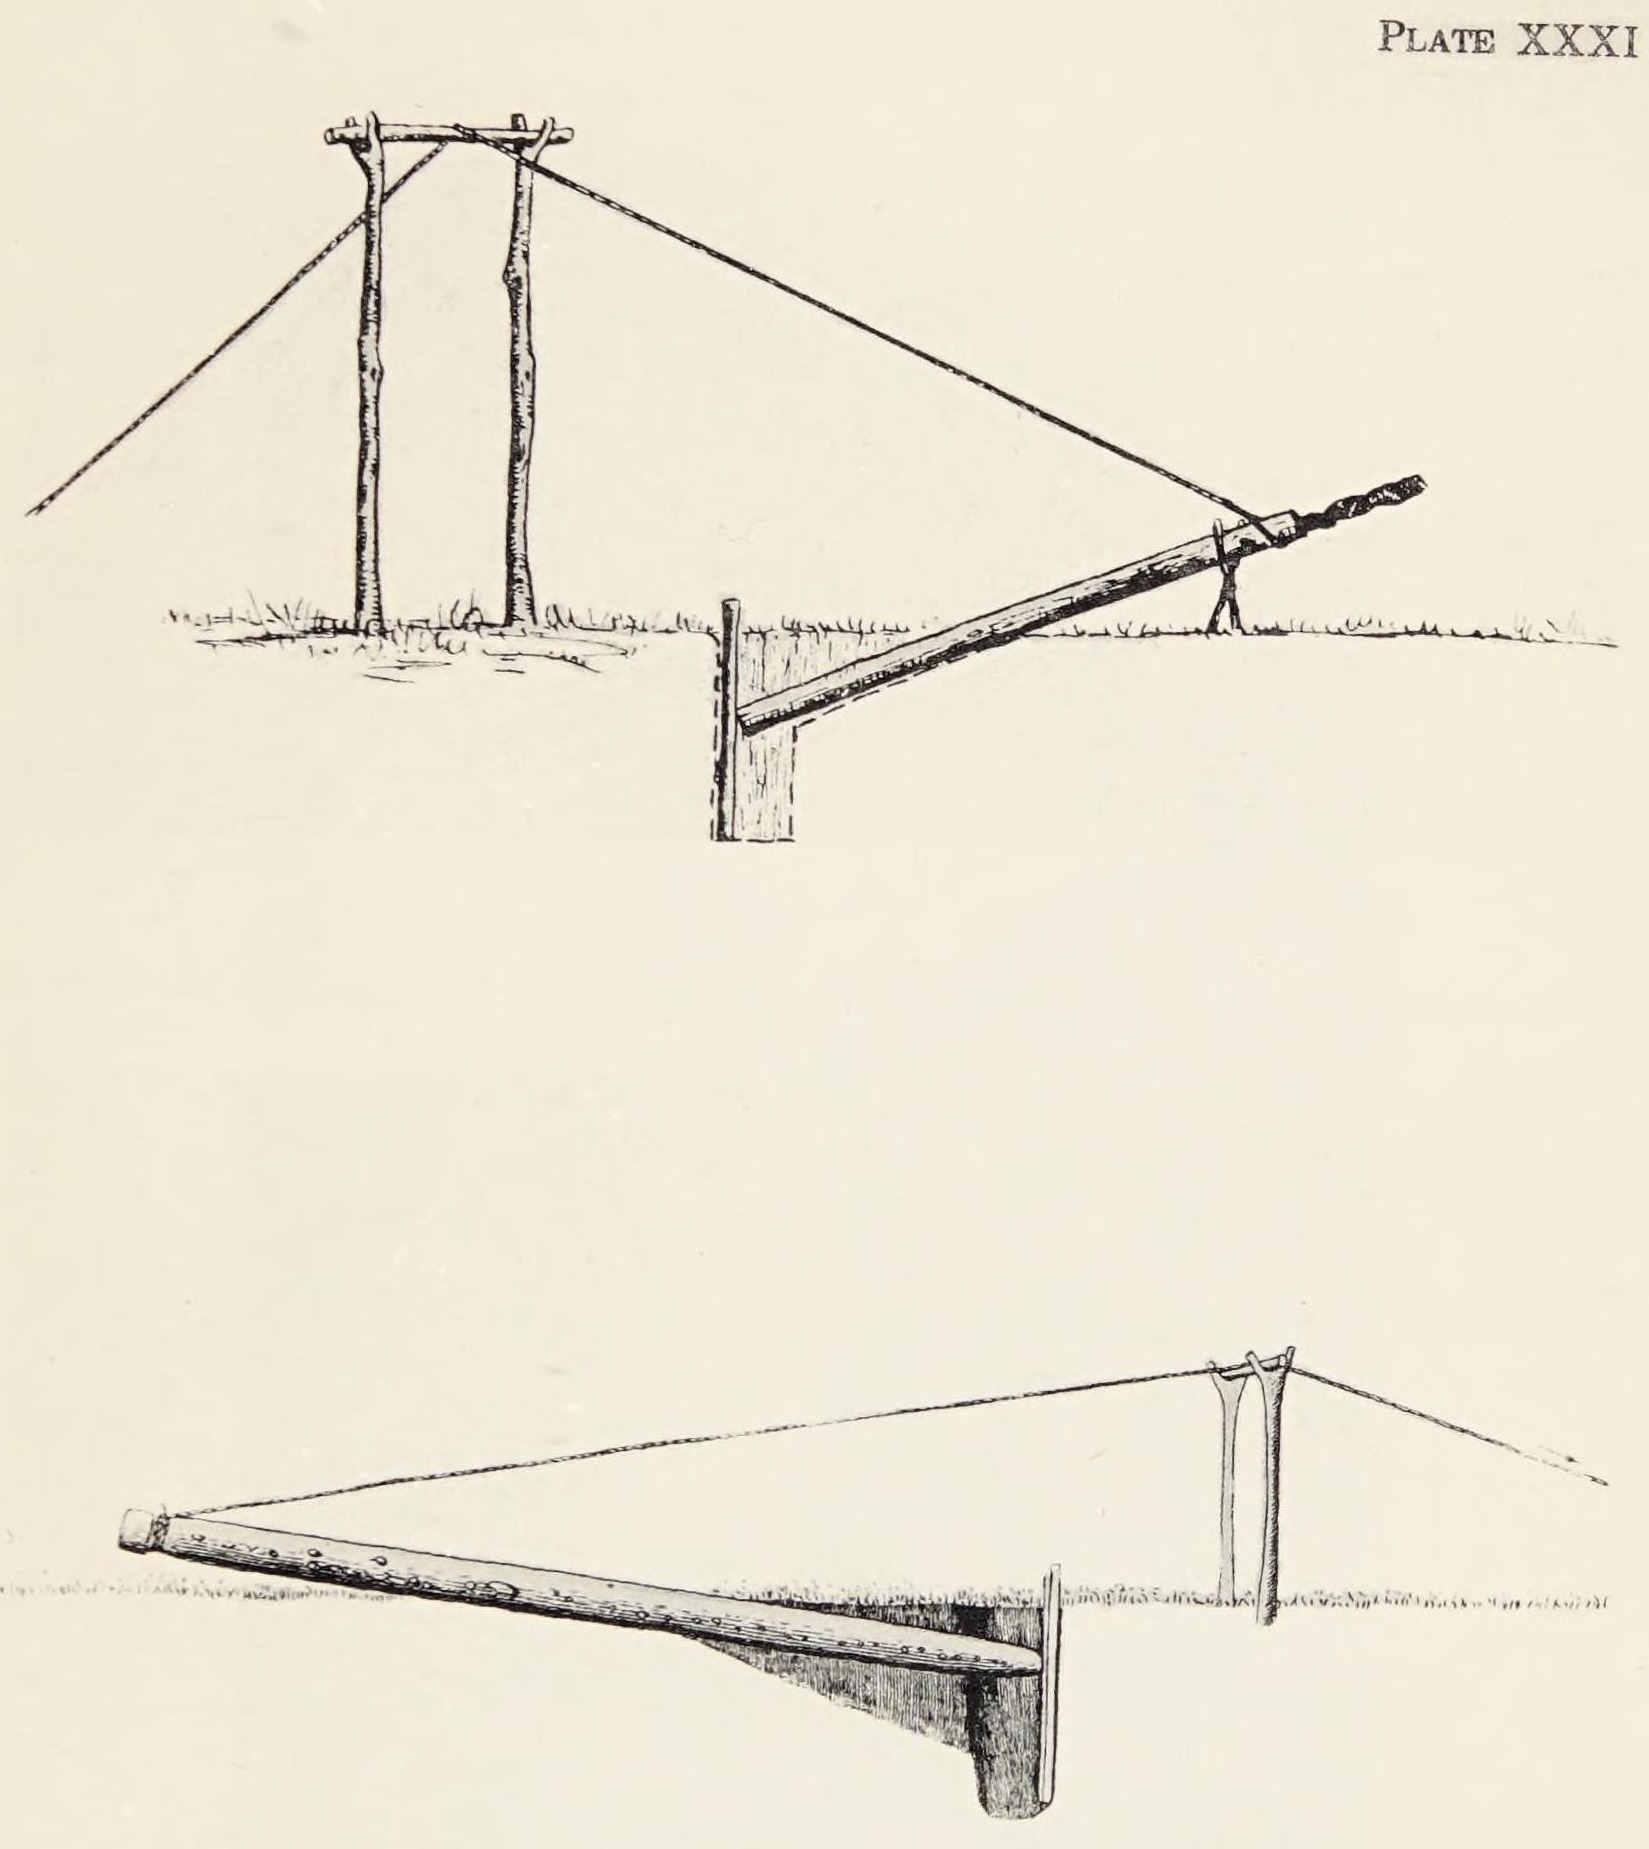


Gitksan Memorial Totem Pole: Red Cedar Carved Under Shelter, Butt Rolled into a Trench, Hauled Up over a Square Frame (Barbeau, 1929)
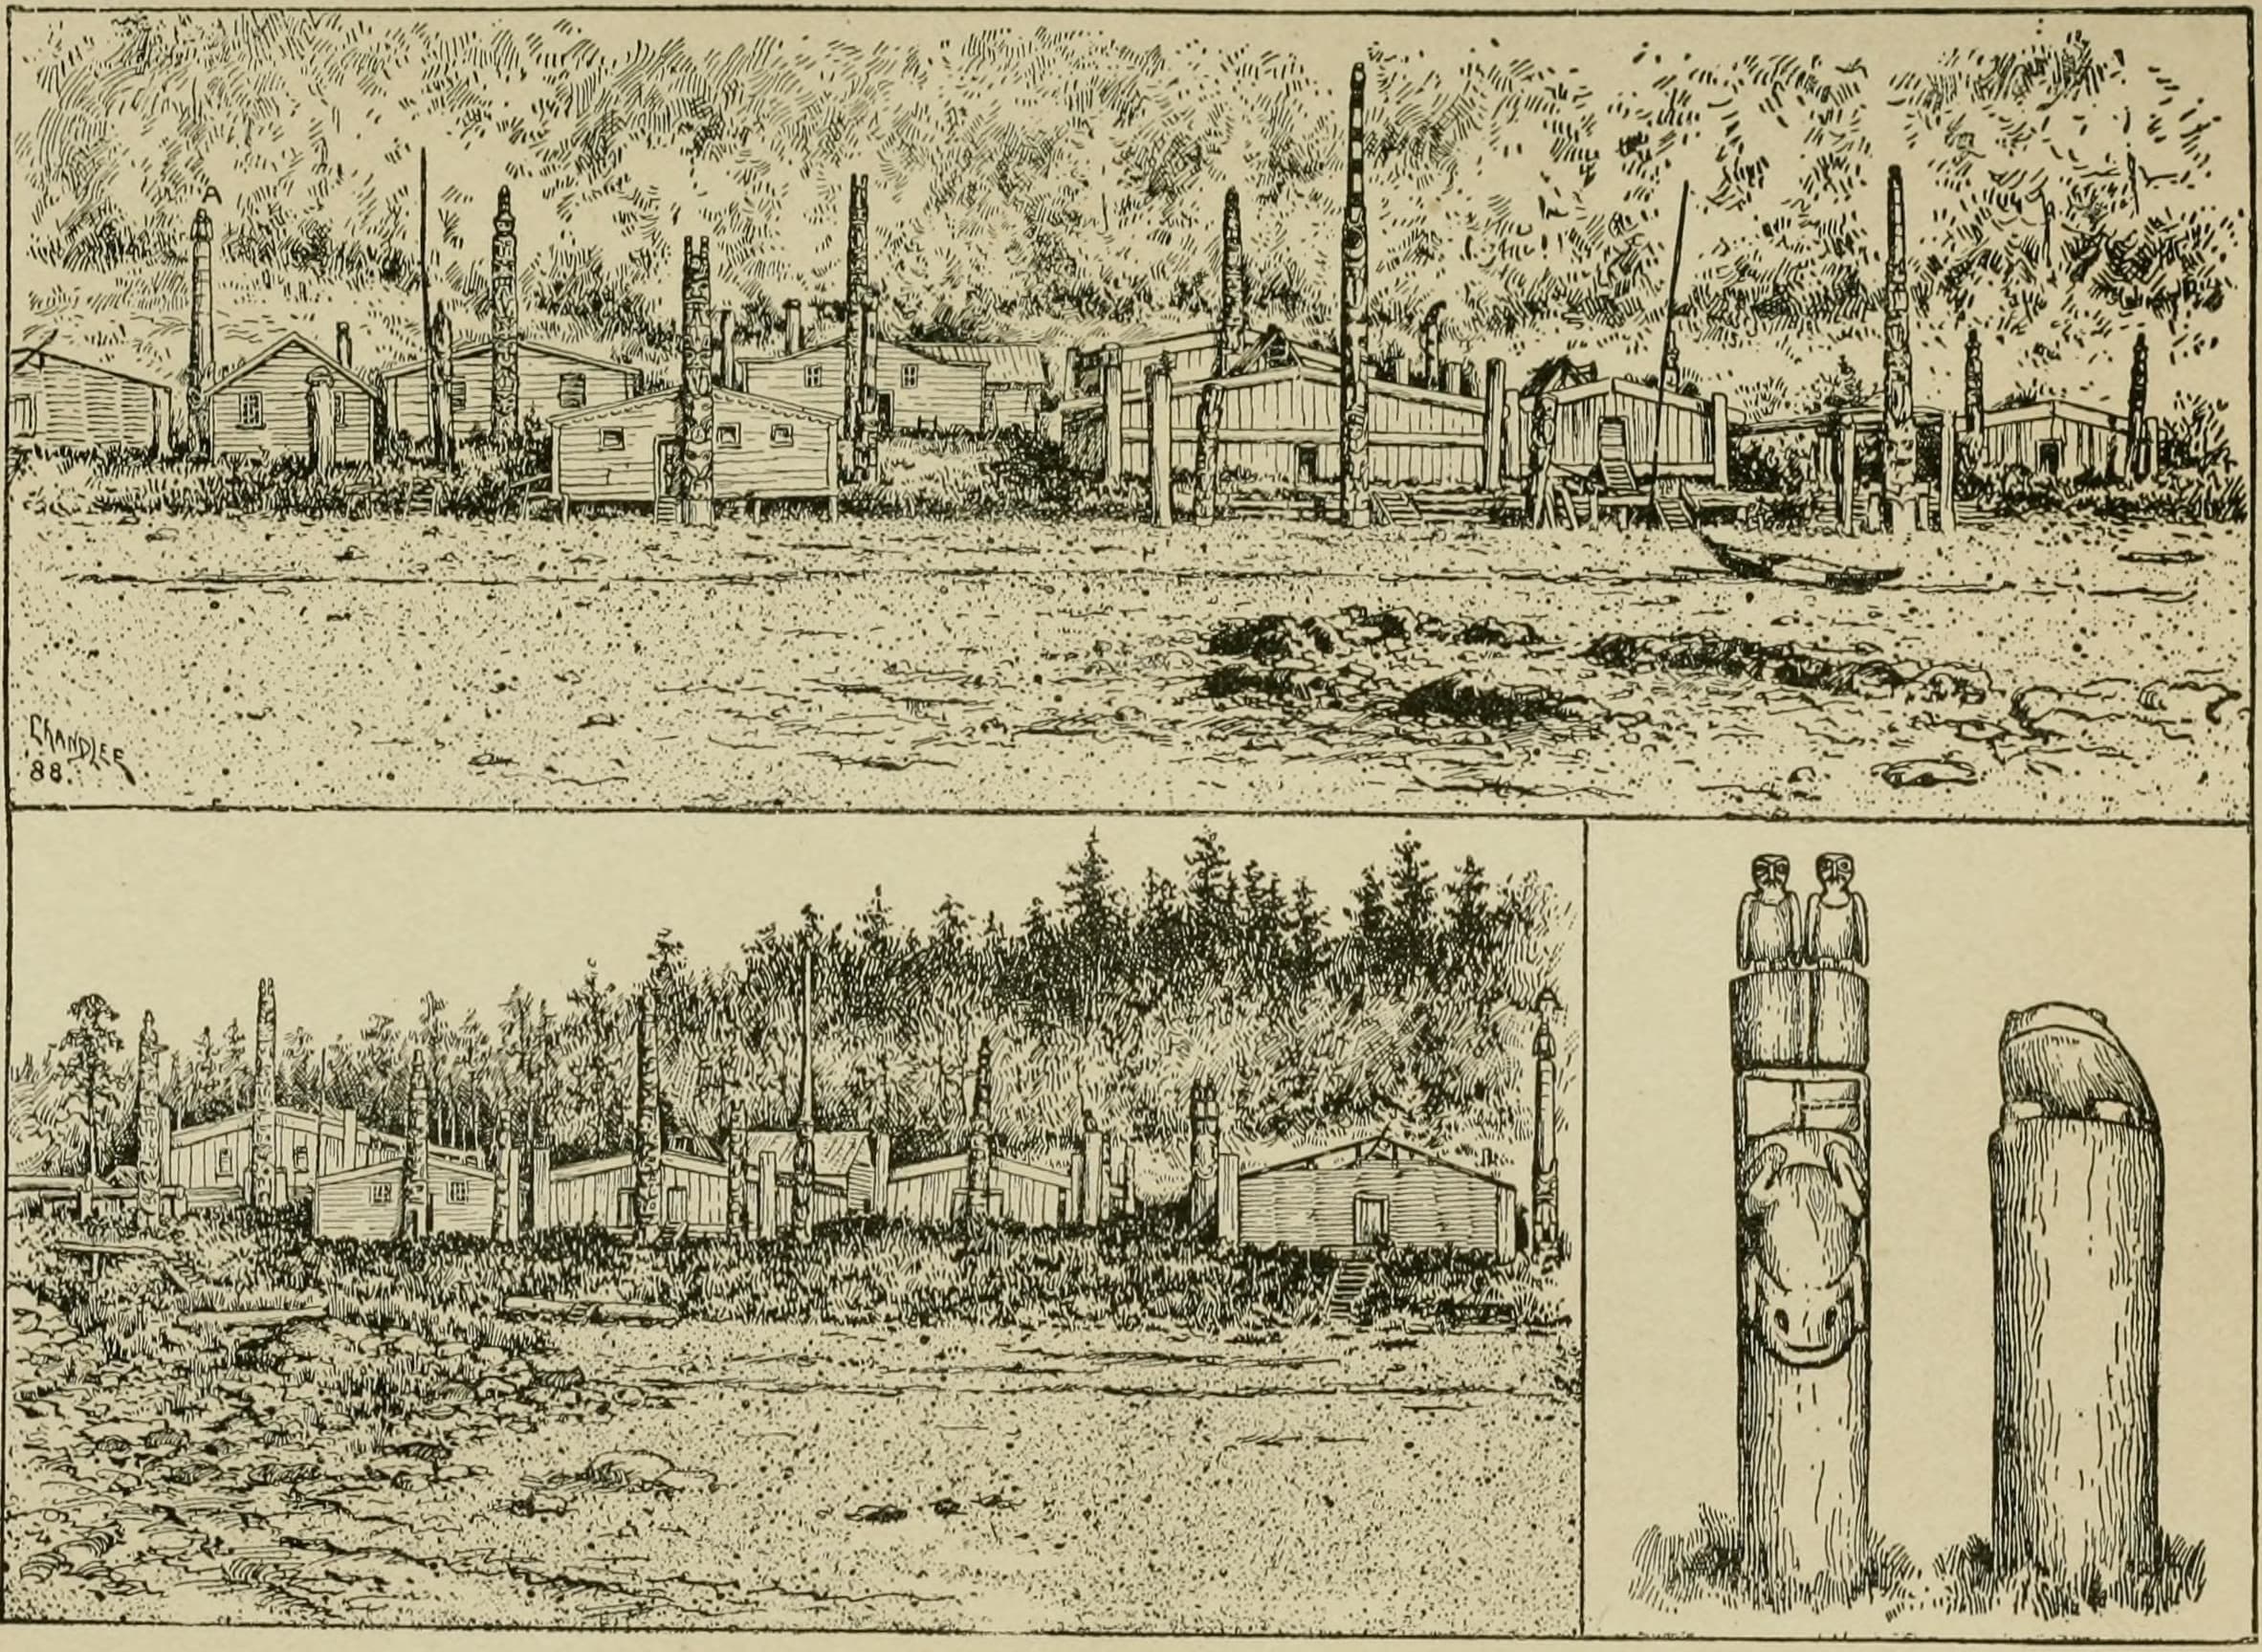
How the Gitksan of the upper Skeena made a memorial pole, as Marius Barbeau recorded it at Kitwanga: a red cedar 15 to 60 ft long felled and hauled by people of another clan group, carved under shelter with the owners' crests using ax, adze and curved knife, left mostly unpainted, and raised by rolling its butt into a trench to a hole 6 to 8 ft deep and hauling the top up with cedar-bark ropes over a square frame, in jerks, all together.
Avançado
Two years or more
Instruções
1
1
His measures
His measures
A carregar o notebook Jupyter…
2
2
Read Barbeau
Read Barbeau
"A hole was first dug in the ground, at least 6 feet deep. The butt was sunk in a trench leading to the hole, and the smaller end was raised gradually on wooden props."
3
3
Fell and haul the cedar
Fell and haul the cedar
Select a red cedar and fell it, then haul the trunk to where the pole will stand, sometimes many miles. Gitksan poles were 15 to 60 ft (4.6-18 m) long. Among the Gitksan this work fell to people of another phratry, fed and paid by the family. The log often lay a year or more before carving.
Materiais para este passo:
 Tronco de cedro-vermelho1 peça
Ferramentas necessárias:
 Machado
 Corda
 Vara de madeira
4
4
Carve
Carve
Carve under shelter, out of sight, with ax, adze and curved knife (the tools whose arrival, Barbeau says, made tall poles possible). The figures are the owners' own crests, chosen by them. Kitwanga's old poles were left unpainted except for small touches.
Ferramentas necessárias:
Machado Enxó
 Faca curva (para entalhar colheres)
 Maço de madeira
5
5
Prepare the raising
Prepare the raising
Dig the hole 6 to 8 ft (1.8-2.4 m) deep with a short trench running into it. Put up a square frame (two posts and a crossbar, the 'chevalet') next to the hole. Roll the butt of the pole into the trench and fasten a large rope, of twisted cedar bark in his day, to the smaller end.
Materiais para este passo:
Vara de madeira1 peçaCorda1 peçaFerramentas necessárias:
 PáMachado
6
6
Raise the pole
Raise the pole
Throw the rope over the frame. Lift the top a little at a time and set wooden props under it, while many people haul on the rope together in jerks (they called the cadence 'haw, haw, haw'), until the pole stands in the hole. Ours: fill the hole and ram the earth hard round the butt before letting go of the rope.
Ferramentas necessárias:
CordaVara de madeiraPá7
7
Troubleshooting
Troubleshooting
Raising troubleshooting.
Flow
Loading...
8
8
History and honest limits
History and honest limits
From Marius Barbeau, *Totem Poles of the Gitksan, Upper Skeena River, British Columbia*, **National Museum of Canada Bulletin 61** (1929), pp. 3, 7, 12, 27, 150 and Plate XXXI (checked on the archive.org scan totempolesofgitk0000barb); the raising method comes from chief Hlengwah of Kitwanga. A pole was put up about two years after a chief died, at the feast where his successor took his name, with dirge songs, drumming and gifts; a Making-dry feast followed two years later. The frame's size, filling the hole and metric are ours; the plate's two drawings are unlabelled, and we take the square-frame one as the Skeena method.
Materiais
3- 1 peçaReferência
- 1 peçaReferência
- 1 peçaReferência
Este projeto faz
Blueprints relacionados
Estes blueprints compartilham conhecimento — técnicas, materiais ou princípios
CC0 Domínio Público
Este blueprint é liberado sob CC0. Você é livre para copiar, modificar, distribuir e usar este trabalho para qualquer finalidade, sem pedir permissão.
Apoie o Maker comprando produtos através do Blueprint, onde ele ganha uma Comissão Maker definida pelos vendedores, ou crie uma nova versão deste Blueprint e inclua-o como conexão no seu próprio Blueprint para compartilhar receita.