ARTE
BELEZA E BEM-ESTAR
ARTESANATO
CULTURA E HISTÓRIA
ENTRETENIMENTO
MEIO AMBIENTE
COMIDA E BEBIDAS
ENGENHARIA REVERSA
CIÊNCIAS
ESPORTES
TECNOLOGIA
TECNOLOGIA VESTÍVEL
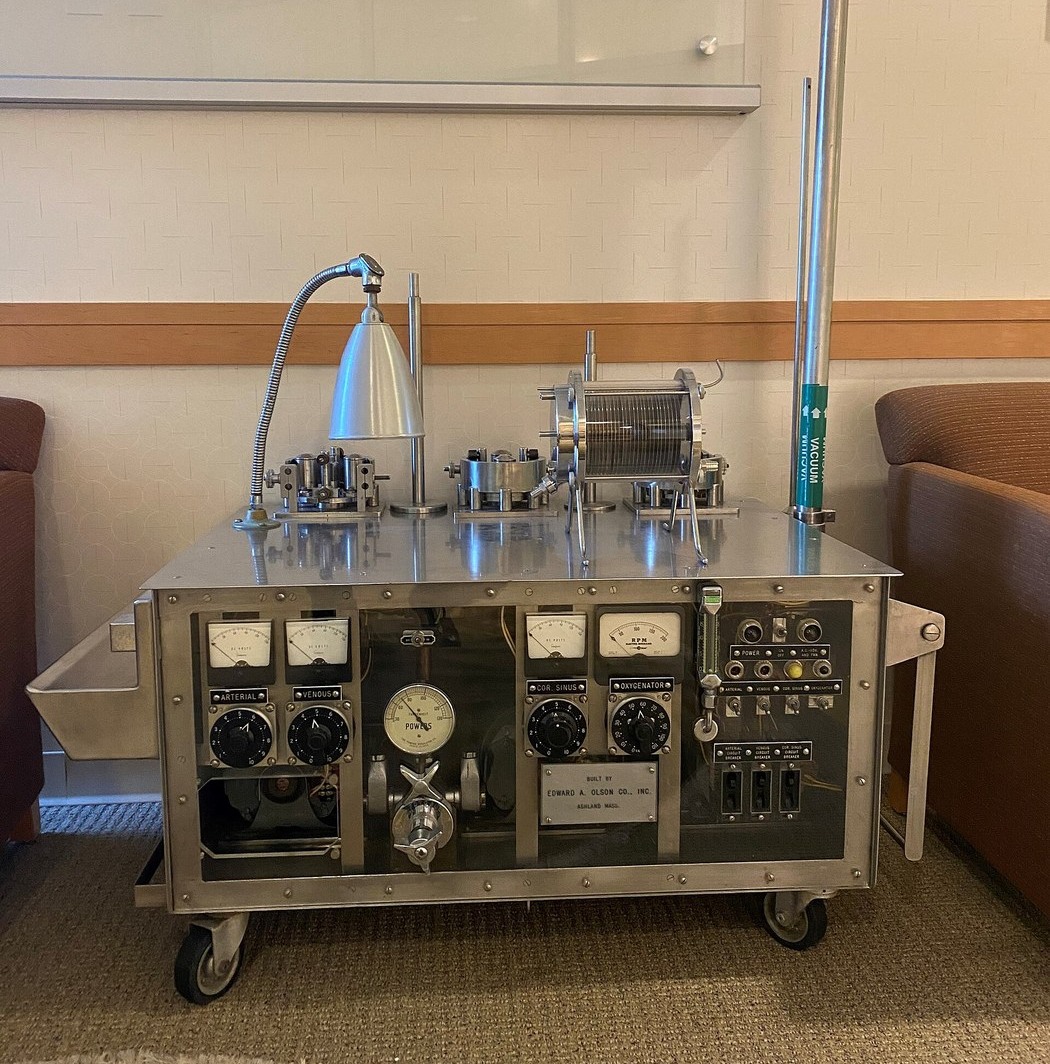


The Heart-Lung Machine
You cannot operate inside a beating heart, and you cannot stop a heart, because stopping it stops everything else within minutes. For the first half of the twentieth century that was simply the end of the argument: the inside of the heart was unreachable.
John Gibbon spent twenty years on the problem and on 6 May 1953 closed a hole between the chambers of an eighteen-year-old patient's heart while a machine did her circulation and her breathing for twenty-six minutes. The heart was empty and still, and afterwards it started again.
The machine is two functions bolted together. A pump replaces the heart, and a gas exchanger replaces the lungs. Both have a constraint that no industrial pump or exchanger has: they must not damage what passes through them. Red cells are fragile. An impeller shears them. A valve seat crushes them. A gas bubble that enters the return line is an air embolism and is immediately lethal.
So the pump had to be one with no valves and no impeller — the roller pump, which squeezes a tube from outside and never touches the fluid at all — and the exchanger had to bring gas and blood together without leaving any gas behind.
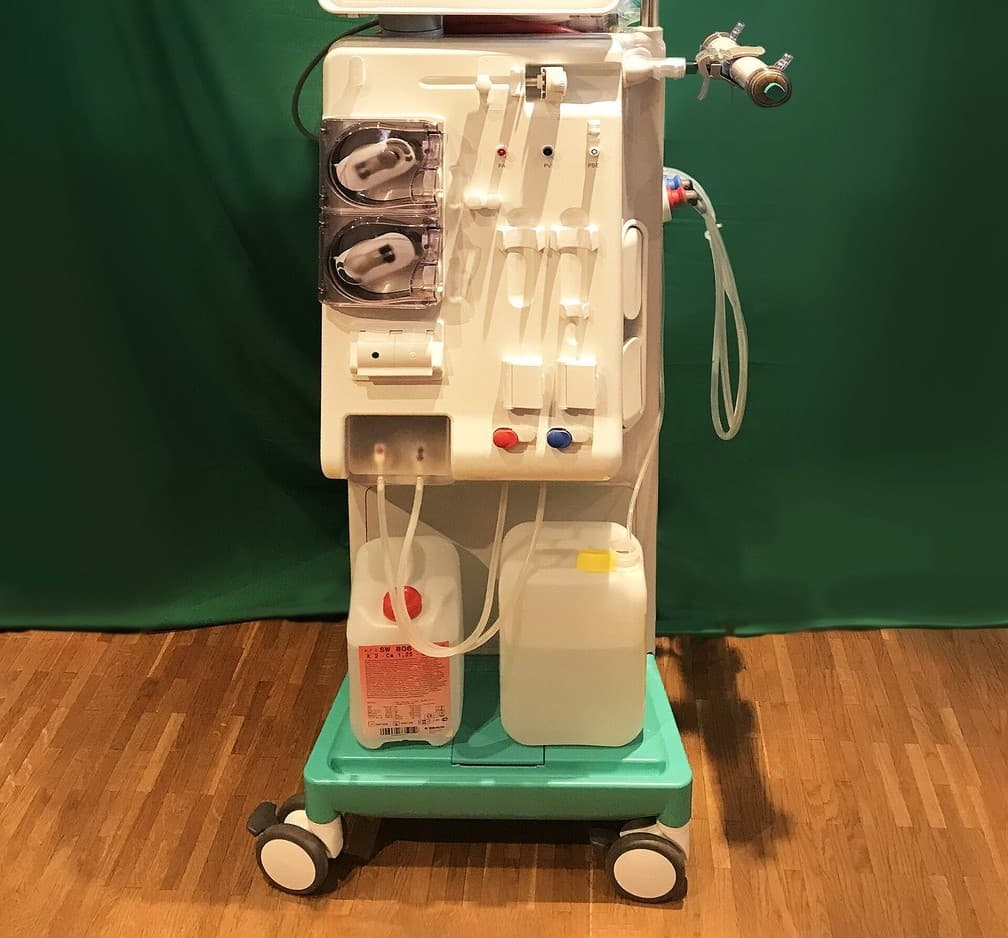
You will build the roller pump circuit, calibrate it, and measure the shear damage it does, using a surrogate. Never blood.
Avançado
8 hours
Instruções
1
1
Why a roller pump and nothing else
Why a roller pump and nothing else
Set out the constraint before choosing hardware, because the constraint eliminates almost everything.
A centrifugal impeller accelerates fluid in a tight clearance and the shear at the blade tip destroys red cells. A piston pump needs valves, and every valve seat is a place where cells are trapped and crushed as it closes. A gear pump meshes teeth through the fluid. A diaphragm pump is gentler but needs valves too.
The roller pump does something different: the fluid stays inside a length of tubing, and the pump squeezes the tubing from outside. Nothing in the pump ever contacts the fluid. There are no valves because the occlusion point itself is the valve — the squeezed tube seals, and as the roller advances the seal travels with it. Sterility becomes trivial, because only the tubing needs to be sterile and the tubing is disposable.
It also gives you flow directly. One revolution displaces the tube's internal volume over the arc the rollers sweep, so flow is revolutions times a fixed volume, independent of the pressure it is working against. That last property is why it was adopted and why it is dangerous: a roller pump will happily generate enough pressure to burst the circuit, because it does not know or care what is downstream.
Occlusion setting is the one adjustment. Too loose and the pump backflows and the flow calibration is wrong. Too tight and the tubing is abraded, shedding particles into the circuit, and the cells in the squeezed zone are crushed. It is set just barely occlusive, and step 4 is how you find that point.
2
2
Sizing the circuit to a body
Sizing the circuit to a body
A carregar o notebook Jupyter…
Ferramentas necessárias:
 Desktop Computer
3
3
The bypass circuit and its interlocks
The bypass circuit and its interlocks
Trace the loop. Blood leaves the patient by gravity into a venous reservoir, is pumped through the oxygenator and a heat exchanger, passes an arterial filter and a bubble detector, and returns under pressure to the arterial side.
The reservoir is not storage, it is the safety element. It decouples drainage from pumping, so a momentary drop in venous return empties the reservoir rather than pulling air into the pump. Everything on this diagram that looks like a convenience is actually an interlock, and the diagram marks each one with what it is there to catch.
Note where the bubble detector sits: after the filter and before the patient, which is the last possible place. Note that the pump is upstream of the oxygenator, so the oxygenator runs under positive pressure and a leak pushes blood out rather than drawing air in. Both are deliberate. Follow the three failure branches to see what each protects against.
Flow
Loading...
Materiais para este passo:
 Silicone Tubing (6mm ID)4 metre
 Polypropylene Reservoir Bottle (2L)1 peça
Ferramentas necessárias:
 Laboratory Peristaltic Pump
 Ring Stand (Support Stand)
4
4
Set occlusion, then calibrate by weight
Set occlusion, then calibrate by weight
Occlusion first, because every later number depends on it.
Fill the circuit with water and raise the outlet tubing vertically about a metre. Stop the pump. Watch the column. With the rollers over-occluded the column holds indefinitely; with them under-occluded it falls quickly. Back the occlusion off until the column falls at roughly one centimetre per minute. That is the standard setting and it means the rollers are just barely sealing — enough to pump, not enough to grind the tube.
Now calibrate. Run the pump into a tared beaker on the scale for exactly sixty seconds at a set speed, and weigh what arrives. Water is one gram per millilitre so the mass is the volume directly. Repeat at five speeds across the range and plot flow against rpm.
The plot should be a straight line through the origin. Where it bends away at the top, the tube is not refilling fast enough between rollers and you have found the pump's real ceiling — which is a property of the tubing, not the motor. Where it sits below the theoretical line from the notebook, the difference is your backflow past the occlusion.
Repeat the whole calibration with glycerol solution at about four times the viscosity of water, which is closer to blood. The straight line should barely move — that is the roller pump's defining virtue, and it is worth seeing rather than being told.
Materiais para este passo:
 Distilled Water5 litros
 Glycerol (99%)1 litro
Ferramentas necessárias:
Laboratory Peristaltic Pump Precision Digital Scale (0.01g)
 Glass Beaker
 Thermometer (Lab)
5
5
Measure the damage, and read the limit
Measure the damage, and read the limit
The pump is gentle, not harmless, and you can measure how gentle with a surrogate that fails visibly.
Make a suspension of intact cells you can afford to destroy — baker's yeast works, and so does a dilute suspension of oil in water stabilised just enough to hold. Run it around a closed loop for an hour at your working speed, drawing a sample every ten minutes. For yeast, count intact cells under the microscope. For the emulsion, watch the droplet size distribution shift downward as shear breaks droplets apart.
Plot damage against total passes through the pump head, not against time — passes is the quantity that matters, and a small circuit at high flow racks them up fast. Then repeat at a deliberately over-occluded setting and watch the curve steepen. That comparison is the reason occlusion is set the way it is in step 4, and it is far more convincing measured than asserted.
Where this stops. You have built and characterised a non-contact pumping circuit, which is genuine and useful engineering — the same circuit runs dialysis, fermentation, and dosing. It is not cardiopulmonary bypass. Real bypass requires anticoagulation of the whole patient because blood clots on contact with any foreign surface, an oxygenator that transfers gas without letting a single bubble through, temperature management, continuous blood gas and pressure monitoring, a trained perfusionist watching it, and a surgical team on the other end. Every one of those is a discipline in itself. Run water and yeast. The value here is the pump principle and the interlock logic, and both transfer to anything you build that must not damage what it moves.
Materiais para este passo:
 Active Dry Yeast50 gramDistilled Water5 litros
Ferramentas necessárias:
 Digital MicroscopeLaboratory Peristaltic Pump
 Hot Plate Magnetic Stirrer
Materiais
5- 4 metreReferência
- Referência
- 5 litrosReferência
- 1 litroReferência
- 50 gramReferência
Ferramentas necessárias
8- Referência
- Referência
- Referência
- Referência
- Referência
- Referência
- Referência
- Referência
Blueprints relacionados
Estes blueprints compartilham conhecimento — técnicas, materiais ou princípios



CC0 Domínio Público
Este blueprint é liberado sob CC0. Você é livre para copiar, modificar, distribuir e usar este trabalho para qualquer finalidade, sem pedir permissão.
Apoie o Maker comprando produtos através do Blueprint, onde ele ganha uma Comissão Maker definida pelos vendedores, ou crie uma nova versão deste Blueprint e inclua-o como conexão no seu próprio Blueprint para compartilhar receita.