ARTE
BELEZA E BEM-ESTAR
ARTESANATO
CULTURA E HISTÓRIA
ENTRETENIMENTO
MEIO AMBIENTE
COMIDA E BEBIDAS
ENGENHARIA REVERSA
CIÊNCIAS
ESPORTES
TECNOLOGIA
TECNOLOGIA VESTÍVEL


Heat-Shrink Tubing
Paul Cook founded Raychem in 1957 to use radiation chemistry: electron beams that cross-link polyethylene chains so the plastic no longer melts, only softens. Such a material has a memory. Stretch it while hot, cool it stretched, and it keeps the new size until heated again - then it shrinks back tight onto whatever is inside.
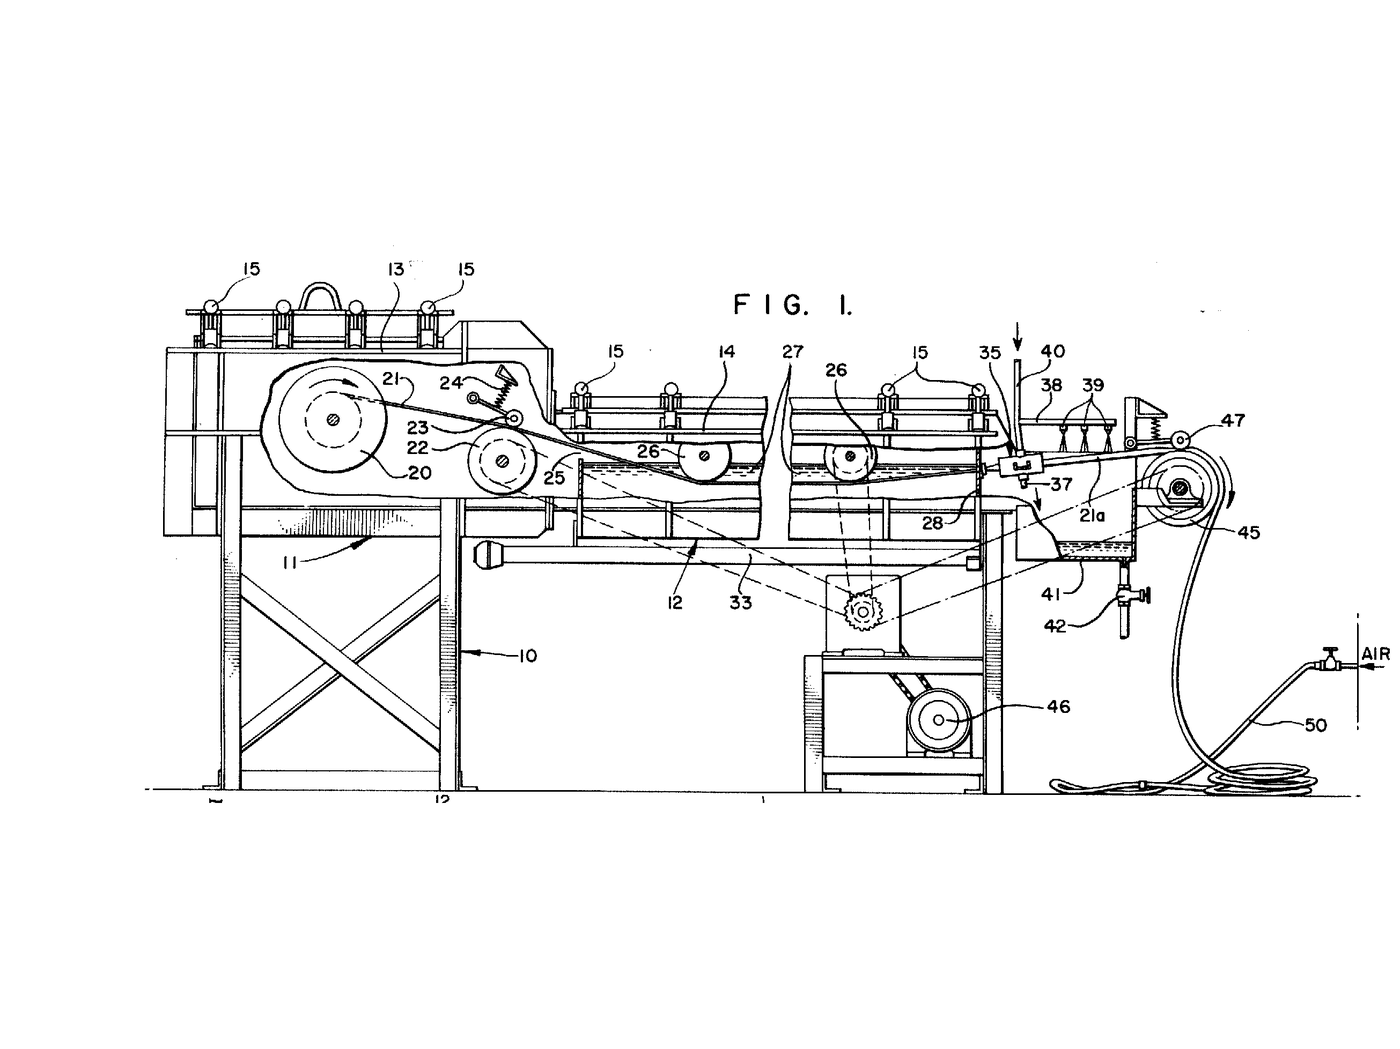
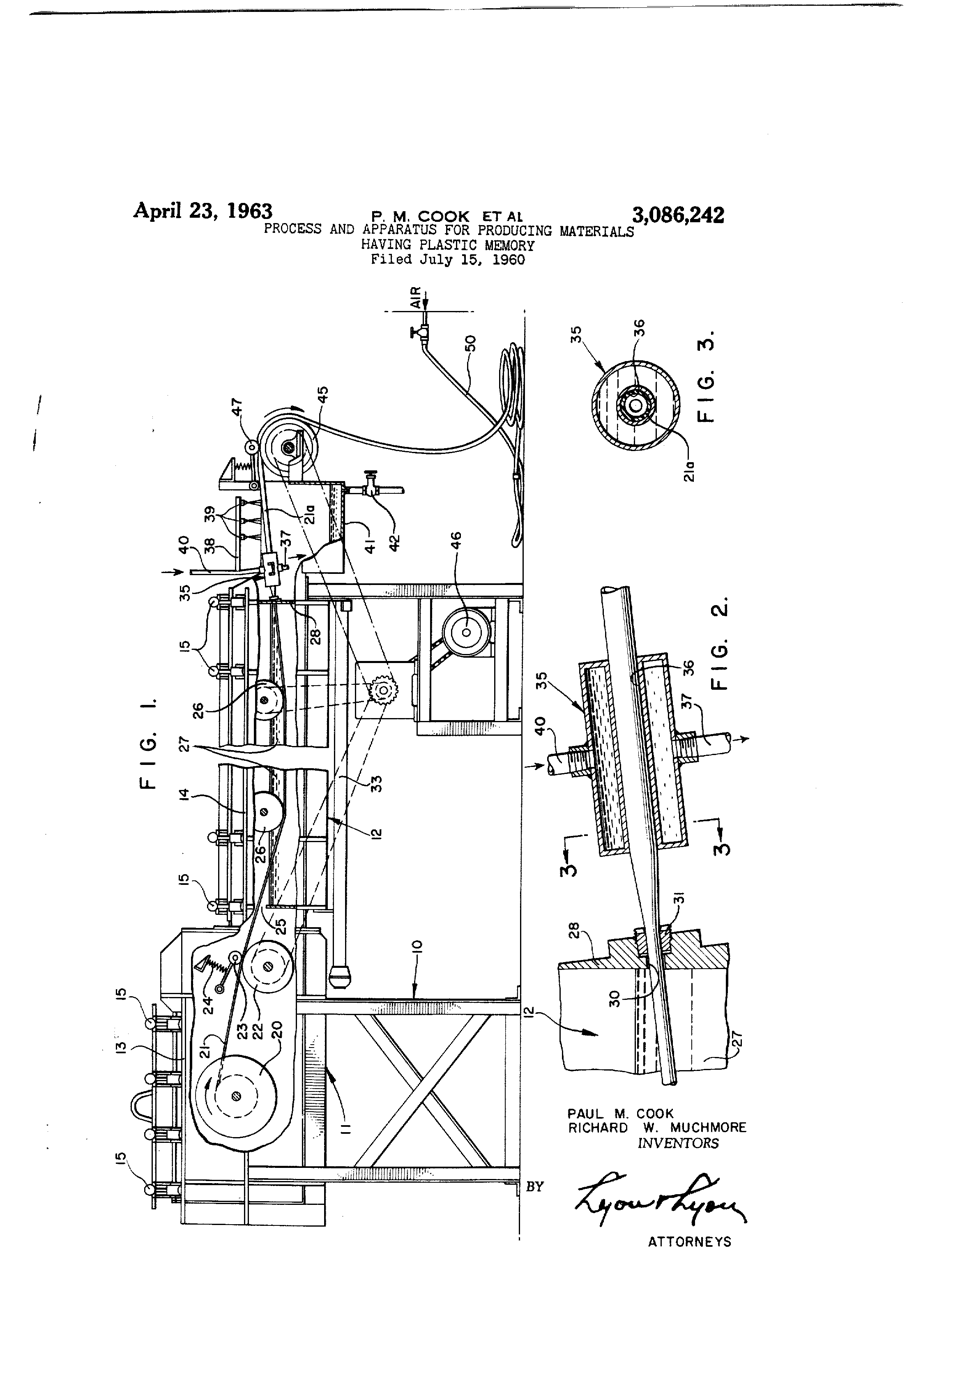
**US 3,086,242**, "Process and apparatus for producing materials having plastic memory", Cook and Muchmore, assigned to Raychem, filed 15. July 1960, granted 23. April 1963: tubing carried through a heated zone in a pressure vessel, expanded as it emerges, and cooled while expanded - "dimensionally heat-unstable tubing".
**You measure the memory and use it**: free-shrink a sample and check where the plastic went, then insulate a crimped wire splice.
Iniciante
1 hour
Instruções
1
1
Measure as supplied
Measure as supplied
Cut 40 mm of 2:1 heat-shrink. Measure its flattened width, its wall (pinch one wall in the caliper) and its length.
Materiais para este passo:
 Manga termorretráctil1 peça
Ferramentas necessárias:
 X-ato de oficina
 Paquímetro digital de 6 polegadas
2
2
Shrink it free
Shrink it free
Hold it in the helping hands and heat evenly with the heat gun, keeping the gun moving, until it stops changing. Let it cool; measure inside diameter, wall and length again.
Ferramentas necessárias:
 Pistola de ar quente
 Terceira mãoPaquímetro digital de 6 polegadas
 Óculos de segurança transparentes
3
3
Crimp the splice
Crimp the splice
Slide 40 mm of heat-shrink onto one wire first. Strip 6 mm from both wire ends, push them into a butt splice and crimp each side. Tug each wire to 20 N on the spring scale - it must not pull out.
Materiais para este passo:
 Fio de ligação1 metro
 Emenda de topo sem isolamento1 peçaManga termorretráctil1 peça
Ferramentas necessárias:
 Descarnador de fios
 Alicate de cravar
 Dinamómetro (balança de mola)
4
4
Shrink it on
Shrink it on
Centre the tube over the splice with 10 mm overlap onto the insulation each side. Heat from the middle outwards so air is pushed out, not trapped.
Ferramentas necessárias:
Pistola de ar quente5
5
Test the insulation
Test the insulation
Wrap aluminium foil tightly round the shrunk sleeve. Set the multimeter to its highest resistance range and measure between the wire and the foil: it must read open circuit. Then check the wire end to end: near zero ohms.
Materiais para este passo:
 Folha de alumínio1 folha
Ferramentas necessárias:
 Multímetro
6
6
Shrink ratio and conservation
Shrink ratio and conservation
A carregar o notebook Jupyter…
7
7
History & Context
History & Context
**What the patent specifies:** tubing heated, expanded under pressure as it leaves a vessel, and cooled while expanded, to give material with plastic memory. **Modern build (derived):** commercial 2:1 polyolefin heat-shrink.
Heat-shrink replaced tape on aircraft, military and then all wiring harnesses; the same memory idea gives shrink film and pipe-joint sleeves. Its limits: it must be slid on before the joint is made, overheating chars it, and a thin wall offers little protection from abrasion.
Materiais
4- 2 peçasReferência
- 1 metroReferência
- Referência
- 1 folhaReferência
Ferramentas necessárias
9- Referência
- Referência
- 1 vendor sell this, none ship to you yetReferência
- Referência
- Referência
- Referência
- Referência
- Referência
- Referência
Blueprints relacionados
Estes blueprints compartilham conhecimento — técnicas, materiais ou princípios


CC0 Domínio Público
Este blueprint é liberado sob CC0. Você é livre para copiar, modificar, distribuir e usar este trabalho para qualquer finalidade, sem pedir permissão.
Apoie o Maker comprando produtos através do Blueprint, onde ele ganha uma Comissão Maker definida pelos vendedores, ou crie uma nova versão deste Blueprint e inclua-o como conexão no seu próprio Blueprint para compartilhar receita.