ARTE
BELEZA E BEM-ESTAR
ARTESANATO
CULTURA E HISTÓRIA
ENTRETENIMENTO
MEIO AMBIENTE
COMIDA E BEBIDAS
ENGENHARIA REVERSA
CIÊNCIAS
ESPORTES
TECNOLOGIA
TECNOLOGIA VESTÍVEL
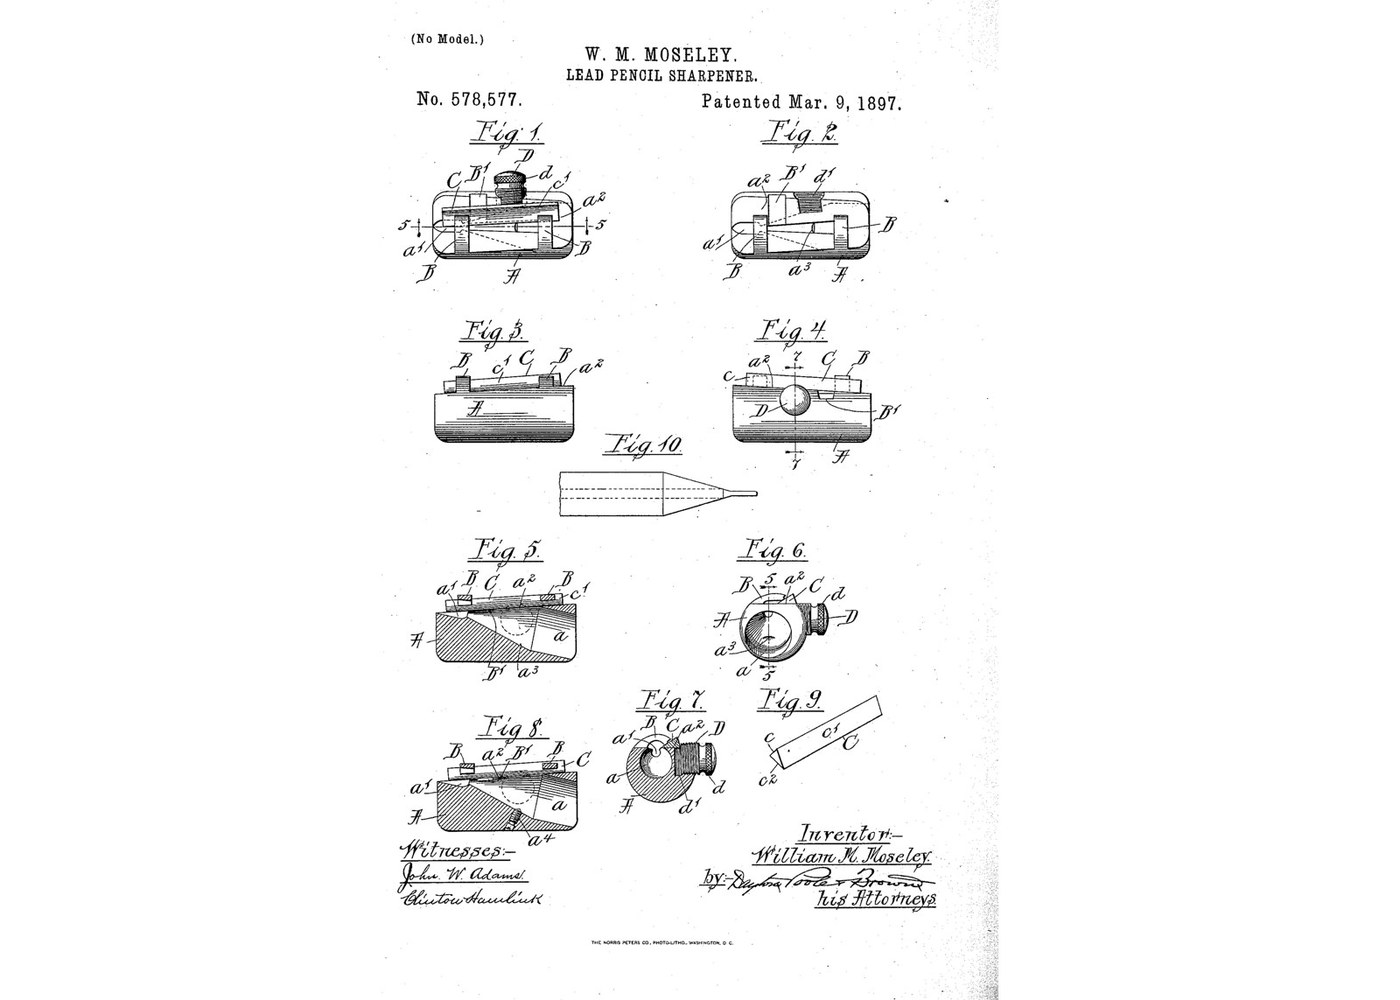


Pencil Sharpener: Conical Bore and a Reversible Triangular Blade (Moseley 1897)
The pocket pencil sharpener: twist the pencil in a conical hole and a blade along its side shaves the wood and lead to a point. Moseley made the body from plain round rod by drilling the cone at a slant, so the flat seat for the blade could be cut close to the rod's surface. His blade is longer than it needs to be: when the part that meets the lead wears, slide it along or turn it end for end.
Source: William M. Moseley, US 578,577 (1897). Unknown: the metals and the sizes. Moseley gives the body as metal, hard rubber or the like, and no sizes or angles, so these are linked to unknown heads. Lathe and mill are ours. Picture: the patent's drawing.
Intermediário
1 day
Instruções
1
1
Turn the body from rod
Turn the body from rod
Cut a length of round rod and round its ends. In one end, bore a cone tapering inwards, its axis set at an angle to the rod's axis. Unknown: the metal, the sizes and the angle.
Materiais para este passo:
 Metal desconhecido1 as required
Ferramentas necessárias:
 Torno mecânico
 Conjunto de ferramentas de torno (HSS)
 Paquímetro
 Dimensões desconhecidas
2
2
Cut the blade seat and the stop arms
Cut the blade seat and the stop arms
Mill one side of the rod flat to make the blade seat, roughly parallel with the side of the cone, so it breaks into the bore. Leave two ribs standing across it as stop arms, and undercut them so the blade's edge slips under. Give their free ends oblique faces matching the blade. Cut away a clearance space in front of the blade so shavings do not clog. Drill and tap a hole for the clamping stud.
Ferramentas necessárias:
 Fresadora
 Jogo de limas
 Jogo de machos e cossinetesDimensões desconhecidas
3
3
Make the blade and the clamping stud
Make the blade and the clamping stud
Make a triangular blade: a back, and two converging faces meeting in the cutting edge, longer than the cone. Turn a threaded stud with a knurled head for the finger.
Materiais para este passo:
Metal desconhecido1 as requiredFerramentas necessárias:
Jogo de limasTorno mecânicoJogo de machos e cossinetesDimensões desconhecidas4
4
Clamp the blade and sharpen
Clamp the blade and sharpen
Lay the blade with one face on the seat and the other against the arms, edge projecting into the bore, and screw the stud down. Twist a pencil in the cone. When the part of the edge that meets the lead wears, slide the blade along; when that is used up, turn it end for end.
Ferramentas necessárias:
 Óculos de segurança
Materiais
1- 1 as requiredReferência
Ferramentas necessárias
8- Referência
- Referência
- Referência
- Referência
- Referência
- Referência
- Referência
- Referência
Este projeto faz
Blueprints relacionados
Estes blueprints compartilham conhecimento — técnicas, materiais ou princípios
CC0 Domínio Público
Este blueprint é liberado sob CC0. Você é livre para copiar, modificar, distribuir e usar este trabalho para qualquer finalidade, sem pedir permissão.
Apoie o Maker comprando produtos através do Blueprint, onde ele ganha uma Comissão Maker definida pelos vendedores, ou crie uma nova versão deste Blueprint e inclua-o como conexão no seu próprio Blueprint para compartilhar receita.