Overdyeing Lincoln Green — Weld Yellow over Indigo Blue
Instruções
Prepare Indigo Vat
Prepare Indigo Vat
Prepare a reduced indigo vat following the indigo extraction blueprint — the vat liquid should be yellow-green beneath the surface
Ferramentas necessárias:
 Stock Pot
Wet the Wool
Wet the Wool
Soak the undyed wool skein in warm water for 30 minutes to ensure even dye uptake
Materiais para este passo:
 Wool Yarn Skein (Undyed)100 grams
 Water5 litros
First Indigo Dip
First Indigo Dip
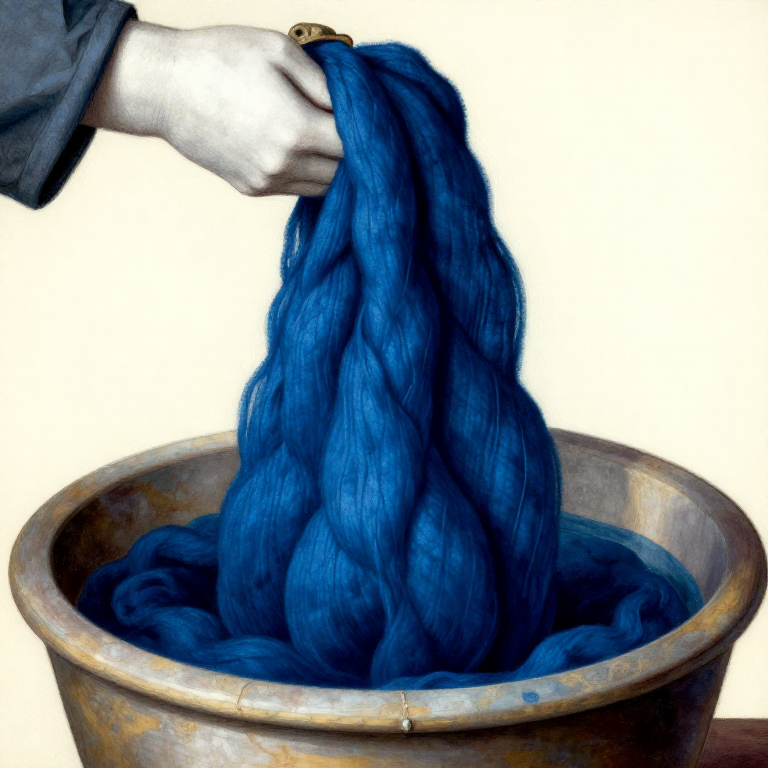
Lower the wetted wool gently into the indigo vat — do not agitate, as oxygen breaks the reduction
Hold Submerged 20 Minutes
Hold Submerged 20 Minutes
Keep the wool submerged for 20 minutes, pressing it down gently to avoid air pockets
Oxidise in Air
Oxidise in Air
Lift the wool out — it will be yellow-green at first, then turn blue as it oxidises in the air over 15 minutes
Repeat Indigo Dips
Repeat Indigo Dips
Dip and oxidise 2-3 more times to build a medium blue — not too dark, or the final green will be very deep
Rinse the Blue Wool
Rinse the Blue Wool
Rinse the indigo-dyed wool thoroughly in cool water until the rinse runs clear
Materiais para este passo:
Water10 litrosDry the Blue Wool
Dry the Blue Wool
Hang the blue-dyed wool to dry completely before the second dye bath — this sets the indigo
Prepare Weld Bath
Prepare Weld Bath
Prepare a weld dye bath following the weld yellow dye blueprint — chop 200 g of weld and simmer at 80°C for 45 minutes
Materiais para este passo:
 Weld Plant (Reseda luteola)200 grams
Strain Weld Bath
Strain Weld Bath
Strain out all plant matter and return the golden dye liquid to the pot
Ferramentas necessárias:
 Cloth (Straining)
Add Alum Mordant
Add Alum Mordant
Dissolve 10 g alum in hot water and add to the weld bath — this fixes the yellow layer permanently
Materiais para este passo:
 Alum (Potassium Alum)10 grams
Re-Wet the Blue Wool
Re-Wet the Blue Wool
Soak the dried blue wool in warm water for 15 minutes before entering the weld bath
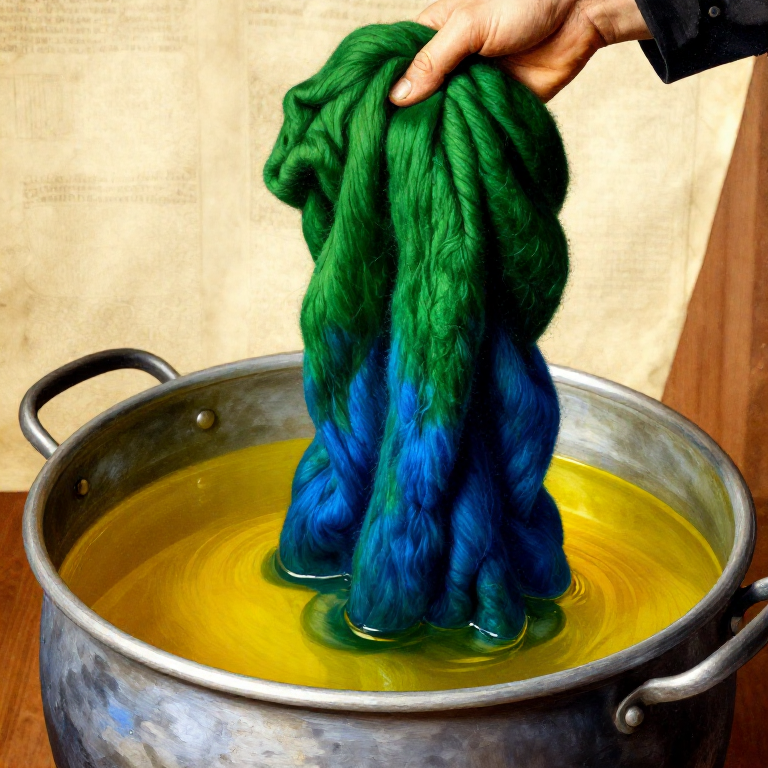
Enter the Weld Bath
Enter the Weld Bath
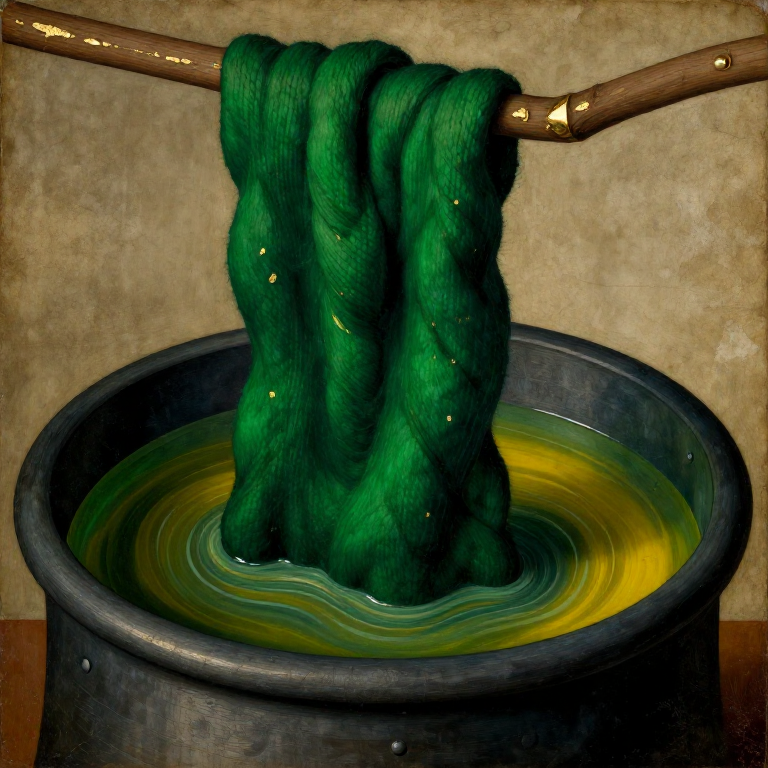
Lower the blue-dyed wool into the yellow weld bath — the colour will begin shifting toward green immediately
Materiais para este passo:
 Firewood1 feixe
Simmer at 80°C
Simmer at 80°C
Heat the bath to 80°C and hold for 45 minutes to 1 hour, turning the wool every 10 minutes
Check the Green
Check the Green
Lift a section to check — the blue and yellow combine in the fibre to produce a rich green
Adjust if Needed
Adjust if Needed
For a bluer green, shorten the weld bath time; for a yellower green, extend it or increase the weld concentration
Final Rinse
Final Rinse
Remove the green wool and rinse in progressively cooler water until the water runs clear
Materiais para este passo:
Water10 litrosDry in Shade
Dry in Shade
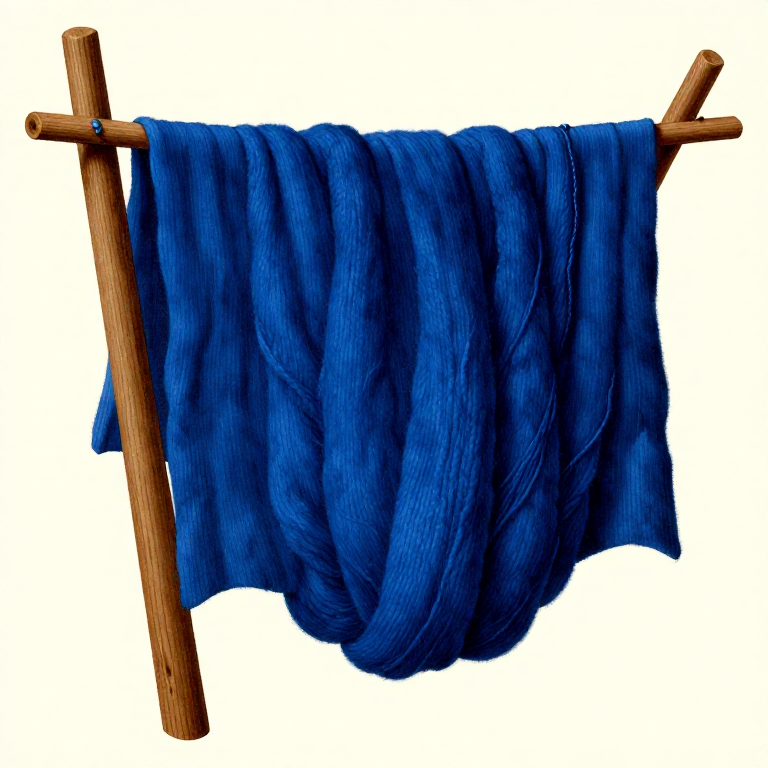
Hang the Lincoln Green wool in shade to dry — the overdyed colour is extremely lightfast and permanent
Materiais
5- 100 gramsReferência
- 200 gramsReferência
- 10 gramsReferência
CC0 Domínio Público
Este blueprint é liberado sob CC0. Você é livre para copiar, modificar, distribuir e usar este trabalho para qualquer finalidade, sem pedir permissão.
Apoie o Maker comprando produtos através do Blueprint, onde ele ganha uma Comissão Maker definida pelos vendedores, ou crie uma nova versão deste Blueprint e inclua-o como conexão no seu próprio Blueprint para compartilhar receita.