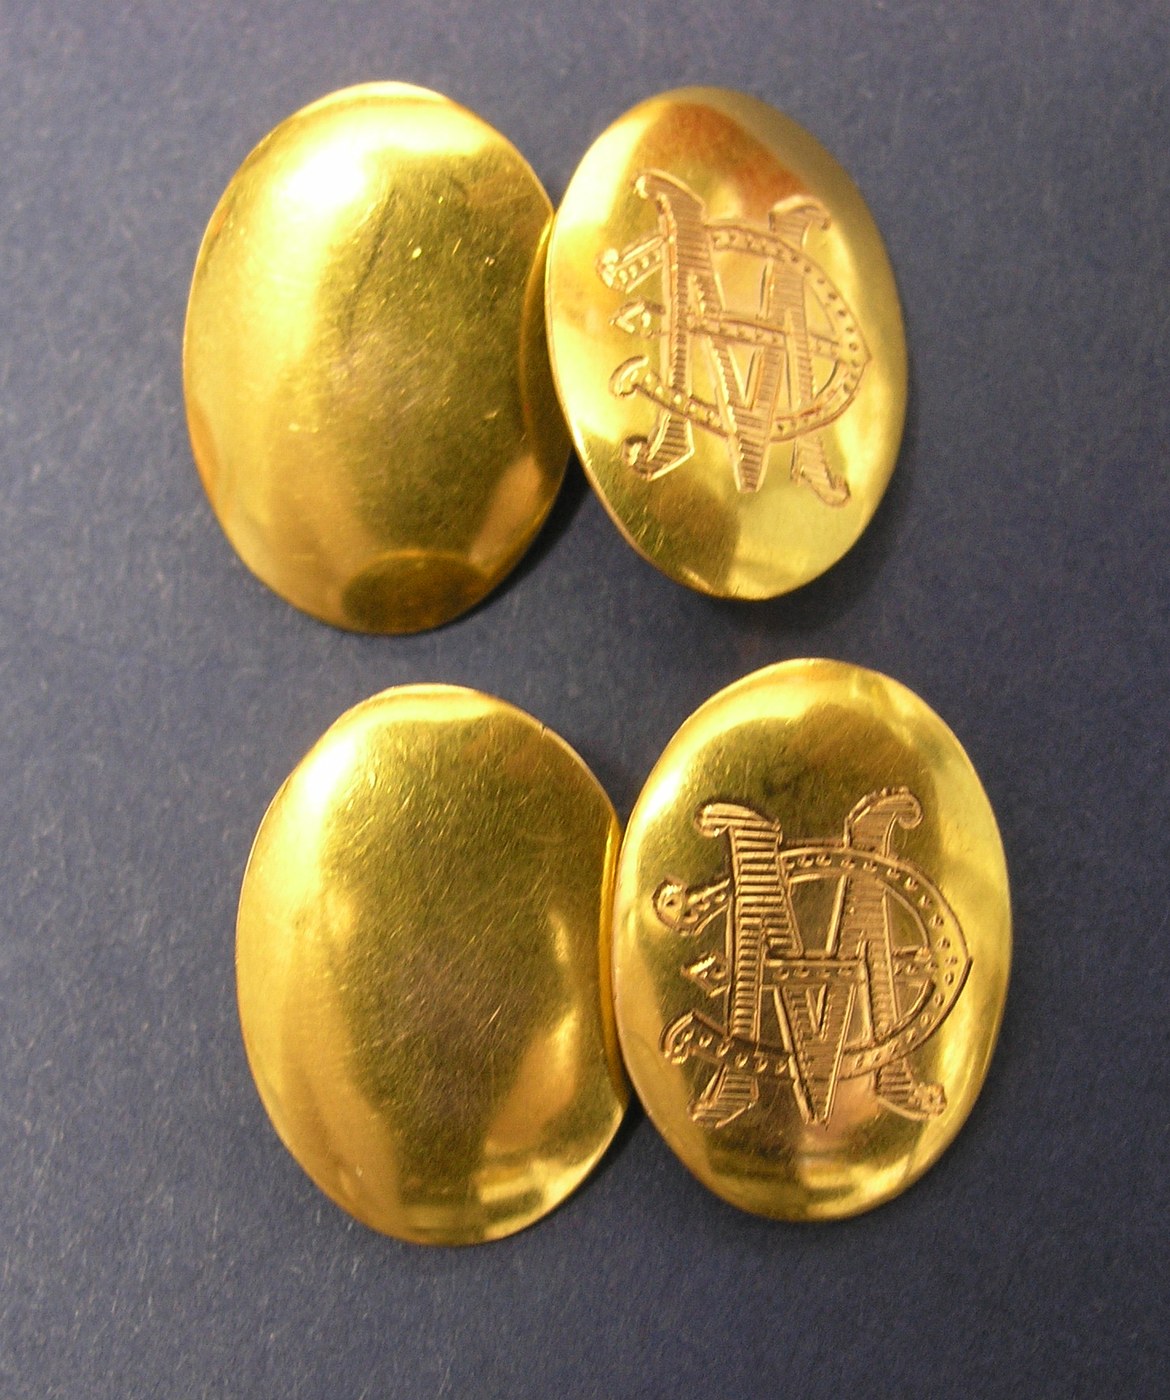


Sleeve Buttons
Cufflinks began as sleeve buttons — two decorated faces joined by a short chain, threaded through two buttonholes to hold a cuff shut. They appear in the seventeenth century, when men's shirts first had cuffs that needed fastening rather than tying with ribbon.
The design problem is small and specific: the link must pass through two buttonholes easily, then sit so that both decorated faces show and neither turns edge-on. Everything about the traditional form follows from that — the short chain, the flat faces, the balanced weight.
This blueprint makes a chain-linked pair in silver. It is a genuinely good first soldering project: small, forgiving, two identical halves so you get a second attempt at every operation, and a finished object you can actually wear.
Instruções
Saw four discs
Saw four discs
Saw four 14 mm discs from 24 gauge sterling sheet — two faces per cuff, four in total for a pair.
Materiais para este passo:
 Chapa de prata de lei 925 de 0,5 mm1 folha
Ferramentas necessárias:
 Serra de joalheiro
File all four to match
File all four to match
File the edges smooth and stack the discs to check they are the same size. Mismatched faces are obvious the moment both cuffs are worn together.
Ferramentas necessárias:
 Jogo de limas de agulha
Dome the faces slightly
Dome the faces slightly
Dish each disc gently in a doming block. A slight dome stiffens thin sheet considerably and catches light better than a flat face.
Engrave a simple device
Engrave a simple device
Engrave a monogram or geometric motif on each face. Keep it shallow and bold — at 14 mm, fine detail disappears at conversational distance.
Ferramentas necessárias:
 Buril de gravação
Make four jump rings
Make four jump rings
Wind 20 gauge wire around a 3 mm rod and saw the coil into four rings. Sawing rather than cutting gives flat ends that close without a gap.
Materiais para este passo:
 Fio redondo de prata de lei calibre 160.15 metro
Ferramentas necessárias:
Serra de joalheiroSolder a ring to each face
Solder a ring to each face
Flux and solder one jump ring to the back of each disc with hard solder. Keep the ring perpendicular to the face — a skewed ring makes the button hang crooked.
Materiais para este passo:
 Conjunto de solda de prata (fraca/média/forte)1 conjunto
 Pasta de fluxo para soldar (à base de colofónia)1 peça
Ferramentas necessárias:
 Maçarico a propano
 Tijolos refratários
Pickle after every soldering
Pickle after every soldering
Pickle 5 minutes in citric acid at 1 part to 5 parts water. Firescale left on will show as a grey shadow under the final polish.
Materiais para este passo:
 Ácido cítrico100 g
Make two chain links
Make two chain links
Make two more rings and use each to join one pair of faces. Keep the connection short — 10 mm between faces at most.
Ferramentas necessárias:
 Conjunto de alicates de joalharia
Close the joining rings tightly
Close the joining rings tightly
Close each joining ring so the ends meet with no gap. Do not solder these — an unsoldered but well-closed ring lets the faces swivel, which is what allows them to pass through a buttonhole.
Test through a real cuff
Test through a real cuff
Thread it through two buttonholes in a shirt cuff. It should go through without forcing and then sit with both faces outward. Too long a link and it dangles; too short and it will not pass.
Polish and burnish
Polish and burnish
Polish the faces and burnish the engraved lines' edges. Cufflinks are seen close up and in motion, so the finish matters more than on most small work.
Ferramentas necessárias:
 Brunidor de ágata
History & Context
History & Context
They followed a change in shirts. Sleeve buttons appear once men's shirts have cuffs that need fastening. Earlier shirt sleeves were closed with ribbon ties or simple strings; when the stiffened, turned-back cuff arrived in the seventeenth century, a fastening was needed that could be undone and that looked like jewellery on both sides of the wrist. The object exists because a garment changed.
Why two faces and a link. A cuff fastened with a link shows one face on the outside of the wrist and one on the inside, and it holds two edges together rather than overlapping them — the barrel cuff. That is a different fastening geometry from a button and buttonhole, and it is why cufflinks did not simply become buttons.
The name arrived later. "Cufflink" is a nineteenth-century word; the earlier term is sleeve buttons, and eighteenth-century inventories and advertisements use it. If you are searching older sources, that is the term to look for.
Industrial production changed them. Through the nineteenth century, machine stamping and the growth of costume jewellery made decorated sleeve buttons cheap and widespread, and later the swivel-bar fitting replaced the chain for convenience. The chain-linked form in this blueprint is the older one and is still regarded as the more formal.
Why this is a good first project. Two identical halves means every operation is performed twice, so a mistake on the first is a rehearsal rather than a disaster. The pieces are small enough to heat quickly and forgiving of imperfect soldering, and the result is a wearable object rather than a practice scrap — which matters more for staying with a craft than most people admit.
Materiais
5- Referência
- 0.15 metroReferência
- Referência
- Referência
- 100 gReferência
Ferramentas necessárias
7- Referência
- Referência
- Referência
- Referência
- Referência
- Referência
- Referência
CC0 Domínio Público
Este blueprint é liberado sob CC0. Você é livre para copiar, modificar, distribuir e usar este trabalho para qualquer finalidade, sem pedir permissão.
Apoie o Maker comprando produtos através do Blueprint, onde ele ganha uma Comissão Maker definida pelos vendedores, ou crie uma nova versão deste Blueprint e inclua-o como conexão no seu próprio Blueprint para compartilhar receita.