ARTE
BELEZA E BEM-ESTAR
ARTESANATO
CULTURA E HISTÓRIA
ENTRETENIMENTO
MEIO AMBIENTE
COMIDA E BEBIDAS
ENGENHARIA REVERSA
CIÊNCIAS
ESPORTES
TECNOLOGIA
TECNOLOGIA VESTÍVEL
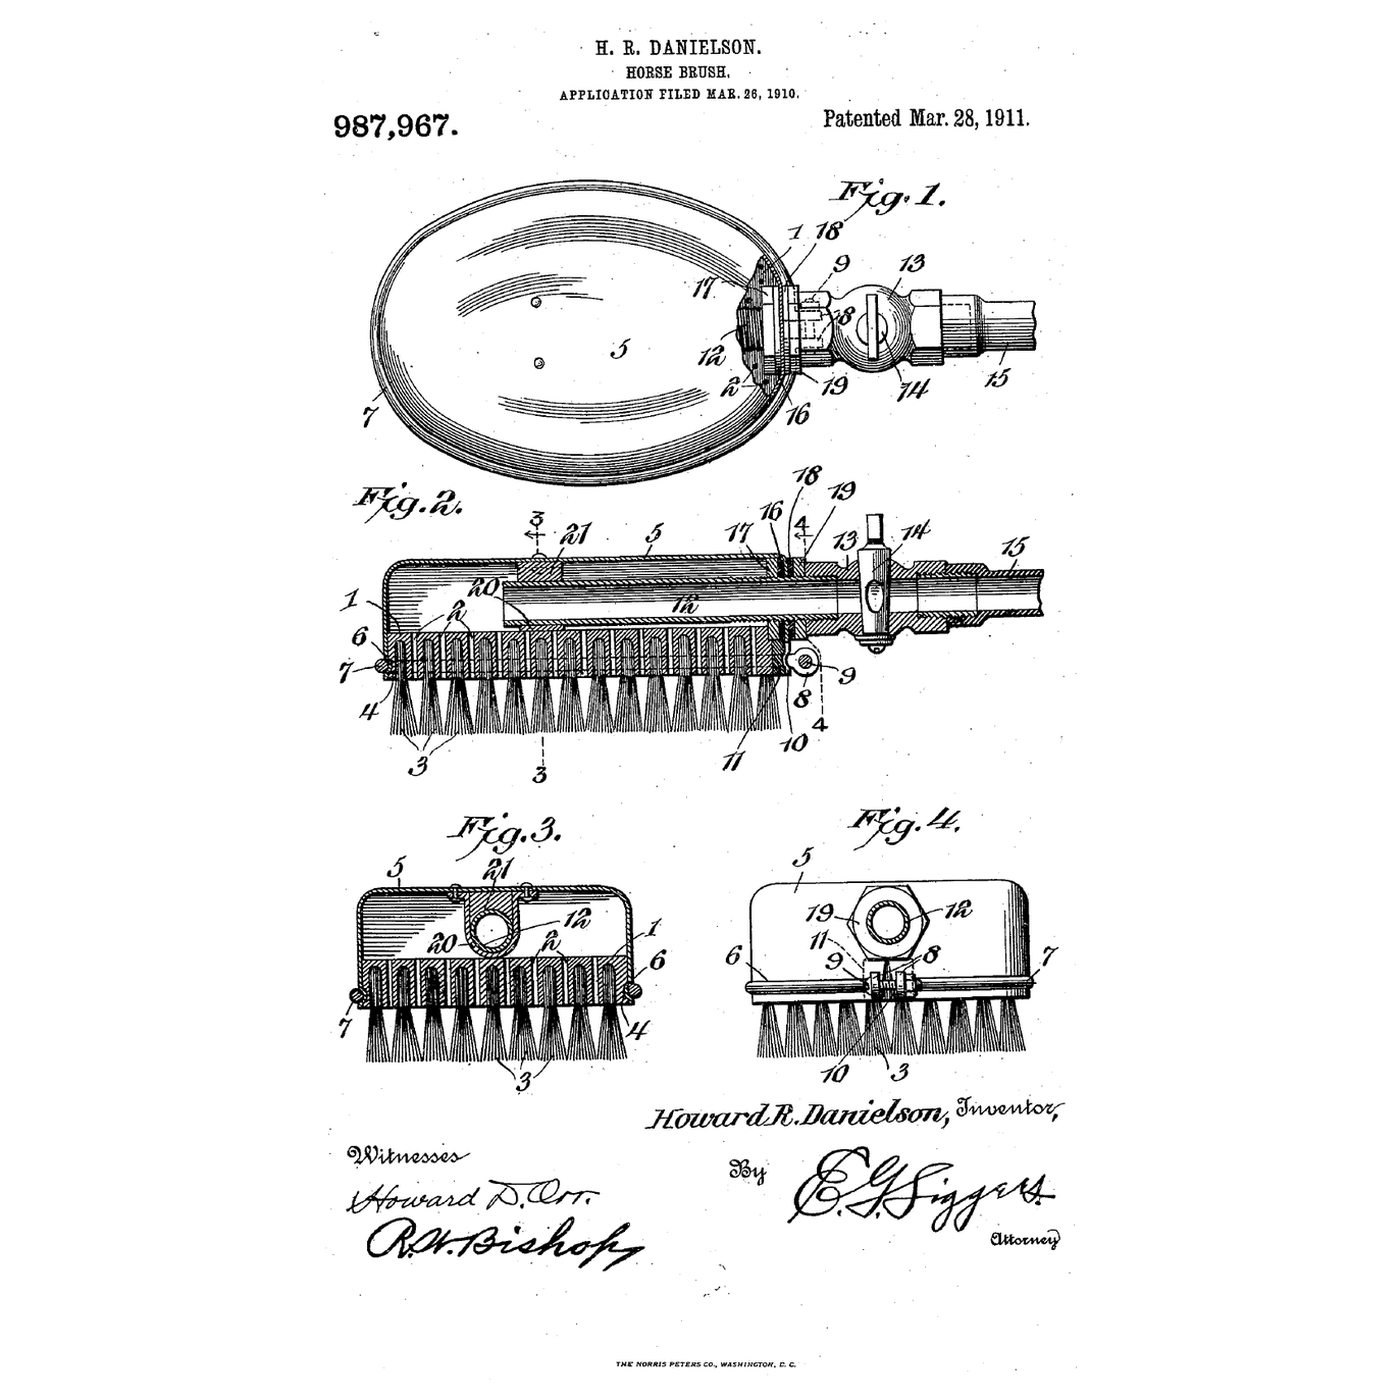


The Capped Fountain Horse Brush: Water Out Only Through the Bristles
A horse caked in mud is slow to clean with a dry brush, and a hose alone soaks the handler.
Howard R. Danielson of Crookston, Minnesota, received US 987,967, patented 28 March 1911, for a horse brush "so constructed as to avoid leakage, and to provide no outlet for the water except through the bristles": a perforated wooden back under a steel cap whose bead sits in a groove round the back, held by a clamping wire and bolt, with a pipe clamped through the cap by washers and nuts; loosening the wire lets a worn brush be replaced.
This rung shows why the valve sets the water use, then caps a scrub brush in aluminium, plumbs it and measures the water a grooming takes.
Intermediário
About 4 hours
Instruções
1
1
Water per grooming
Water per grooming
A carregar o notebook Jupyter…
2
2
A horse brush before it
A horse brush before it
The embedded blueprint cleans the coat dry with rubber ridges. Danielson brings water to the bristles and lets it out nowhere else.
3
3
Read US 987,967
Read US 987,967
"A clamping wire 7 is placed around the cap and body within the groove in the cap presented by the said bead 6, and the ends of this clamping wire are formed into perforated lugs or ears 8 through which a securing bolt or screw 9 is inserted."
"The brush is moved over the body of the horse and the water permitted to flow through the pipe to the interior of the cap, whence it will escape through the perforations in the body or back of the brush and escape through the bristles to the animal. The flow of water may be regulated according to the condition of the animal's skin so that mud or other matter may be quickly and easily removed and the horse quickly cleaned."
4
4
Perforate the back
Perforate the back
Drill ten 4 mm holes through the scrub brush's back between the tufts, from the top.
Materiais para este passo:
 Escova de esfregar1 peça
Ferramentas necessárias:
 Torno de bancada
 Berbequim sem fios
 Jogo de brocas
 Marcador permanente
 Óculos de segurança transparentes
5
5
Groove the edge
Groove the edge
Rout a 3 mm groove 3 mm deep round the back's edge, 8 mm above the bristle face.
Ferramentas necessárias:
 Tupia
Tupia Conjunto de fresas de tupiaÓculos de segurança transparentes
6
6
Shape the cap
Shape the cap
Cut aluminium sheet to the back's outline plus 25 mm all round. Snip the margin into 15 mm tabs, fold them down over the sides, and press their edges into the groove. Seal the tab gaps with silicone.
Materiais para este passo:
 Chapa de alumínio1 peça
 Vedante de silicone1 peça
Ferramentas necessárias:
 Tesoura de chapa
 Alicate de bico chato
 Martelo
 Luvas de trabalho em couro
7
7
Wire it on
Wire it on
Lay a strip of rubber sheet across the cap's joint. Lay galvanised wire in the groove over the tabs, bend its ends into eyes, and draw them together with an M4 screw and nut.
Materiais para este passo:
 Chapa de borracha1 peça
 Arame de aço galvanizado1 peça
 Parafusos de máquina1 peça
 Porca sextavada1 peça
Ferramentas necessárias:
Alicate de bico chato Conjunto de chaves de fendas
 Chave inglesa ajustável
8
8
Plumb the cap
Plumb the cap
Drill the cap's end for a threaded brass connector from the fittings. Clamp it with a flat washer, a rubber washer and a nut each side. Fit the ball valve and a hose connector to it.
Materiais para este passo:
 Acessórios de latão1 peça
 Anilha plana1 peçaChapa de borracha1 peça
 Válvula de esfera1 peça
 Fita de PTFE para roscas1 peça
Ferramentas necessárias:
Berbequim sem fiosJogo de brocasChave inglesa ajustável9
9
The build in 3D
The build in 3D
FreeCAD model of this build, not of the patent: a 190 × 90 × 24 mm elliptical back with ten 4 mm holes and a groove, the cap and clamping wire, and the connector, valve and hose tail.
10
10
Test it
Test it
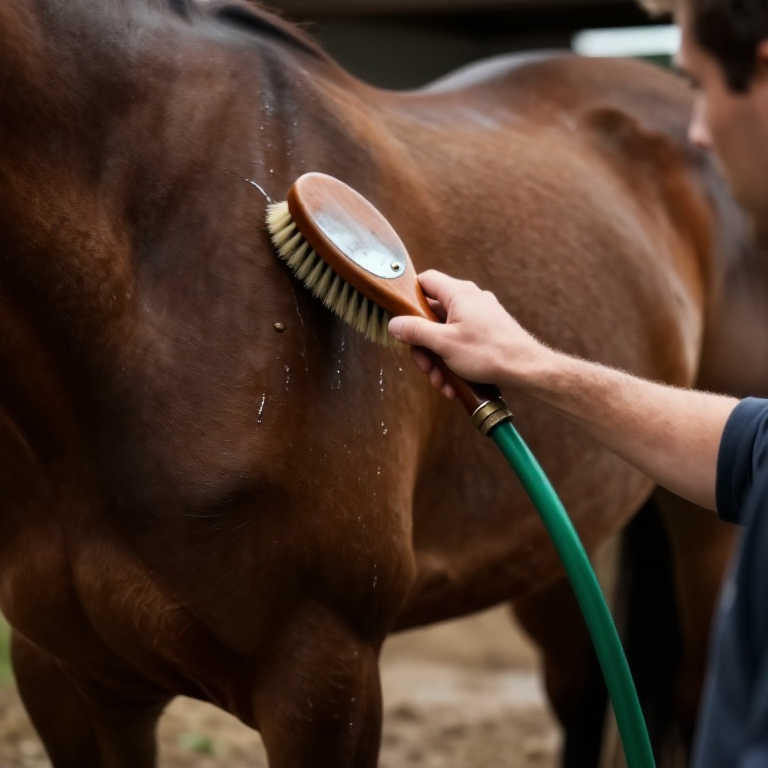
Connect the garden hose. Set the valve to fill the jug in one minute and note the litres; look for water anywhere but the bristles. Time how long it takes to loosen the wire and lift the cap off.
Materiais para este passo:
 Mangueira de jardim1 peça
 Água1 peça
Ferramentas necessárias:
 Jarro medidor
 Cronómetro
11
11
A brush that leaks, floods or will not come apart
A brush that leaks, floods or will not come apart
Capped fountain horse brush troubleshooting.
Flow
Loading...
12
12
History and honest limits
History and honest limits
**Howard R. Danielson** of Crookston, Minnesota, filed US 987,967 on 26 March 1910; it was patented 28 March 1911. The back is preferably a wooden block of elliptical outline; the cap preferably a single piece of steel. A slit lets the cap spring over the back, sealed by a rubber block behind it. Inside, a clamping band riveted to the cap supports the pipe's inner end. He wrote that its life "is practically limitless, as the wear will all be on the bristles."
**Honest limits.** Our tabbed aluminium cap needs silicone where his pressed steel cap did not, and a bought scrub brush stands in for his. Your water use is the result.
Materiais
13- 1 peçaReferência
- 1 peçaReferência
- 1 peçaReferência
- 1 peçaReferência
- 1 peçaReferência
- 1 peçaReferência
- 1 peçaReferência
- 1 peçaReferência
- 1 peçaReferência
- 1 peçaReferência
- 1 peçaReferência
- Mangueira de jardim10% de comissão1 peçaReferência
- 1 peçaReferência
Ferramentas necessárias
15- Referência
- 1 vendor sell this, none ship to you yetReferência
- Referência
- Referência
- Referência
- Referência
- 1 vendor sell this, none ship to you yetReferência
- Referência
- Referência
- Referência
- Referência
- Referência
- Referência
- Referência
- Referência
Ficheiros de design
1Blueprints relacionados
Estes blueprints compartilham conhecimento — técnicas, materiais ou princípios


CC0 Domínio Público
Este blueprint é liberado sob CC0. Você é livre para copiar, modificar, distribuir e usar este trabalho para qualquer finalidade, sem pedir permissão.
Apoie o Maker comprando produtos através do Blueprint, onde ele ganha uma Comissão Maker definida pelos vendedores, ou crie uma nova versão deste Blueprint e inclua-o como conexão no seu próprio Blueprint para compartilhar receita.