ARTE
BELEZA E BEM-ESTAR
ARTESANATO
CULTURA E HISTÓRIA
ENTRETENIMENTO
MEIO AMBIENTE
COMIDA E BEBIDAS
ENGENHARIA REVERSA
CIÊNCIAS
ESPORTES
TECNOLOGIA
TECNOLOGIA VESTÍVEL


The Clamp-On Ironing Table: A Board, a Leg and a Sleeve Board
An ironing board needs to be firm, the right height, and narrow enough at one end for a sleeve. Many houses had no room to leave one standing.
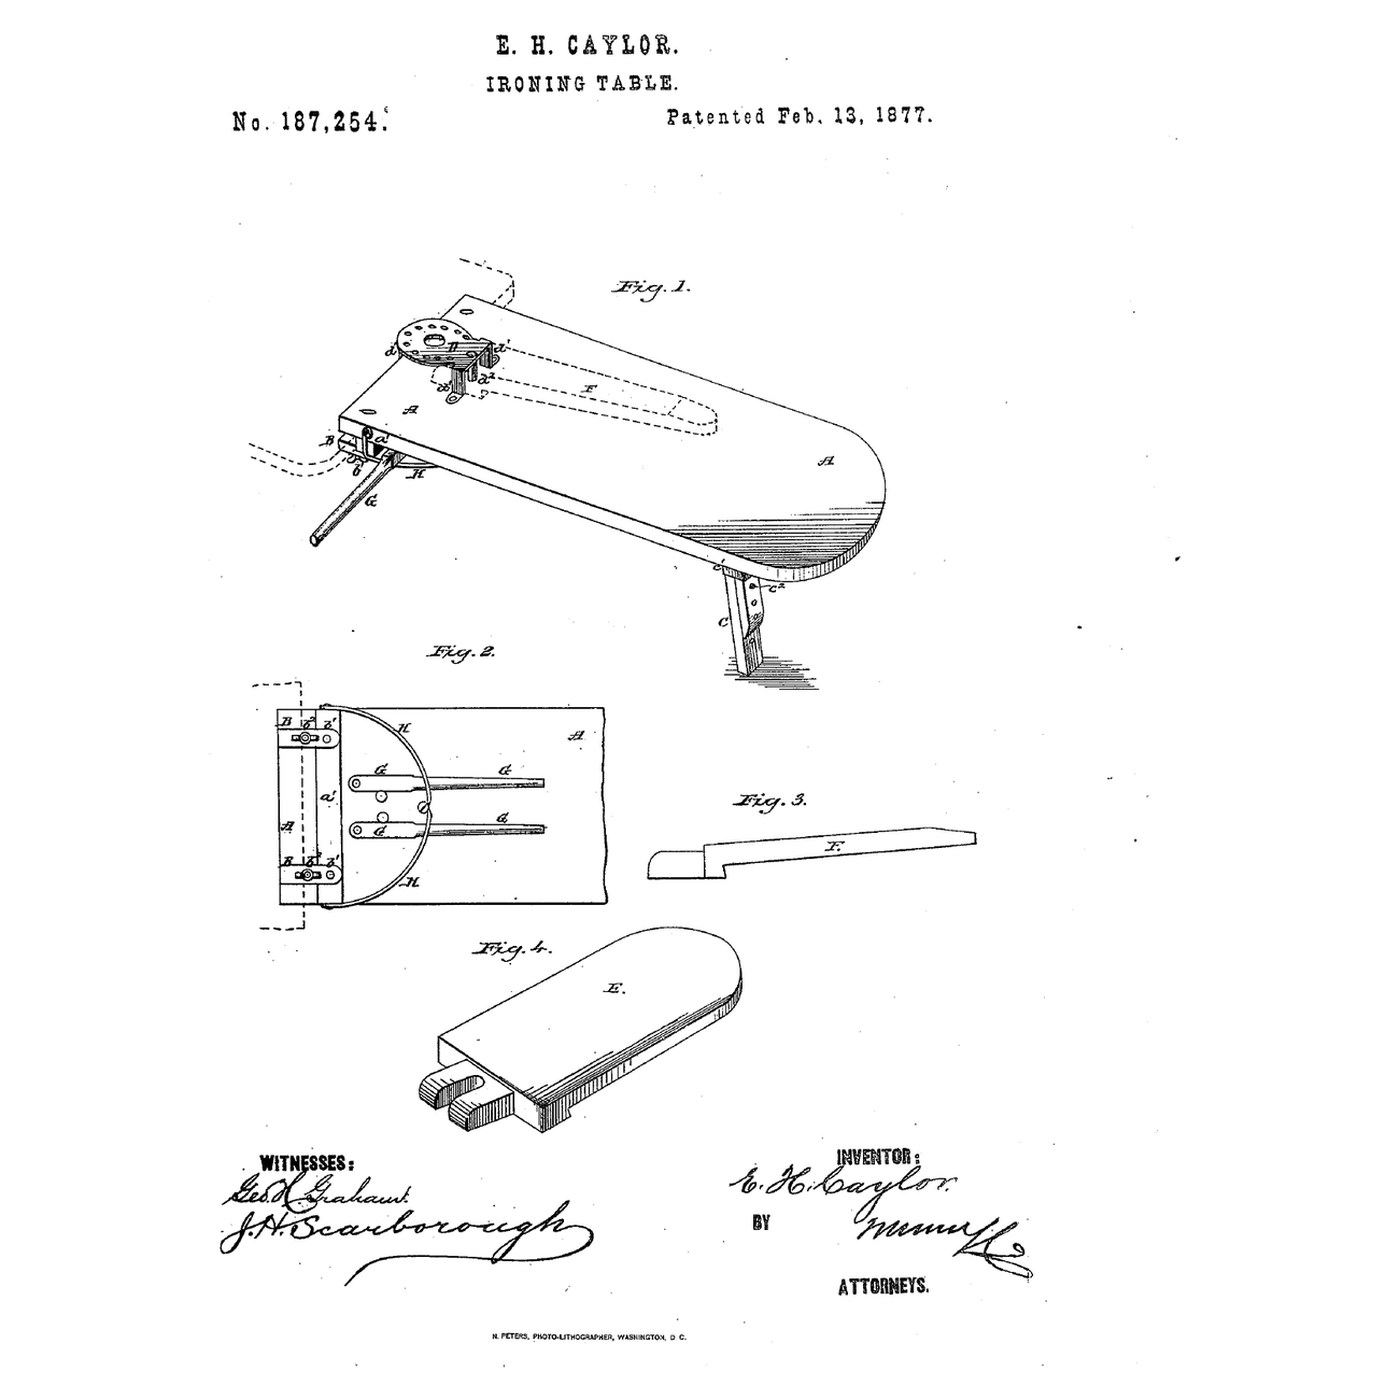
The Rev. Edward H. Caylor of West Elkton, Ohio, received US 187,254, dated 13 February 1877 (filed 18 November 1876), for an ironing-table that "may be attached to a table or other convenient support, may be supported at any desired height, may have a shirt-board and a sleeve-board attached to it, and shall be provided with a clothes-rack and a stand for the sad-irons."
This rung computes what the clamp must hold with and without the leg, then builds a clamp-on board with a slip-on sleeve board and irons a sleeve on it.
Iniciante
About 3 hours
Instruções
1
1
Clamp, leg and load
Clamp, leg and load
A carregar o notebook Jupyter…
2
2
The iron the table was built for
The iron the table was built for
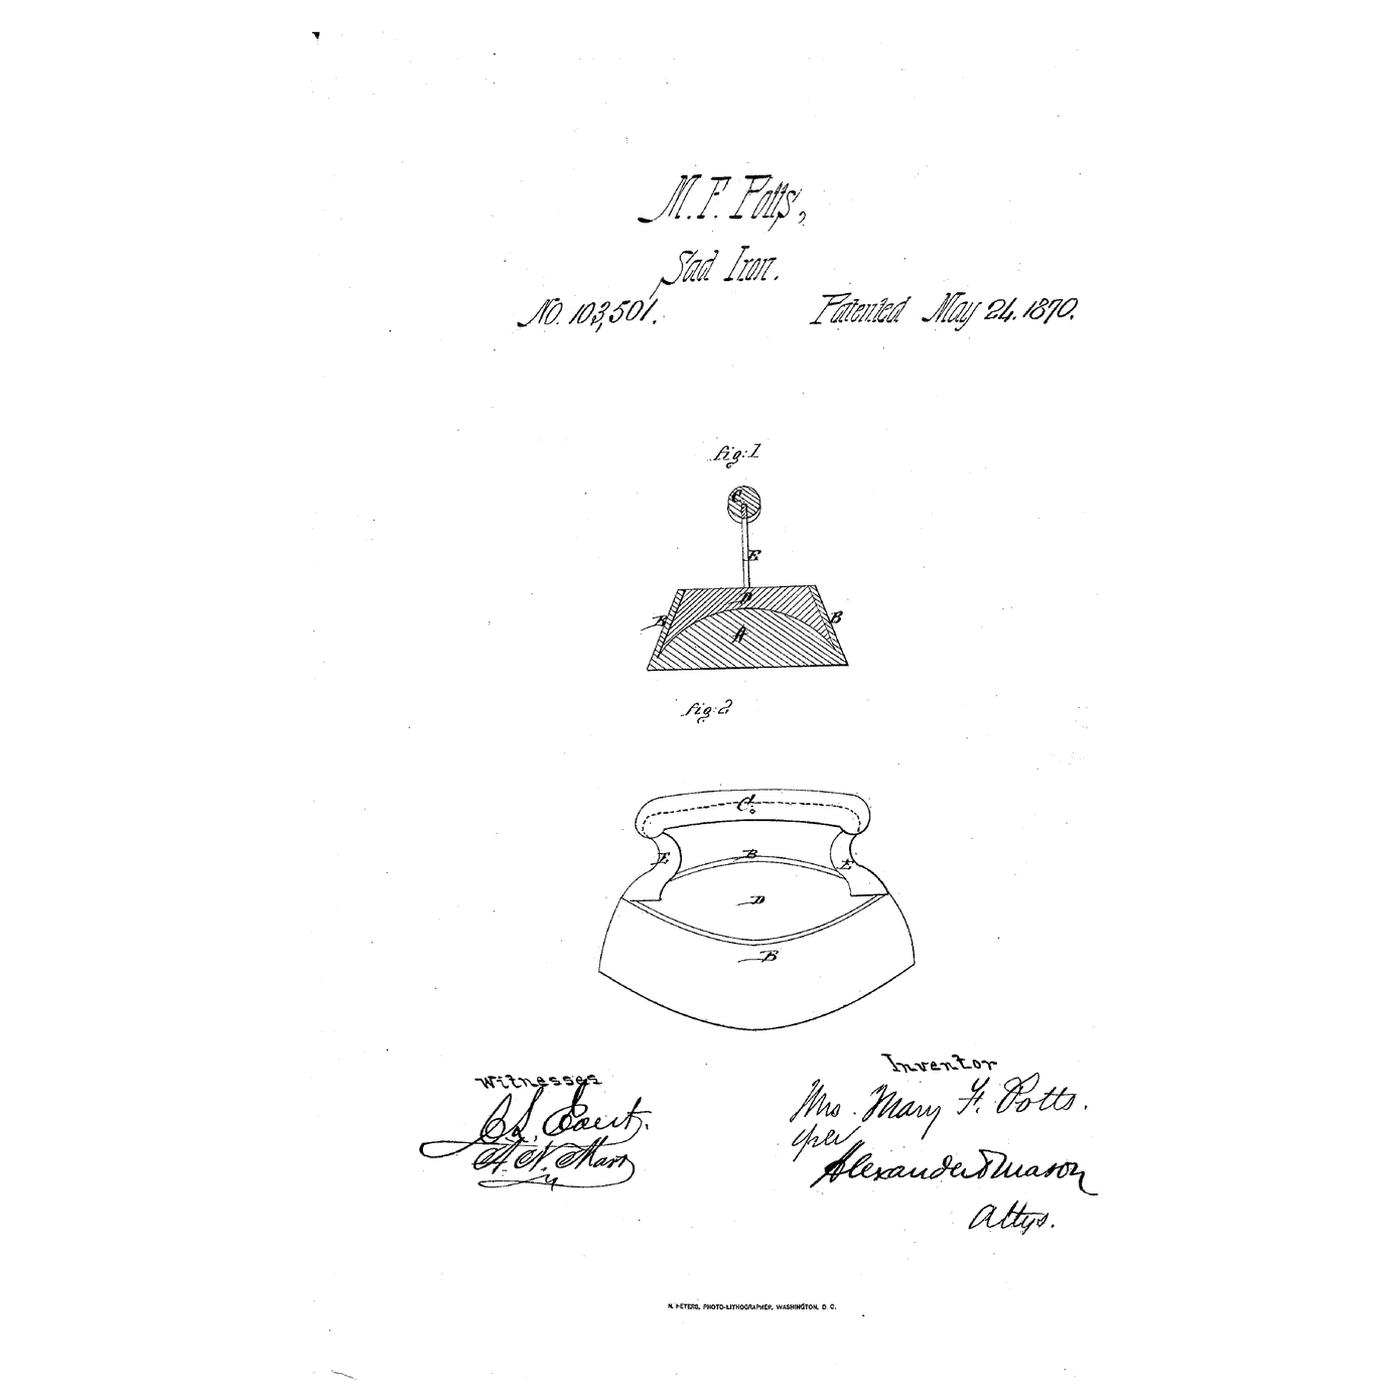
The embedded blueprint is an 1870 sad iron; Caylor's table has a stand for it at the front.
3
3
Read US 187,254
Read US 187,254
"The object of this invention is to furnish an improved ironing-table, which shall be so constructed that it may be attached to a table or other convenient support, may be supported at any desired height, may have a shirt-board and a sleeve-board attached to it, and shall be provided with a clothes-rack and a stand for the sad-irons."
Hand-nuts on two bolts clamp the front end "to the edge of a table, a stand, a sewing-machine table, a chair-board, a window-ledge, or other convenient support." The rear end is supported by a leg "hinged to the said table A, so that it may be turned up against the under side of the table, when not required for use", made in two sliding parts to adjust its length.
"The forward ends of the shirt-board E and of the sleeve-board F are made thicker, and are beveled off upon the lower side, so that the rear parts of the said boards may stand up a little from the table A, to allow shirts and sleeves to be placed upon them readily."
4
4
Build it and iron a sleeve
Build it and iron a sleeve
Cut a board about a metre long and a narrow sleeve board with one end rounded. Fix two bolts with wing nuts and a batten under the front end so it clamps to a table edge, and hinge a leg near the far end with a peg to set its length. Pad both boards with cloth.
Clamp it to a table, first without the leg: press down near the far end with the force meter and feel it flex. Put the leg down and press again. Then slip a shirt sleeve over the sleeve board and iron it without a crease along its edge.
Materiais para este passo:
 Placa de contraplacado1 peça
 Parafusos de máquina2 peças
 Tecido de algodão (leve)1 peça
Ferramentas necessárias:
 Tábua de mangas
 Ferro de engomar a vapor
 Berbequim sem fios
 Dinamómetro (balança de mola)
 Régua
Régua5
5
A board that wobbles, tips or creases sleeves
A board that wobbles, tips or creases sleeves
Ironing table troubleshooting.
Flow
Loading...
6
6
History and honest limits
History and honest limits
The **Rev. Edward H. Caylor** of West Elkton, Ohio, filed US 187,254 on 18 November 1876; it is dated 13 February 1877. His table also swings out pivoted arms as a clothes-airing rack.
**Honest limits.** The notebook treats the board as a rigid beam with point supports; a real clamp and board flex. Forces and lengths are examples. What you feel with the force meter is the measurement.
Materiais
3- 1 peçaReferência
- 2 peçasReferência
- 1 peçaReferência
Ferramentas necessárias
5- Referência
- Referência
- 1 vendor sell this, none ship to you yetReferência
- Referência
- Referência
Blueprints relacionados
Estes blueprints compartilham conhecimento — técnicas, materiais ou princípios


CC0 Domínio Público
Este blueprint é liberado sob CC0. Você é livre para copiar, modificar, distribuir e usar este trabalho para qualquer finalidade, sem pedir permissão.
Apoie o Maker comprando produtos através do Blueprint, onde ele ganha uma Comissão Maker definida pelos vendedores, ou crie uma nova versão deste Blueprint e inclua-o como conexão no seu próprio Blueprint para compartilhar receita.