ARTE
BELEZA E BEM-ESTAR
ARTESANATO
CULTURA E HISTÓRIA
ENTRETENIMENTO
MEIO AMBIENTE
COMIDA E BEBIDAS
ENGENHARIA REVERSA
CIÊNCIAS
ESPORTES
TECNOLOGIA
TECNOLOGIA VESTÍVEL
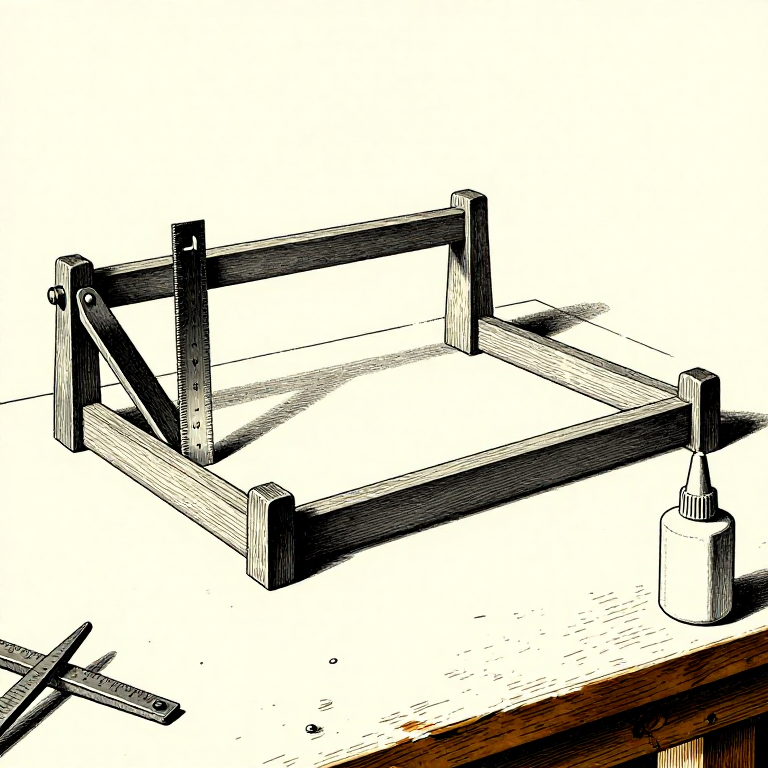


The Dry Run: Assemble It Once With No Glue at All
Once the glue is on, the clock is running and every problem has to be solved in minutes. The dry run moves all of those problems to a time when there is no clock at all.
You assemble the whole thing with no adhesive, fit every clamp, check it is square, and take it apart again. Everything that goes wrong then is free to fix; the same thing going wrong during the glue-up costs the assembly.
It is the step experienced makers never skip and beginners almost always do — because it feels like doing the work twice, and it is in fact the only way to do it once.
Iniciante
2 hours
Instruções
1
1
Fit every clamp you intend to use
Fit every clamp you intend to use
Not an approximation — the actual clamps, in the actual positions, tightened as they will be. Then look at what happened.
The usual discoveries: a clamp that will not reach, a bar that fouls another clamp, a jaw that lands on a face it will mark, and — most often — that you do not own enough clamps. Every one of those is a five-minute problem now and a ruined assembly later.
Lay the clamps out open and ready afterwards, at the reach you measured. Hunting for a clamp with glue going off is exactly the situation the dry run exists to prevent.
Materiais para este passo:
 Tábua de madeira de lei4 peças
Ferramentas necessárias:
 Sargento de barra
 Grampo em C
 Ripa distribuidora de pressão
2
2
Check square, check flat, check it sits down
Check square, check flat, check it sits down
With everything clamped dry, measure the diagonals, put a straightedge across the faces, and stand it on a flat surface to see whether it rocks.
A frame that will not come square dry will not come square glued — the fault is in the parts, and this is the moment to find out which one. A carcass that rocks is twisted, and twist cured into a glue-up is permanent.
Adjust until it is right with no glue involved. Then you know that when it goes wrong during the real glue-up, the cause is something you did in the last five minutes rather than something built into the parts.
Ferramentas necessárias:
 Esquadro fixo
 Régua de traçarSargento de barra
3
3
Mark the parts so they cannot go back wrong
Mark the parts so they cannot go back wrong
While it is together dry, mark every joint — a pencil triangle across the whole assembly, or numbered pairs — so each part has one obvious home.
Joints that were fitted to each other are not interchangeable. A tenon eased to fit its own mortise will be loose in the next one, and two dovetails that looked identical are not. Swapping them during the glue-up is a common and completely avoidable disaster.
Mark on faces that will be inside the joint or planed off later. A cabinetmaker's triangle across the top of an assembled frame tells you orientation and order at a glance and disappears in the first cleanup.
Materiais para este passo:
Tábua de madeira de lei4 peçasFerramentas necessárias:
Esquadro fixo4
4
Lay out everything, then rehearse the order
Lay out everything, then rehearse the order
Put the glue, the brush, the clamps, the cauls, a damp cloth and the square within reach before any glue is opened. Walk through the sequence once with your hands.
The order matters more than it looks: which joint gets glue first, which sub-assembly goes together before the whole, which clamp goes on before another blocks it. Deciding that mid-glue-up is where mistakes come from.
For anything with more joints than the open-time arithmetic allows — the adhesive rung computes this — plan it as STAGES from the start. Glue the two sides today, join them tomorrow. Nobody is fast enough to beat a skinned glue line, and planning to be is the underlying error.
Materiais para este passo:
 Cola branca para madeira (PVA)1 peça
Ferramentas necessárias:
 Pincel para cola
 Pano de algodãoSargento de barra
Materiais
2- 4 peçasReferência
- Referência
Ferramentas necessárias
7- Referência
- Referência
- Referência
- Referência
- Referência
- Referência
- Referência
Blueprints relacionados
Estes blueprints compartilham conhecimento — técnicas, materiais ou princípios
CC0 Domínio Público
Este blueprint é liberado sob CC0. Você é livre para copiar, modificar, distribuir e usar este trabalho para qualquer finalidade, sem pedir permissão.
Apoie o Maker comprando produtos através do Blueprint, onde ele ganha uma Comissão Maker definida pelos vendedores, ou crie uma nova versão deste Blueprint e inclua-o como conexão no seu próprio Blueprint para compartilhar receita.