
ARTE
BELEZA E BEM-ESTAR
ARTESANATO
CULTURA E HISTÓRIA
ENTRETENIMENTO
MEIO AMBIENTE
COMIDA E BEBIDAS
ENGENHARIA REVERSA
CIÊNCIAS
ESPORTES
TECNOLOGIA
TECNOLOGIA VESTÍVEL
Thin-Layer Chromatography: Making Your Own Plates
Mary

Criado por

Mary

23. setembro 2026FI
24
0
0
0
0

Thin-Layer Chromatography: Making Your Own Plates

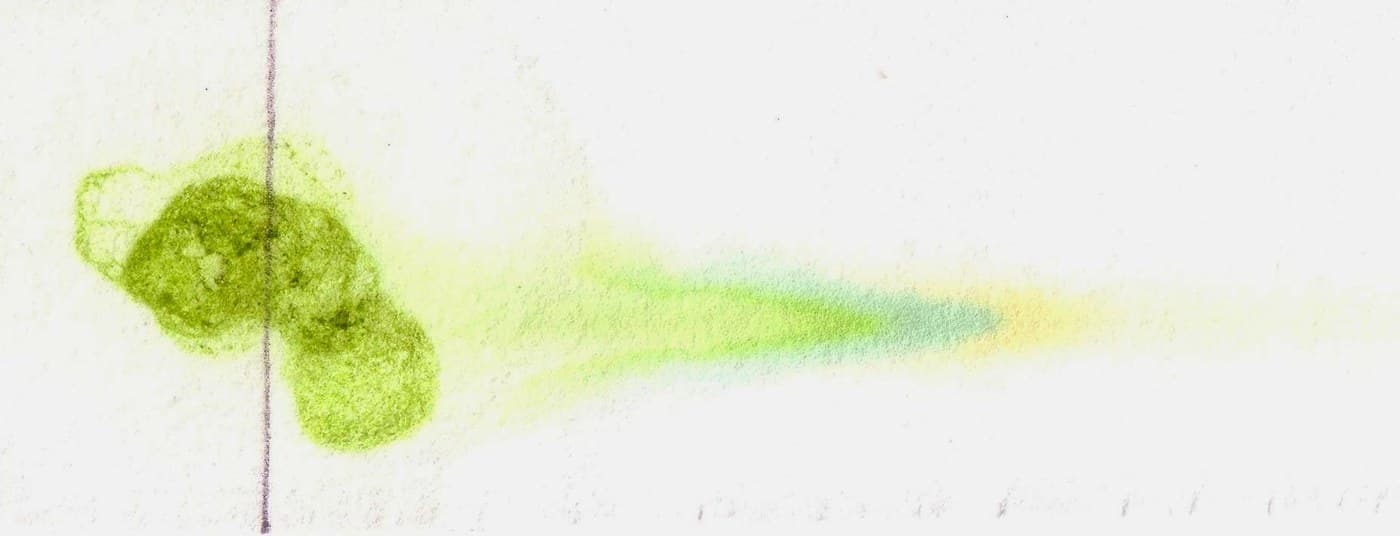
Paper is cellulose, and cellulose is a mediocre stationary phase: its fibres are coarse, they run in one direction, and a spot spreads as it climbs. Egon Stahl's answer in 1956 was to throw the paper away and spread a thin layer of fine powder on a sheet of glass instead. A silica layer a quarter of a millimetre thick, made of particles a few thousandths of a millimetre across, gives far less room for a spot to wander. Runs finish in fifteen minutes instead of hours, spots stay tight, and — because glass does not burn or dissolve — you can develop the plate with corrosive reagents or heat that would destroy paper. Commercial plates are cheap and excellent. Make your own anyway, once: spreading the slurry is where you learn what an even layer is worth, and why the plate, not the chemistry, is usually what went wrong.
Intermediário
1 day

Instruções

1

Clean the glass until water sheets off it

Wash microscope slides in hot detergent, rinse, and finish with a wipe of isopropyl alcohol. Handle them by the edges from now on. Test them: water should spread into an unbroken film, not bead up. A bead means grease, and grease means the silica layer will lift away in a flake exactly there — usually halfway through a run, taking your sample with it. This is the least interesting step and the one that decides whether the plates work.

Materiais para este passo:

Lâminas de microscópio com lamelasLâminas de microscópio com lamelas20 peças
Álcool isopropílico a 99 %Álcool isopropílico a 99 %100 ml

Ferramentas necessárias:

Luvas de nitriloLuvas de nitrilo
2

Mix the slurry: silica, gypsum binder, water

Stir 3 parts chromatography-grade silica gel and 1 part gypsum into about 2 parts water by weight, to the consistency of thin cream. Use it within a few minutes. The gypsum is calcium sulfate — plaster — and it is the only thing holding the silica to the glass; a layer made without it dusts off at a touch. This is exactly the composition sold as 'silica gel G', where the G stands for gypsum. Work fast, because plaster starts setting as soon as it is wet and a slurry that has begun to go off spreads in ridges.

Materiais para este passo:

Gel de sílica (grau cromatográfico)Gel de sílica (grau cromatográfico)30 g
Gesso natural (sulfato de cálcio)Gesso natural (sulfato de cálcio)10 g

Ferramentas necessárias:

Balança digitalBalança digital
Copo de precipitação de borossilicatoCopo de precipitação de borossilicato
3

Coat the plates evenly

The simplest method that works: hold two slides back to back, dip them into the slurry, withdraw them smoothly and steadily, separate them and stand them on edge to dry. Steadily is the whole instruction. Any hesitation leaves a horizontal line in the layer, and a solvent front reaching that line slows, stalls, or jumps it — giving you an Rf value that is a property of your dipping technique rather than of the compound. A uniform thin layer is worth more than a thick careful one.

Ferramentas necessárias:

Copo de precipitação de borossilicatoCopo de precipitação de borossilicato
Luvas de nitriloLuvas de nitrilo
4

Activate the plates in an oven

Air-dry the plates, then heat them at about 110 °C for half an hour and store them somewhere dry until use. Silica holds water on its surface, and adsorbed water occupies exactly the sites your sample needs to stick to. A damp plate therefore behaves as a weaker stationary phase: everything runs faster and the separation compresses. This is the usual reason Rf values drift between a dry week and a humid one, and it is why published Rf figures always state the activation.

Ferramentas necessárias:

Placa de aquecimentoPlaca de aquecimento
5

Spot, develop, and mark the front at once

Mark a faint pencil origin line 1 cm from one end — press lightly, because a hard line scores through the layer. Spot as small as you can, then stand the plate in a closed jar with solvent below the origin line. A thin layer develops fast: the front may reach the top in five to fifteen minutes. Take the plate out while the front is still a centimetre short of the top edge and mark it immediately with pencil, because it evaporates in seconds. A front that ran off the end means every Rf from that plate is unrecoverable.

Materiais para este passo:

Etanol de laboratório, 95 %Etanol de laboratório, 95 %50 ml
Ácido acético (glacial)Ácido acético (glacial)5 ml
EspinafreEspinafre50 g

Ferramentas necessárias:

Frasco de vidroFrasco de vidro
Tubo capilar de vidroTubo capilar de vidro
6

Visualise: iodine first, then heat

Stand the dry plate in a closed jar with a few iodine crystals. Most organic spots turn brown within minutes. Circle them in pencil while they show. Then use what glass allows and paper does not: spray the plate with dilute sulfuric acid and heat it, and every organic compound chars to a permanent black spot. It is destructive and utterly general — nothing organic escapes it. That trick is the real reason Stahl's layers displaced paper, and it needs a fume extract and full protection, so treat it as an optional advanced finish rather than a routine step.

Materiais para este passo:

Cristais de iodoCristais de iodo2 g

Ferramentas necessárias:

Frasco de vidroFrasco de vidro
Luvas de nitriloLuvas de nitrilo
Óculos de proteção estanquesÓculos de proteção estanques
7

Why a thin layer beats paper

A carregar o notebook Jupyter…

Ferramentas necessárias:

RéguaRégua
CronómetroCronómetro
8

Use it the way a chemist actually uses it

Spot three lanes on one plate: your unknown, a known reference compound, and a spot of BOTH together. Develop them side by side. That third lane is the point. If the unknown and the reference are the same substance, the co-spot runs as a single round spot; if they merely have similar Rf values, it runs as an elongated or double spot that neither lane alone would have revealed. Matching Rf values is suggestive — a clean co-spot is evidence. This is how a bench chemist follows a reaction to completion, and it costs one extra capillary.

Ferramentas necessárias:

Tubo capilar de vidroTubo capilar de vidro
Frasco de vidroFrasco de vidro
RéguaRégua

Materiais

8

Ferramentas necessárias

9

CC0 Domínio Público

Este blueprint é liberado sob CC0. Você é livre para copiar, modificar, distribuir e usar este trabalho para qualquer finalidade, sem pedir permissão.

Apoie o Maker comprando produtos através do Blueprint, onde ele ganha uma Comissão Maker definida pelos vendedores, ou crie uma nova versão deste Blueprint e inclua-o como conexão no seu próprio Blueprint para compartilhar receita.

Discussão

(0)

Entrar para participar da discussão

Carregando comentários...