Colaboração
ARTE
BELEZA E BEM-ESTAR
ARTESANATO
CULTURA E HISTÓRIA
ENTRETENIMENTO
MEIO AMBIENTE
COMIDA E BEBIDAS
ENGENHARIA REVERSA
CIÊNCIAS
ESPORTES
TECNOLOGIA
TECNOLOGIA VESTÍVEL
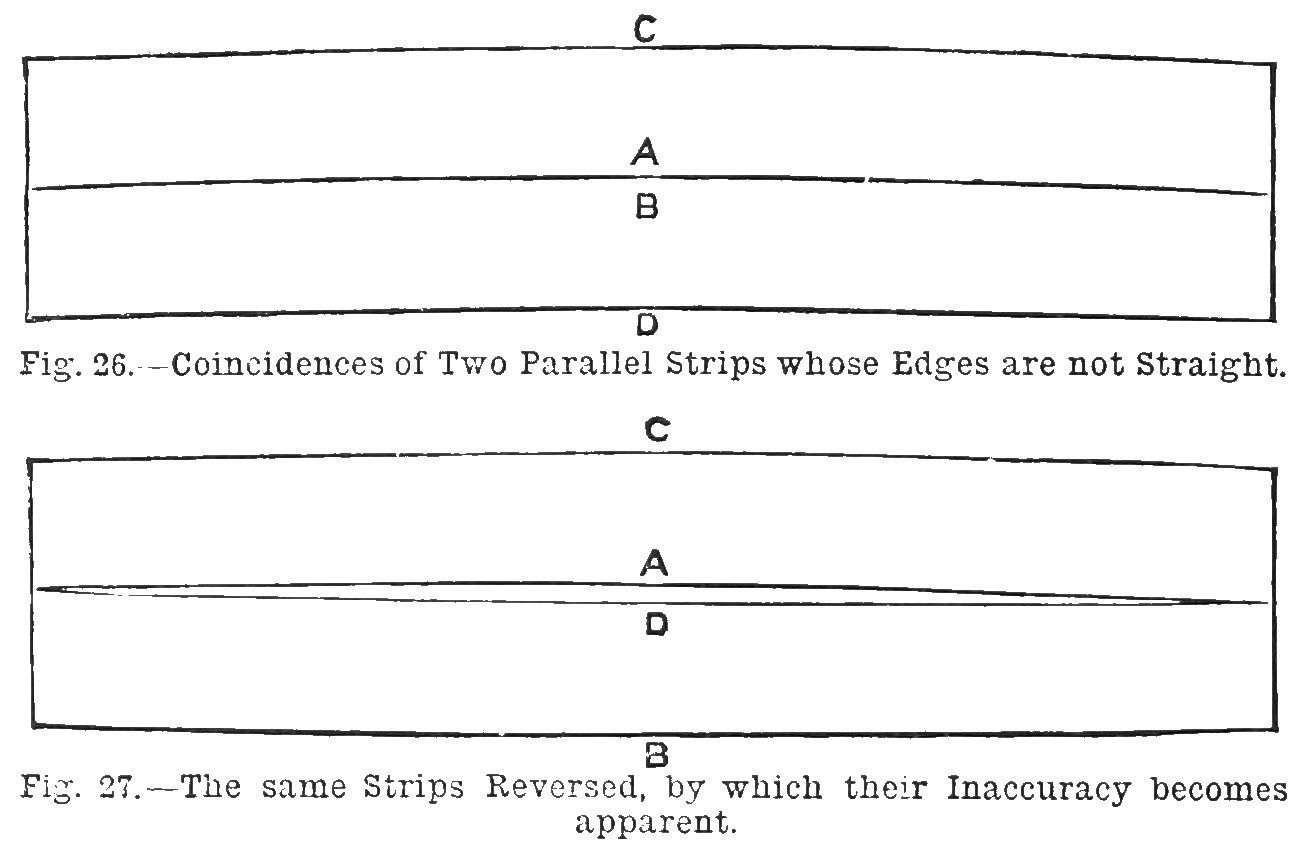


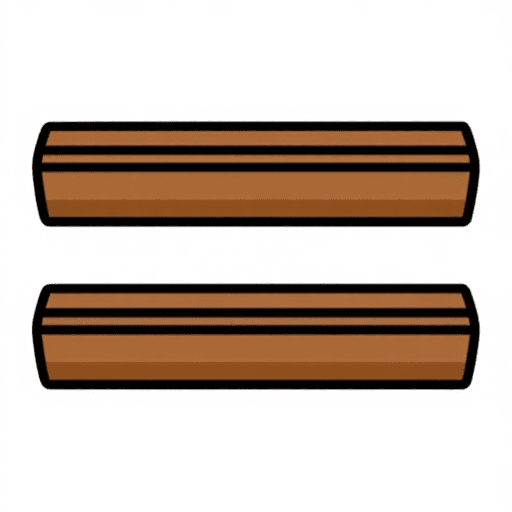
Winding Sticks: a Pair of Parallel Mahogany Strips Planed Together (Work, 1889)
Two parallel wooden strips laid across a board to show twist (winding). Carpenters and joiners made their straightedges in pairs as winding strips: if two parallel strips still meet edge to edge when their edges and ends are swapped, three edges have been checked against each other and the strips are true.
Straight-grained mahogany is used for strips under three feet. The two are planed together, then tried against each other and reversed until no difference shows.
Source: J. H., 'Home-Made Tools', Work, 26 October 1889, pp. 499-500. Picture: Figs. 26-27.
Intermediário
Unknown (the stuff is left to stand for days or weeks first)
Instruções
1
1
Read the source
Read the source
"Carpenters, joiners, pattern makers, and cabinet makers usually make their straightedges in pairs as 'winding strips;' and it is clear that if two winding strips are in the first place parallel, and then coincident when the positions of edges and ends are changed, there is obtained really the contact of three edges." (Work, 26 October 1889.)
2
2
Rough out and let stand
Rough out and let stand
Rough out two strips of well-seasoned, straight-grained mahogany (for strips under three feet; long ones are made of yellow pine). Jack them over and let them stand for a few days or even weeks, because fresh-cut strips curve and warp. Length, width and thickness are not given (unknown).
Materiais para este passo:
 Ripa de madeira dura2 mahogany strips
Ferramentas necessárias:
 Plaina manual
 Dimensões desconhecidas
3
3
Plane them together
Plane them together
Plane both to gauged thickness and width and square the ends. Screw the two side by side, then finish the edges together with a trying plane sharpened keenly and set very fine. Gauge to width with a fine-toothed gauge, check them parallel with calipers, and keep the edges square to the faces with a try square.
Ferramentas necessárias:
 Parafusos para madeiraPlaina manual
 Graminho
 Paquímetro
 Esquadro fixo
4
4
Test the edges
Test the edges
To test an edge without a straightedge, lay the strip on a board, scribe a fine line along the edge, turn the strip over and bring the opposite edge to the line: any error shows at twice its size. Plane off the high parts, still checking with calipers and square.
Ferramentas necessárias:
 Tábua de madeira de lei
 Faca de marcarPlaina manualPaquímetroEsquadro fixo
5
5
Unfasten and try them against each other
Unfasten and try them against each other
Take the screws out. Lay the strips edge to edge by opposite edges in turn, then change ends and try the opposite edges again, correcting with the trying plane until no difference shows (woodworkers test by chalking the edges and laying them together). Most of the work should already have been done while they were joined.
Ferramentas necessárias:
 Giz de marcaçãoPlaina manualPaquímetroEsquadro fixo
6
6
Varnish the faces
Varnish the faces
Protect the broad faces and the ends with shellac varnish, but not the edges, which are chalked in use. Chalking wears the edges hollow and wood always warps a little, so re-correct winding strips every few months, and keep them for testing winding only.
Materiais para este passo:
 Verniz de goma-laca1 faces and ends
Materiais
2- 2 mahogany stripsReferência
- 1 faces and endsReferência
Ferramentas necessárias
9- Referência
- Referência
- Referência
- Referência
- 1 vendor sell this, none ship to you yetReferência
- Referência
- Referência
- Referência
- Referência
Este projeto faz
CC0 Domínio Público
Este blueprint é liberado sob CC0. Você é livre para copiar, modificar, distribuir e usar este trabalho para qualquer finalidade, sem pedir permissão.
Apoie o Maker comprando produtos através do Blueprint, onde ele ganha uma Comissão Maker definida pelos vendedores, ou crie uma nova versão deste Blueprint e inclua-o como conexão no seu próprio Blueprint para compartilhar receita.