艺术
美容与健康
工艺
文化与历史
娱乐
环境
食品与饮料
逆向工程
科学
体育
技术
可穿戴设备
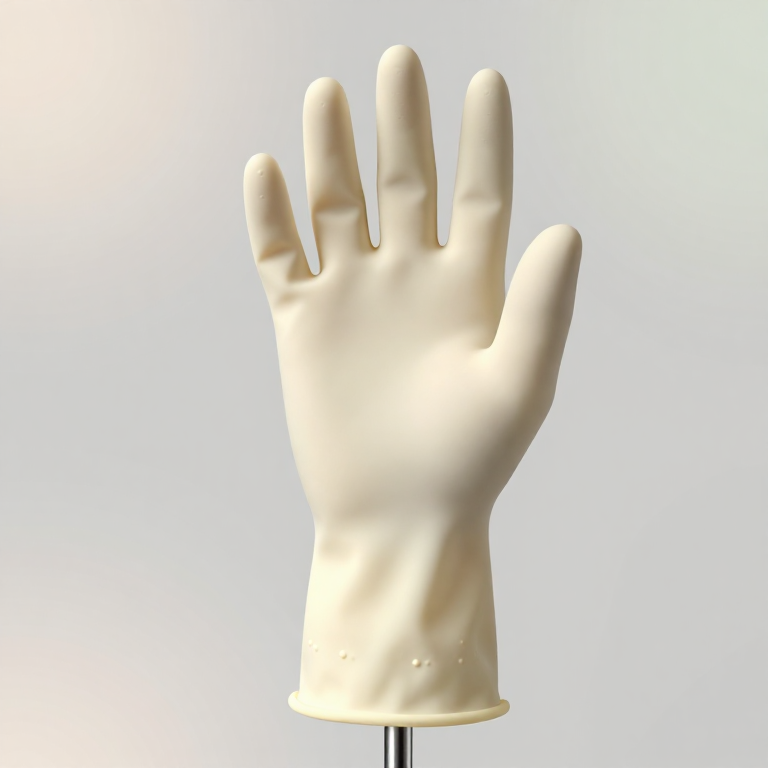


The Surgical Rubber Glove
The surgical glove was not invented to protect the patient. It was invented in 1890 at Johns Hopkins because William Halsted's scrub nurse, Caroline Hampton, was developing severe dermatitis from the mercuric chloride used to disinfect hands. Halsted asked the Goodyear company to make thin rubber gloves so she could keep working.
Only afterwards did anyone notice that the gloves were also keeping the surgeon's hands out of the wound. The asepsis case — the reason gloves are universal now — was a side effect that took another decade to be argued properly.
That history is worth holding onto, because it is a clean example of a solution finding a second and larger function than the one it was built for. It also explains the design constraints, which are unusual. A surgical glove must be thin enough to feel a suture knot through, strong enough not to tear on bone, chemically inert, and manufacturable in a size range with a fit close enough that it does not bunch. Almost nothing else has that combination.
You will make gloves by coagulant dipping, the process still used today, and measure the two properties that decide whether a glove is any good: wall thickness uniformity, and whether it leaks.
中级
6 hours
说明
1
1
Make the former, because the former is the glove
Make the former, because the former is the glove
In dip moulding the mould is called a former, and it is the only tooling. Its surface finish becomes the inside surface of the glove, its shape is the glove's shape, and its thermal mass sets how the film builds.
Make a hand former from close-grained hardwood or dense plaster, sanded to a genuinely smooth finish and sealed. Get the geometry right at three places that matter more than the rest: the web between thumb and index finger, which is where gloves tear; the fingertips, which must be rounded generously because a sharp radius gives a thin film exactly where you need thickness; and the cuff, which needs a slight taper so the finished glove rolls off.
Mount it on a rod so you can dip and withdraw it vertically, and so you can rotate it while the film sets. Rotation matters — a stationary former drains to one side and you get a thick edge and a thin one.
Warm the former before dipping. Temperature is a process variable here, not a comfort: the coagulant works by local destabilisation of the latex at the surface, and a warm former deposits faster than a cold one.
此步骤所需材料:
 硬木块——窑干1 个
 虫胶封闭底漆250 millilitre
所需工具:
 木锉(粗齿)
 手用锉刀
手用锉刀 Digital Calipers - 152.4 mm
 热风枪
热风枪2
2
How thick will the film be?
How thick will the film be?
正在加载 Jupyter 笔记本…
所需工具:
 台式电脑
台式电脑3
3
The dipping line, in order
The dipping line, in order
Every step in a dipping line exists to fix a specific defect, and running them out of order produces a glove that fails in a specific way. This flow puts the sequence down with the reason attached to each stage.
The two that makers usually skip are leaching and post-cure. Leaching washes out residual proteins and processing chemicals — skip it and you have made a glove that causes exactly the contact dermatitis the glove was invented to prevent, which would be a poor joke. Post-cure completes vulcanisation; skip it and the film is tacky, weak, and ages badly.
Follow the diagram once dry-run with no latex, so the timing is muscle memory before anything is wet.
Flow
Loading...
此步骤所需材料:
 过滤后的乳胶2 升
 硝酸钙500 gram
 99% 异丙醇250 millilitre
所需工具:
 电热板
电热板 不锈钢碗套装
 实验室温度计
4
4
Dip, and then dip again with one thing changed
Dip, and then dip again with one thing changed
Run the line from step 3 and make your first glove. Then make five more, changing exactly one variable each time and holding everything else fixed: former temperature, coagulant concentration, dwell time, withdrawal speed, and whether you rotate during drain.
This single-variable discipline is the difference between a process and a series of accidents. Latex dipping has enough interacting parameters that changing two at once teaches you nothing at all.
After cure, measure wall thickness at nine points on each glove: three fingertips, the web, the palm, the back, and three points around the cuff. Use the calipers with a light touch — rubber compresses, and a heavy hand reads thin. Record the mean and, more importantly, the spread.
The spread is the quality metric. A glove with a 150 micron mean and a 40 micron spread is worse than one with a 180 micron mean and a 10 micron spread, because the thin spot is where it fails and nobody cares about the average. Rank your six gloves by spread and see which variable bought you the most uniformity. It will almost certainly be the rotation during drain.
此步骤所需材料:
过滤后的乳胶2 升硝酸钙250 gram所需工具:
Digital Calipers - 152.4 mm热风枪 精密数字天平
5
5
The water leak test, and the honest limit
The water leak test, and the honest limit
The industry test for glove integrity is beautifully simple and you can run it exactly as specified. Seal the cuff, fill the glove with one litre of water, hang it, and watch for two minutes. Any droplet forming anywhere is a failure. No droplet is a pass.
Run it on all six gloves and correlate failures against your thickness map. The leaks will be at the thin spots, and the thin spots will be at the fingertips and the web — the two places you were warned about when shaping the former. That closes the loop from step 1 and is the most satisfying result in this build.
Also hold each glove up to a light and look. Pinholes from dust on the former during the coagulant stage are the other common defect, and they are visible before they leak.
Where this stops, stated plainly. You have made a dipped latex glove and measured its wall and its integrity. That is real dip-moulding practice. It is not a surgical glove. A surgical glove is made in a clean environment, sterilised by a validated route, sampled by lot to a defined acceptable quality limit for pinholes, tested for residual protein because latex allergy is a genuine and occasionally severe hazard, and sized to a standard so a surgeon's fit is predictable. The single most important of those for a maker to respect is the allergy one: natural rubber latex proteins sensitise people, sensitisation is cumulative, and it is the reason most clinical settings moved to nitrile. If you or anyone near your bench reacts to latex, make this blueprint with a nitrile dispersion instead and keep everything else the same.
此步骤所需材料:
 蒸馏水5 升
所需工具:
 铁架台(实验支架)
 数码显微镜
数码显微镜材料
6- 1 个占位符
- 250 millilitre占位符
- 2 升占位符
- 750 gram占位符
- 250 millilitre占位符
- 5 升占位符
相关蓝图
这些蓝图共享知识——技术、材料或原理




CC0 公共领域
此蓝图以 CC0 协议发布。你可以自由复制、修改、分发和使用此作品,无需征得许可。
通过购买蓝图中的产品支持创客,他们将获得 创客佣金 (由供应商设定),或创建此蓝图的新版本并将其作为连接包含在你自己的蓝图中以分享收入。