
Zusammenarbeit
KUNST
SCHÖNHEIT & WELLNESS
HANDWERK
KULTUR & GESCHICHTE
UNTERHALTUNG
UMFELD
ESSEN & GETRÄNKE
REVERSE ENGINEERING
WISSENSCHAFTEN
SPORT
TECHNOLOGIE
WEARABLES
Bathroom Scale: Four Flat Load Cells Between Two Plates (Angel, 1991)
Penny

Erstellt von

Penny

2. November 2026DK
9
0
0
0
0

Bathroom Scale: Four Flat Load Cells Between Two Plates (Angel, 1991)

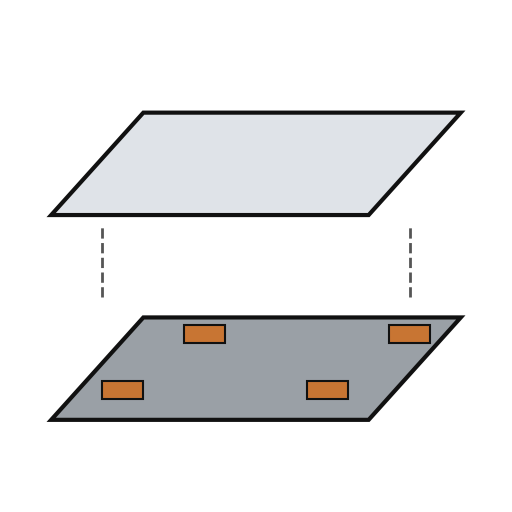
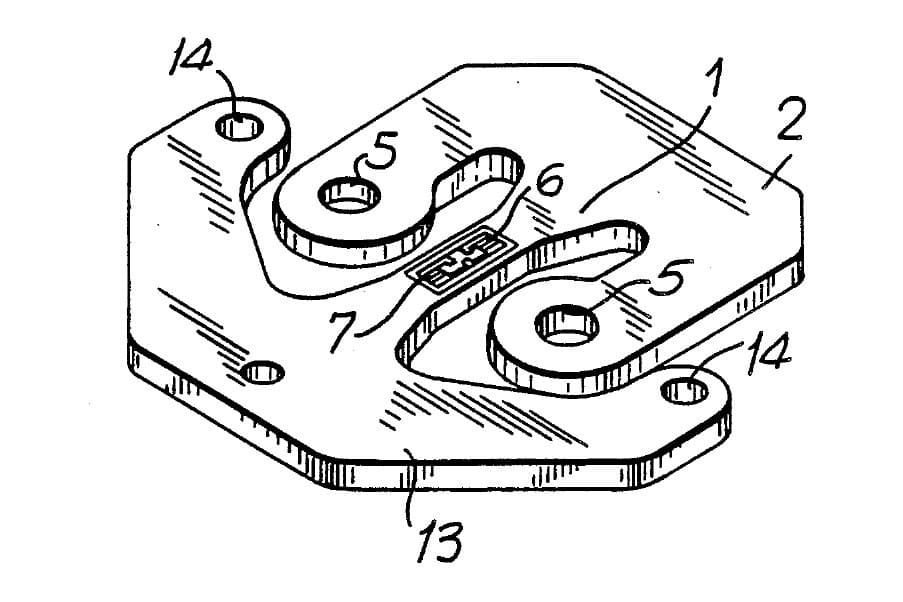
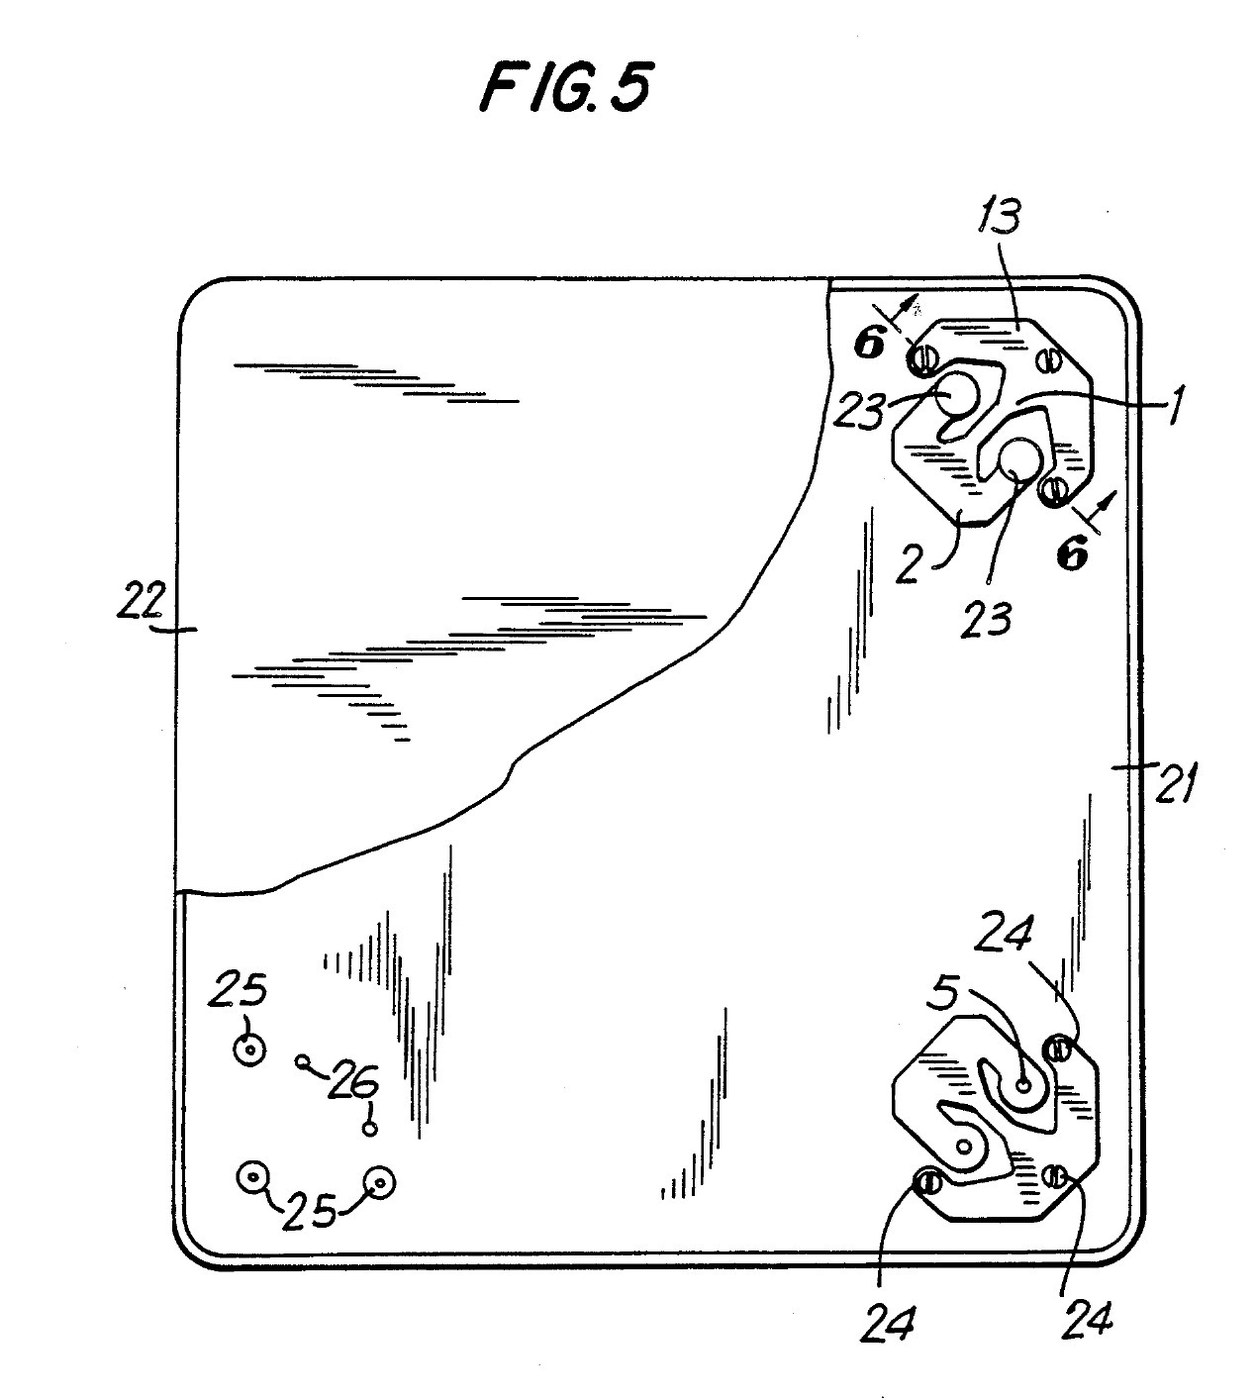
A floor scale only as thick as two plates. Four flat load cells sit in the corners between a base and a top plate; their strain gauges are wired into one bridge, so the signal is the sum of the four loads wherever you stand. Result: a low digital bathroom scale reading in pounds or kilograms. The patent gives under 0.05 % non-linearity, hysteresis and non-repeatability, and under 0.1 % error from off-centre loads; its feet let it stand on thick carpet. Source: S. Angel, US Patent 4,993,506 (1991). Unknown: the plate material and size, the maximum load, and the circuit. Ours: ebonite for the hard rubber, epoxy, the amplifier and display parts. Picture: patent drawing (Fig. 5).
Erfahren
2 days

Anweisungen

1

Mount the four load cells

Put one load cell in each corner of the rigid base plate. Screw each one down to small flat raised pads on the plate. Place the pads away from the edge of the cell's beam, so that fixing the cell does not change its sensitivity. Under each cell, tap two holes through the base for the overload screws. Not given: the plate material and size.

Materialien für diesen Schritt:

WägezelleWägezelle4 Stück
Grund- und Deckplatte der WaageGrund- und Deckplatte der Waage1 base and top plate

MaschinenschraubenMaschinenschrauben8 cell screws

Benötigte Werkzeuge:

GewindeschneidsatzGewindeschneidsatz
Schraubendreher-SatzSchraubendreher-Satz
Unbekannte MaßeUnbekannte Maße
2

Wire one bridge and the readout

Each cell's two gauges are half a Wheatstone bridge. Join the four halves into one full bridge, one half at each corner, so the bridge gives a signal in step with the sum of the four loads. The signal is amplified, turned into numbers by an analog-to-digital converter, worked into pounds or kilograms and shown on a display. Put the electronics and batteries in the space between the plates. Not given: the circuit. Ours: an op-amp and a segment LCD.

Materialien für diesen Schritt:

Operationsverstärker-ICOperationsverstärker-IC1 amplifier
Analog-Digital-WandlerAnalog-Digital-Wandler1 Stück
Segment-LCDSegment-LCD1 Stück
BatterieBatterie1 as the circuit needs
SchaltdrahtSchaltdraht1 as needed
LötdrahtLötdraht1 a little

Benötigte Werkzeuge:

LötkolbenLötkolben
3

Fit the top plate on hard rubber pads

Glue four flat round pads of a rigid but slightly yielding material, such as hard rubber, under the top plate. Give each pad small round studs that snap into the two load holes of its cell, so the weight goes in at the centres of those holes. The pads soften impacts when something is dropped on the scale and take up sideways forces as the top plate bends. The snaps let the top plate be pulled off for repairs. Ours: ebonite and epoxy.

Materialien für diesen Schritt:

EbonitstabEbonitstab1 four pads
ZweikomponentenepoxidZweikomponentenepoxid1 a little

Benötigte Werkzeuge:

Bügelsäge (Metallsäge)Bügelsäge (Metallsäge)
4

Fit the feet

Under the base, below each cell, fix a shallow foot of flexible material such as hard rubber, rounded underneath. Put its lowest point exactly below the centre of the cell's beam: the floor then pushes up at the beam's centre without bending it, and the scale works on thick carpet or uneven floors. Ours: ebonite.

Materialien für diesen Schritt:

EbonitstabEbonitstab1 four feet
ZweikomponentenepoxidZweikomponentenepoxid1 a little

Benötigte Werkzeuge:

Bügelsäge (Metallsäge)Bügelsäge (Metallsäge)
5

Set the overload stops

Load the scale to its maximum capacity. Turn the short screws in from below until they just touch the arms of each cell's loading element, then lock them with adhesive. Any heavier load now rests on the screws instead of bending the cells further. Not given: the maximum capacity. Ours: calibration weights and epoxy.

Materialien für diesen Schritt:

MaschinenschraubenMaschinenschrauben8 overload screws
ZweikomponentenepoxidZweikomponentenepoxid1 a little

Benötigte Werkzeuge:

KalibriergewichtssatzKalibriergewichtssatz
Schraubendreher-SatzSchraubendreher-Satz

Materialien

11

Benötigte Werkzeuge

6

Dieser Bauplan stellt her

Verwandte Blueprints

Diese Blueprints teilen Wissen — Techniken, Materialien oder Prinzipien
CC0 Gemeinfrei

Dieser Blueprint ist unter CC0 veröffentlicht. Sie dürfen dieses Werk für jeden Zweck frei kopieren, ändern, verbreiten und verwenden, ohne um Erlaubnis zu fragen.

Unterstützen Sie den Maker, indem Sie Produkte über seinen Blueprint kaufen, wo er eine Maker-Provision von Anbietern festgelegt, verdient. Oder erstellen Sie eine neue Iteration dieses Blueprints und verbinden Sie ihn in Ihrem eigenen Blueprint, um Einnahmen zu teilen.

Diskussion

(0)

Anmelden um an der Diskussion teilzunehmen

Kommentare werden geladen...