Zusammenarbeit
KUNST
SCHÖNHEIT & WELLNESS
HANDWERK
KULTUR & GESCHICHTE
UNTERHALTUNG
UMFELD
ESSEN & GETRÄNKE
REVERSE ENGINEERING
WISSENSCHAFTEN
SPORT
TECHNOLOGIE
WEARABLES
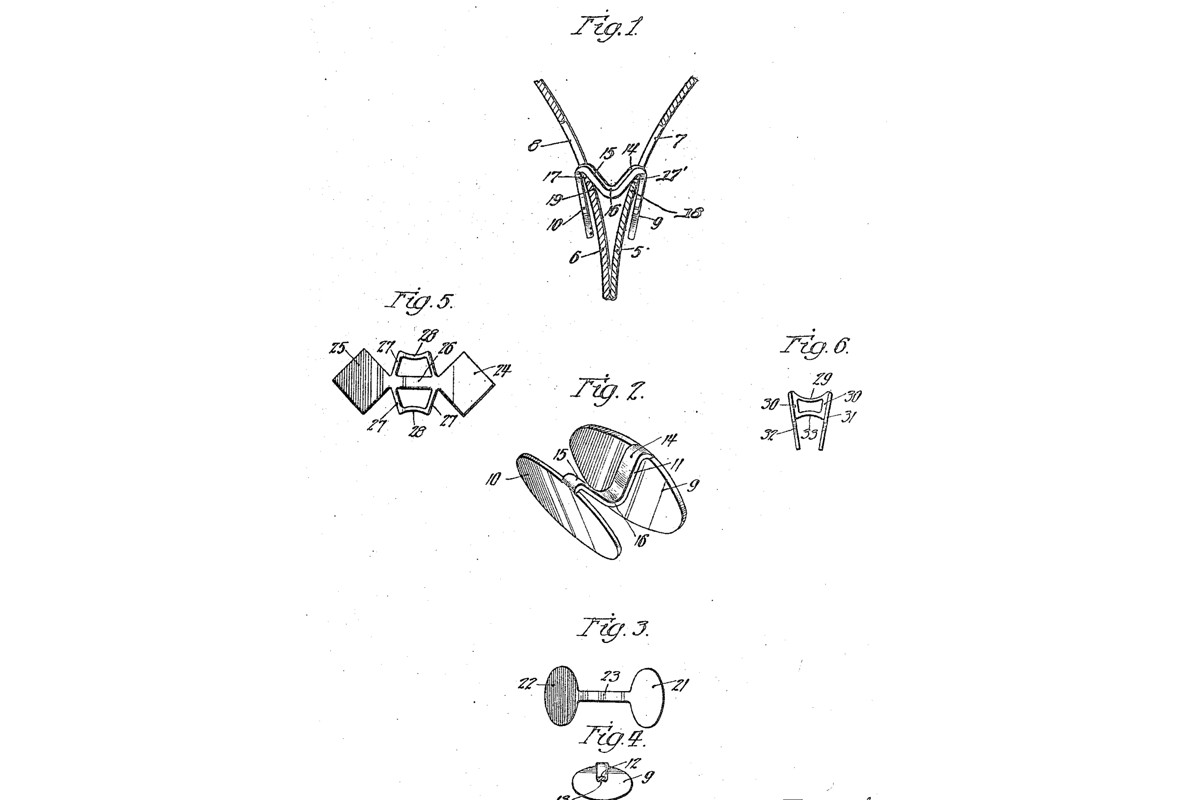


One-Piece Cuff Button: Two Faces and a V Shank Cut From One Brass Blank (Buchsbaum, 1923)
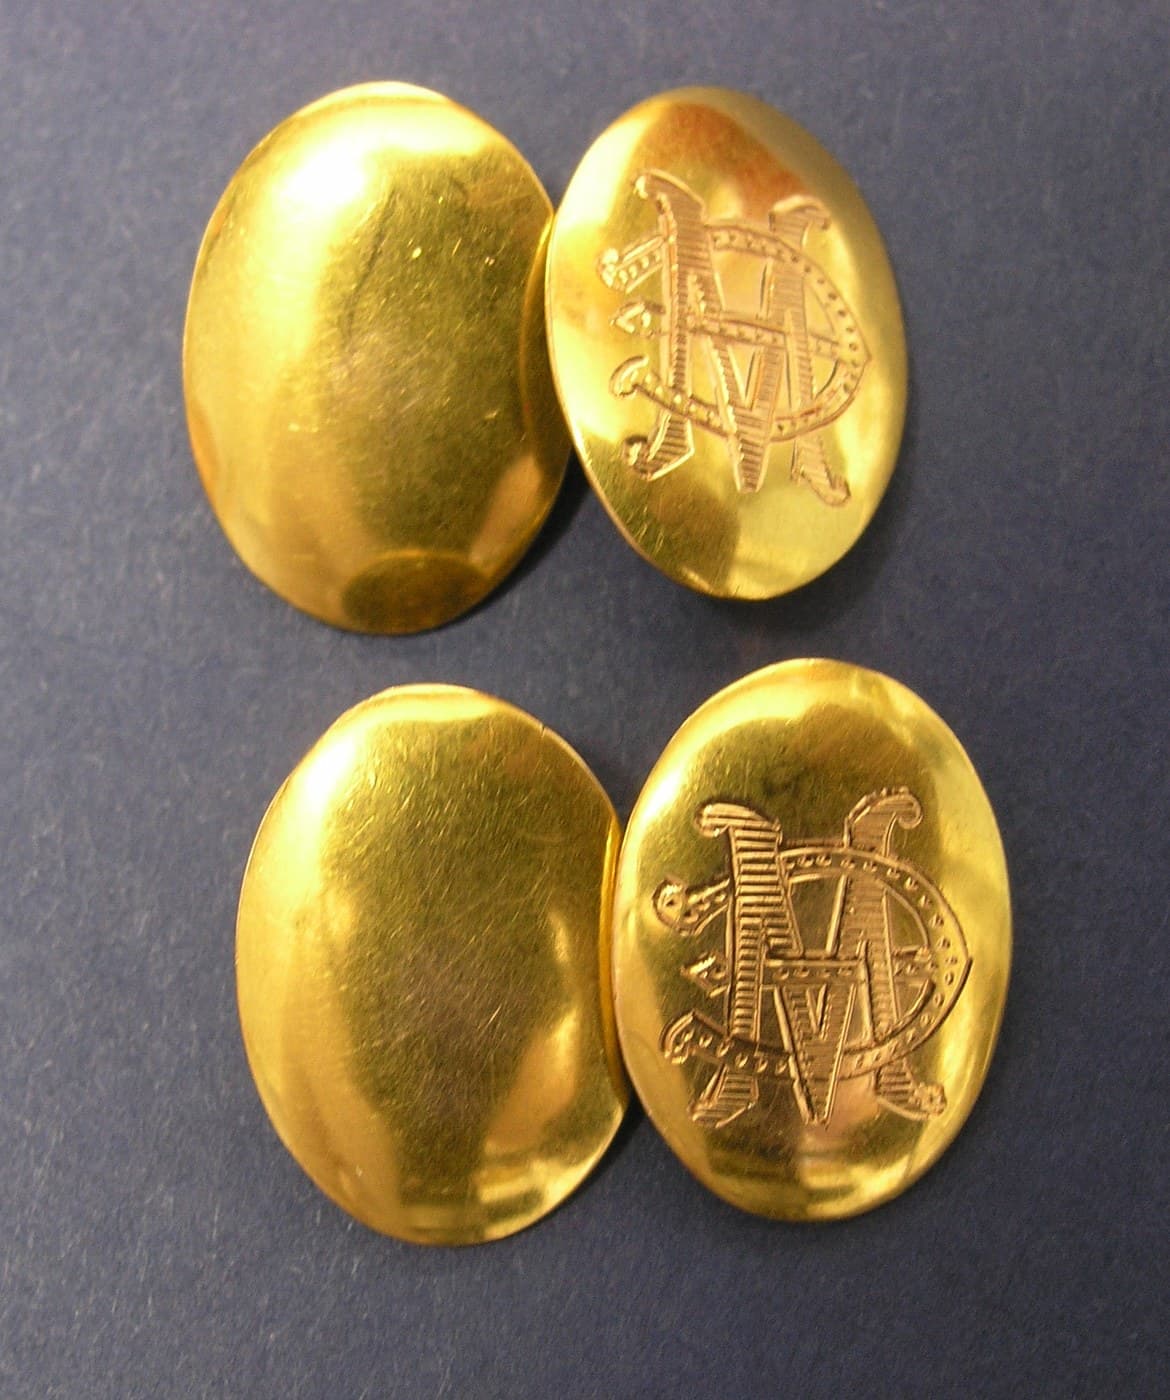
Samuel Buchsbaum of Chicago received US 1,444,023, dated 6 February 1923, for a cuff button made in one piece. A flat blank has two oval faces joined at their edges by a tongue. The tongue is bent into a V-shaped shank with a curved middle, and the faces lean in towards each other. Pockets between the shank and the faces hold the two ends of the cuff together. There is nothing to solder and nothing to come apart.
We cut it from brass sheet with a jeweller's saw, using a 1:1 template. All sizes are ours.
Anfänger
About 2 hours
Anweisungen
1
1
Where the cuff is gripped
Where the cuff is gripped
Jupyter-Notebook wird geladen …
2
2
Read US 1,444,023
Read US 1,444,023
"It is a purpose of the present invention to form a cuff button wherein the face members and shank portion are integral, said members being all stamped from a single sheet of material."
3
3
Print the template
Print the template
Three blanks at 1:1 with the bend lines, and a side view of the bent button. print at 100 % (check the 50 mm bar).
4
4
Cut the blank
Cut the blank
Cut a blank out of the paper and lay it on 0.8 mm brass sheet. Scribe round it. Saw just outside the line with a jeweller's saw, then file to the line, keeping the tongue an even 4 mm wide where it meets each face.
Materialien für diesen Schritt:
 Messingblech1 Stück
Benötigte Werkzeuge:
 Reißnadel
 Juweliersäge
 Nadelfeilensatz
 Schraubstock
5
5
Smooth the edges
Smooth the edges
Round every edge with the needle files and sandpaper so nothing can catch the cuff or the skin. Do the faces' fronts now: they are hard to reach once bent.
Benötigte Werkzeuge:
Nadelfeilensatz Schleifpapier
6
6
Bend the shank
Bend the shank
Hold the middle of the tongue round a 3 mm rod, or in the round-nose pliers, and bend both halves up into a V about 60 degrees apart (ours). The middle stays curved, as his part 16.
Benötigte Werkzeuge:
 Rundzange
 Rundstahl (Baustahl)
7
7
Bend the faces
Bend the faces
Grip each leg close to its face with the flat-nose pliers and fold the face back down outside the leg, so it hangs beside the leg and leans in a little, as in his Fig. 1. The narrow gap between leg and face is the pocket for the cuff. Check both faces sit level with each other.
Benötigte Werkzeuge:
 Flachzange
8
8
Polish
Polish
Polish the faces with polishing compound on a soft cloth.
Benötigte Werkzeuge:
 Polierpaste
9
9
Fit it to the cuff
Fit it to the cuff
Turn the button edgewise and pass one face through both buttonholes, turning it as it goes, as he describes. Each cuff end should sit in a pocket between a leg and its face, and the ends stay together. If it is too tight, open the faces out a little; if loose, press them in.
Benötigte Werkzeuge:
Flachzange10
10
Troubleshooting
Troubleshooting
One-piece cuff button troubleshooting.
Flow
Loading...
11
11
History and honest limits
History and honest limits
**Samuel Buchsbaum** of Chicago, US 1,444,023, dated 6 February 1923, filed 22 August 1921. He claimed "a blank for cuff buttons comprising a sheet metal member having enlarged end members and a connecting tongue joining the adjacent edge portions of said end members". His were stamped; ours is sawn and filed. He also shows a form with square ends and a reinforced tongue (Figs. 5-6), not built here. He gives no sizes or metal: the brass, the 18 x 12 mm faces, the 4 x 18 mm tongue and the angles are ours.
Materialien
1- 1 StückPlatzhalter
Benötigte Werkzeuge
9- Platzhalter
- Platzhalter
- Platzhalter
- Platzhalter
- Platzhalter
- Platzhalter
- Platzhalter
- Platzhalter
- Platzhalter
Designdateien
1Dieser Bauplan stellt her
Verwandte Blueprints
Diese Blueprints teilen Wissen — Techniken, Materialien oder Prinzipien
CC0 Gemeinfrei
Dieser Blueprint ist unter CC0 veröffentlicht. Sie dürfen dieses Werk für jeden Zweck frei kopieren, ändern, verbreiten und verwenden, ohne um Erlaubnis zu fragen.
Unterstützen Sie den Maker, indem Sie Produkte über seinen Blueprint kaufen, wo er eine Maker-Provision von Anbietern festgelegt, verdient. Oder erstellen Sie eine neue Iteration dieses Blueprints und verbinden Sie ihn in Ihrem eigenen Blueprint, um Einnahmen zu teilen.