KUNST
SCHÖNHEIT & WELLNESS
HANDWERK
KULTUR & GESCHICHTE
UNTERHALTUNG
UMFELD
ESSEN & GETRÄNKE
REVERSE ENGINEERING
WISSENSCHAFTEN
SPORT
TECHNOLOGIE
WEARABLES
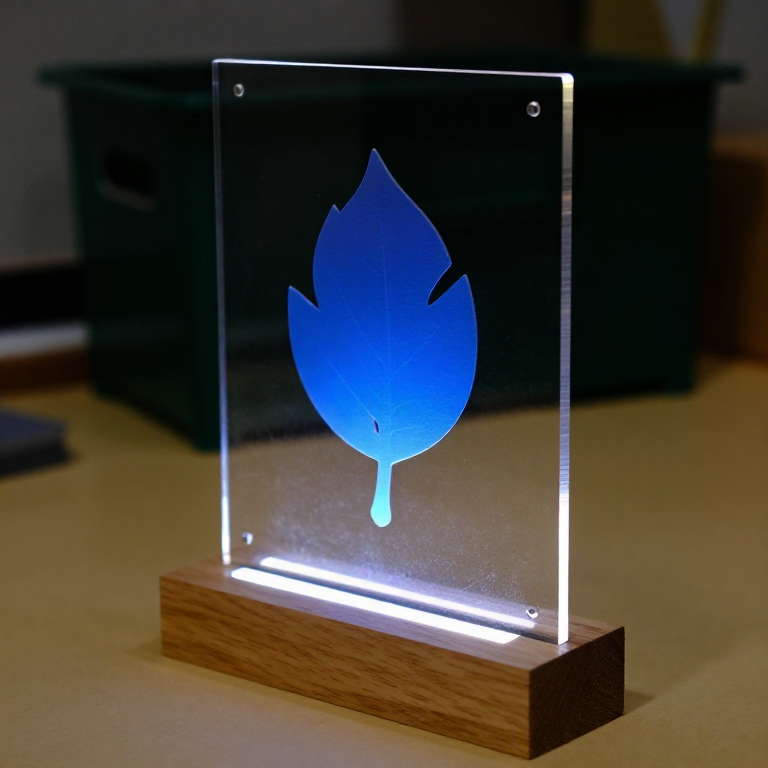


Cast Acrylic Sheet
Otto Röhm had worked on acrylic chemistry since his 1901 doctorate. His firm first used polymethacrylate as the sticky middle layer of laminated safety glass - and noticed that the polymer came away from the glass plates cleanly, leaving a clear sheet as smooth as the glass. Sold from 1933 as Plexiglas, the sheet went into aircraft canopies within the decade.
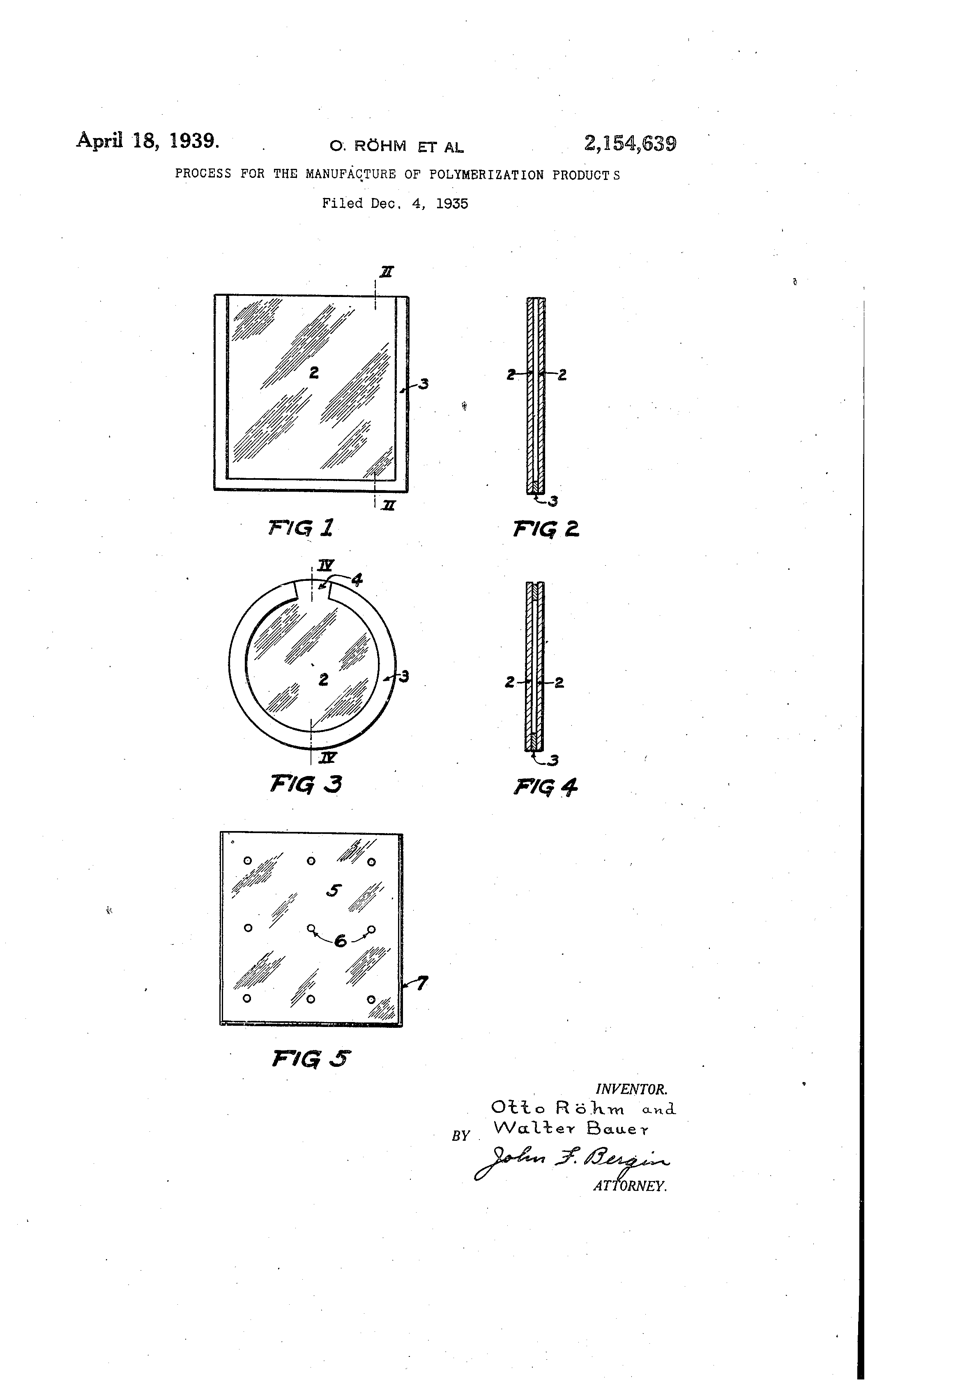
**US 2,154,639**, "Process for the manufacture of polymerization products", Röhm and Bauer, assigned to Röhm & Haas, filed 4. December 1935, granted 18. April 1939: methacrylic esters polymerised between sheets of glass and then separated from them, for "glass substitutes" whose faces are "as highly polished as the surfaces of the glass itself".
**You use that polish**: an edge-lit sign whose engraving glows while the smooth faces stay dark, and two heat-bent offcuts that show how tight a bend the light survives.
Anfänger
3 hours
Anweisungen
1
1
Cut the panel
Cut the panel
Keep the protective film on. Score 3 mm cast acrylic 200 x 120 mm with the utility knife against a ruler, 8 to 10 passes, then snap it over the bench edge. Cut two 100 x 30 mm offcuts the same way.
Benötigte Werkzeuge:
 Cuttermesser
 Lineal
 Klare Schutzbrille
 Acrylplatte
2
2
Polish the light edge
Polish the light edge
Sand the 120 mm bottom edge flat, then run the Micro-Mesh grits in order until it is clear. Light enters here; a frosted edge scatters it at the door.
Benötigte Werkzeuge:
 Mikrogewebe-Schleifset (9 Körnungen)
3
3
Engrave the back
Engrave the back
Peel the back film. Draw your design on paper, tape it under the sheet, and trace it with the engraving point at medium speed, light pressure.
Benötigte Werkzeuge:
 Rotationswerkzeug (Dremel-Art)
 GravierspitzeKlare Schutzbrille
4
4
Slot the base
Slot the base
Cut a pine block 160 x 60 x 40 mm. Saw two parallel kerfs 3.5 mm apart, 15 mm deep, along its length and chisel out between them. Chisel a channel underneath for the LED strip to shine up into the slot.
Materialien für diesen Schritt:
 Kiefernbrett1 Stück
Benötigte Werkzeuge:
 Handsäge
 Stechbeitelsatz für Holz
5
5
Light it
Light it
Strip 5V, GND and DIN to the Uno's 5V, GND and D6. Install the Adafruit NeoPixel library and upload. Stand the panel in the slot.
edge_lit_panel.inocpp
Materialien für diesen Schritt:
 Neopixel-LED-Streifen1 Stück
 Dupont-Steckkabelsatz (Stecker-Buchse)1 Set
Benötigte Werkzeuge:
 Arduino Uno R3
 USB-B-Kabel
6
6
Bend two offcuts
Bend two offcuts
Heat an offcut along a line on the strip heater, turning it over every 30 seconds, until it flexes. Bend it 90° round a 6 mm dowel and hold until cool. Bend the second round a 20 mm dowel.
Materialien für diesen Schritt:
 Holzdübel1 Stück
Benötigte Werkzeuge:
 Biegeheizung für Acryl
 Schweißerhandschuhe
7
7
Trace the beam
Trace the beam
In a dim room shine the laser pointer into the end of each bent strip, never towards anyone's eyes. See where light escapes at the bend, and compare with the notebook.
Benötigte Werkzeuge:
 Laserpointer
8
8
Critical angle and bends
Critical angle and bends
Jupyter-Notebook wird geladen …
9
9
History & Context
History & Context
**What the patent specifies:** methacrylic esters polymerised between glass sheets and separated, giving a glass substitute with glass-polished faces. **Modern build (derived):** commercial cast acrylic sheet, cut and heat-bent.
Cast sheet is still made between glass plates; cheaper extruded sheet came later and is softer and more prone to crazing. The limits: acrylic scratches, cracks if drilled carelessly, crazes when solvents or stress meet, and burns.
Materialien
4- 1 StückPlatzhalter
- 1 StückPlatzhalter
- Platzhalter
- 1 StückPlatzhalter
Benötigte Werkzeuge
14- Platzhalter
- Platzhalter
- Platzhalter
- Platzhalter
- Platzhalter
- Platzhalter
- Platzhalter
- Platzhalter
- Platzhalter
- 1 vendor sell this, none ship to you yetPlatzhalter
- 1 vendor sell this, none ship to you yetPlatzhalter
- Platzhalter
- Platzhalter
- Platzhalter
Dieser Bauplan stellt her

Verwandte Blueprints
Diese Blueprints teilen Wissen — Techniken, Materialien oder Prinzipien

CC0 Gemeinfrei
Dieser Blueprint ist unter CC0 veröffentlicht. Sie dürfen dieses Werk für jeden Zweck frei kopieren, ändern, verbreiten und verwenden, ohne um Erlaubnis zu fragen.
Unterstützen Sie den Maker, indem Sie Produkte über seinen Blueprint kaufen, wo er eine Maker-Provision von Anbietern festgelegt, verdient. Oder erstellen Sie eine neue Iteration dieses Blueprints und verbinden Sie ihn in Ihrem eigenen Blueprint, um Einnahmen zu teilen.