
KUNST
SCHÖNHEIT & WELLNESS
HANDWERK
KULTUR & GESCHICHTE
UNTERHALTUNG
UMFELD
ESSEN & GETRÄNKE
REVERSE ENGINEERING
WISSENSCHAFTEN
SPORT
TECHNOLOGIE
WEARABLES
Churn-and-Washtub Mechanism: One Crank Works a Dasher and a Plunger and Turns Both Tubs
Karen

Erstellt von

Karen

8. Oktober 2026SE
39
0
0
0
0

Churn-and-Washtub Mechanism: One Crank Works a Dasher and a Plunger and Turns Both Tubs

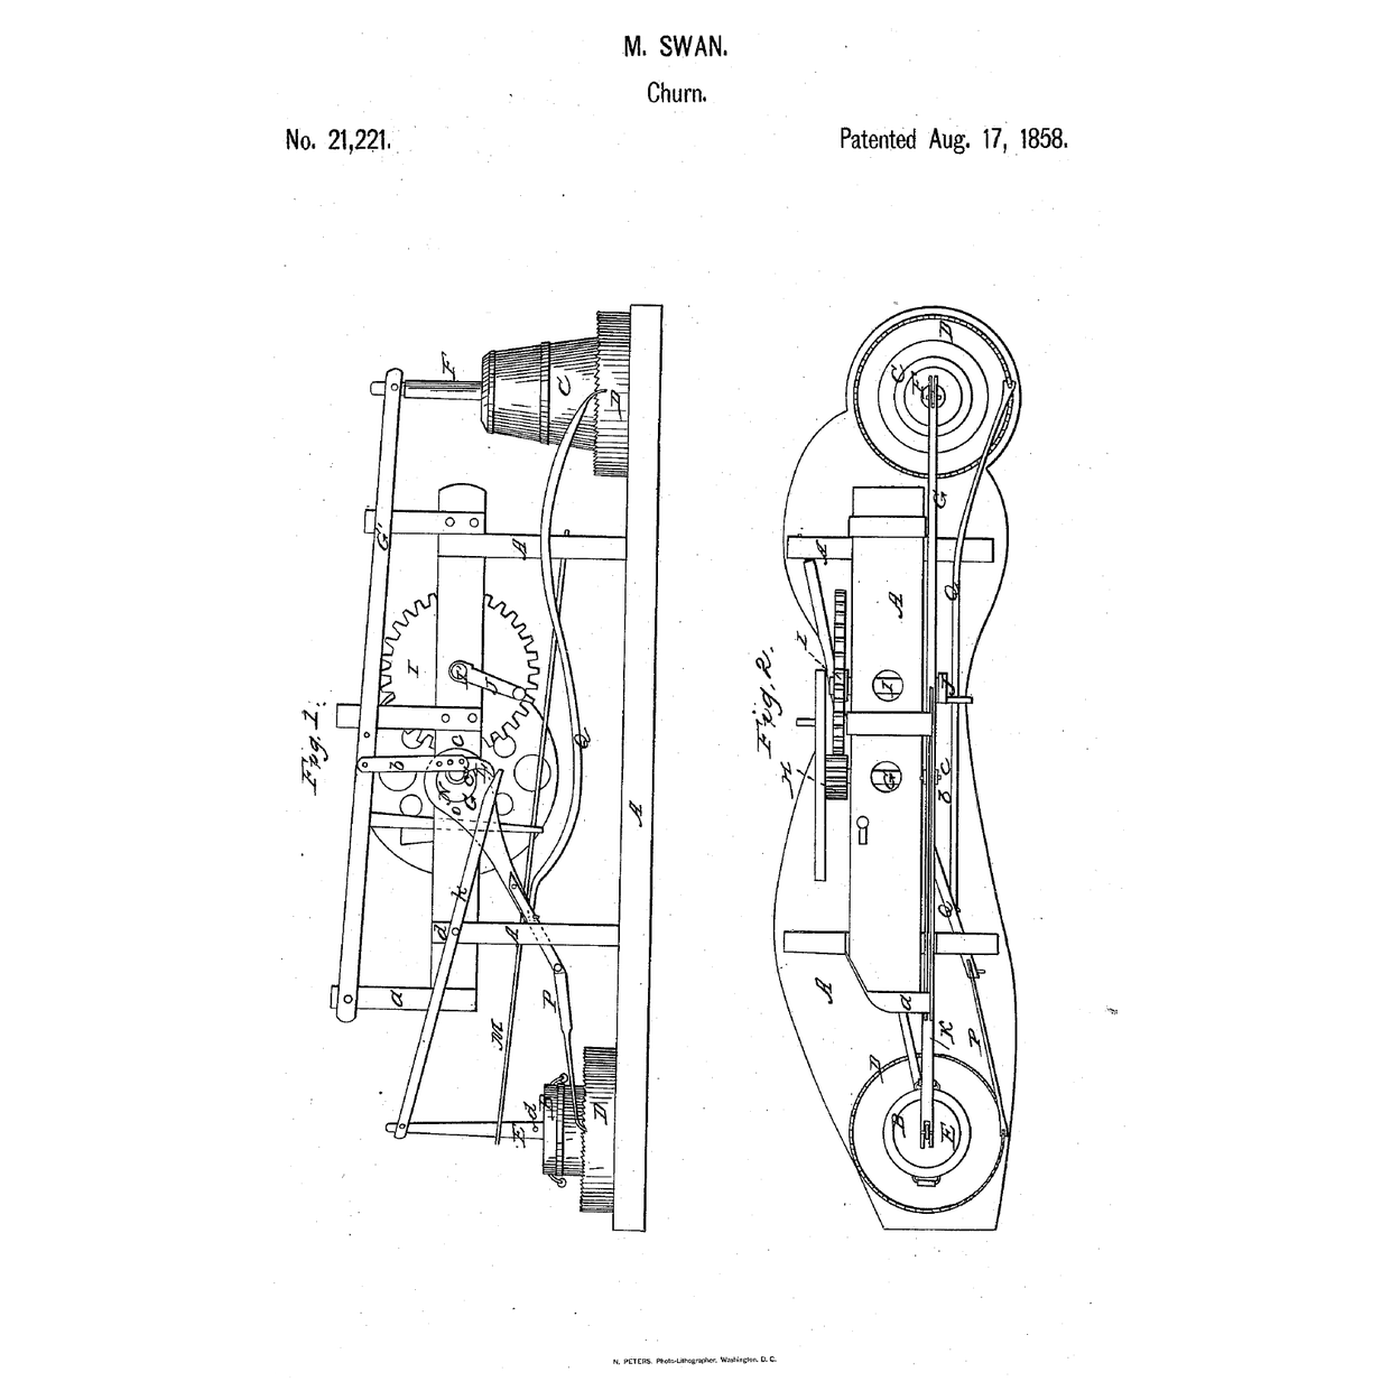
Moses Swan of Potter Hill, New York, received US 21,221, dated 17 August 1858, for one mechanism that works a churn and a washtub together: a crank and spur gears turn a shaft whose eccentric lifts the churn's dasher by a lever, whose cam lifts the washtub's plunger against a flat spring, and whose second eccentric drives pawls that turn both tubs a little at each stroke, so one person does both jobs. This rung builds the base and posts in pine and prints the tubs, ratchet rims and gearing at tabletop scale.
Erfahren
About 9 hours, plus printing

Anweisungen

1

One crank, three motions

Jupyter-Notebook wird geladen …
2

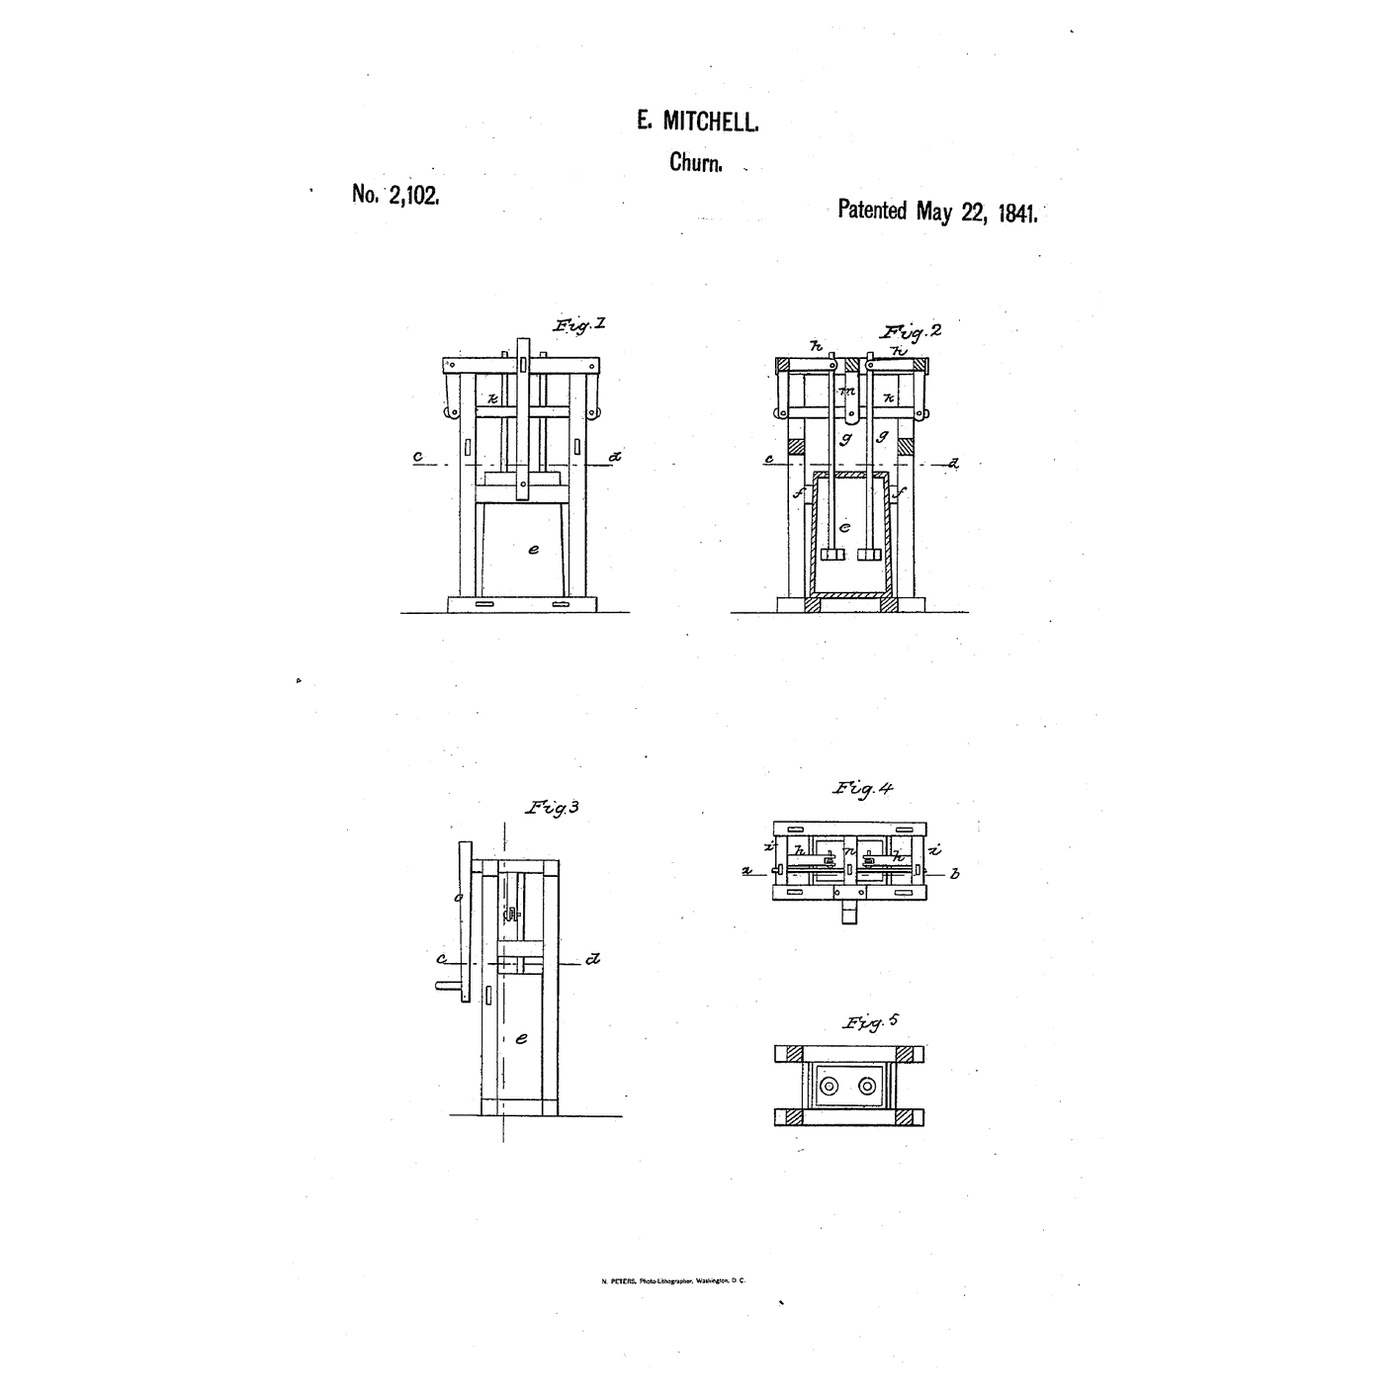
Lever-worked dashers, before it

There a lever was swung by hand; Swan's is worked by an eccentric, which also works a washtub beside it.
3

Read US 21,221

"It is advantageous to rotate the tubs, for by so doing if churning is being performed, the whole body of the cream will be more perfectly subjected to the action of the dasher, and if washing is being performed, the plunger will be brought in contact with every portion of the clothes."
4

Print the parts

Print two ratchet rims, the churn tub, the washtub, pinion H, wheel I, the eccentric c, the cam L, the eccentric N, the strap O, two pawls, the link b, the dash, the dasher head, the plunger and the crank. The rims need a 220 mm print bed. Print in PETG at 0.2 mm layers, 30 % infill, 4 walls; wash before first use.

Materialien für diesen Schritt:

PETG-FilamentPETG-Filament1 Stück

Benötigte Werkzeuge:

FDM-3D-DruckerFDM-3D-Drucker
5

Print the ratchet rim

The ratchet rim, printed as step 4 describes.
DesigndateiSTLCC0 - Free
6

Print the churn tub

The churn tub, printed as step 4 describes.
DesigndateiSTLCC0 - Free
7

Print the washtub

The washtub, printed as step 4 describes.
DesigndateiSTLCC0 - Free
8

Print the pinion H

The pinion H, printed as step 4 describes.
DesigndateiSTLCC0 - Free
9

Print the wheel I

The wheel I, printed as step 4 describes.
DesigndateiSTLCC0 - Free
10

Print the eccentric c

The eccentric c, printed as step 4 describes.
DesigndateiSTLCC0 - Free
11

Print the cam L

The cam L, printed as step 4 describes.
DesigndateiSTLCC0 - Free
12

Print the eccentric N

The eccentric N, printed as step 4 describes.
DesigndateiSTLCC0 - Free
13

Print the strap O

The strap O, printed as step 4 describes.
DesigndateiSTLCC0 - Free
14

Print the pawl

The pawl, printed as step 4 describes.
DesigndateiSTLCC0 - Free
15

Print the link b

The link b, printed as step 4 describes.
DesigndateiSTLCC0 - Free
16

Print the dash

The dash, printed as step 4 describes.
DesigndateiSTLCC0 - Free
17

Print the dasher head

The dasher head, printed as step 4 describes.
DesigndateiSTLCC0 - Free
18

Print the plunger

The plunger, printed as step 4 describes.
DesigndateiSTLCC0 - Free
19

Print the crank

The crank, printed as step 4 describes.
DesigndateiSTLCC0 - Free
20

Base and posts

Cut a pine base 560 by 240 mm. Glue and screw two posts 40 by 18 mm and 180 mm tall in its middle, 100 mm apart inside, with a block 30 mm thick on the front post's inner face; drill 10.5 mm holes through both posts 102 mm above the base for shaft G, and through the front post and its block 150 mm up for shaft I'. Stand an 18 mm square standard a 254 mm tall 55 mm left of the middle, a post d 122 mm tall behind it, and a post 232 mm tall at the back left for the spring. Screw an M6 screw up through the base 170 mm each side of the middle as the rims' pins.

Materialien für diesen Schritt:

KiefernbrettKiefernbrett1 Stück
HolzleimHolzleim1 Stück
HolzschraubenHolzschrauben1 Stück
MaschinenschraubenMaschinenschrauben1 Stück

Benötigte Werkzeuge:

HandsägeHandsäge
AkkubohrschrauberAkkubohrschrauber
SchleifpapierSchleifpapier
Schraubendreher-SatzSchraubendreher-Satz
Bandmaß (Rollmeter)Bandmaß (Rollmeter)
21

Shafts, gears and tubs

Drop a ratchet rim on each pin and stand the washtub on the left rim, the churn tub on the right. Cut 10 mm dowels 202 mm for shaft G and 148 mm for shaft I'. Thread G through the posts with pinion H, the eccentric c behind it, the cam L further back and the eccentric N on its front end; thread I' through the front post with wheel I on its inner end meshing H and the crank on its front end. Fix each with an M3 screw drilled through the dowel.

Materialien für diesen Schritt:

HartholzdübelHartholzdübel1 Stück
MaschinenschraubenMaschinenschrauben1 Stück

Benötigte Werkzeuge:

HandsägeHandsäge
AkkubohrschrauberAkkubohrschrauber
Schraubendreher-SatzSchraubendreher-Satz
22

Dasher, plunger and pawls

Pivot an 18 mm square pine lever G1, 243 mm long, on the standard a with an M6 screw, the link b from the eccentric's pin to its middle hole, and pin the dasher's head into its fork over the churn: a 10 mm dowel 155 mm long with the dash on its foot. Pivot the lever K on post d, its short end under the cam, and hang the plunger beside its long end on a 10 mm dowel 153 mm long, with an M3 screw through the dowel's top as the pin d. Screw a spring steel strip to the back left post, reaching over the pin. Hang the strap O on the eccentric N and pin both pawls to its foot with one M6 screw, resting on the rims' teeth at their front points.

Materialien für diesen Schritt:

KiefernbrettKiefernbrett1 Stück
HartholzdübelHartholzdübel1 Stück
MaschinenschraubenMaschinenschrauben1 Stück
Sicherungsmutter mit KunststoffeinsatzSicherungsmutter mit Kunststoffeinsatz1 Stück

UnterlegscheibeUnterlegscheibe1 Stück
FederstahlbandFederstahlband1 Stück

Benötigte Werkzeuge:

HandsägeHandsäge
AkkubohrschrauberAkkubohrschrauber
Schraubendreher-SatzSchraubendreher-Satz
23

The build in 3D

FreeCAD model of this build: the pine base and posts, the washtub and churn tub on their ratchet rims, the crank and spur gears, shaft G with its eccentric, cam and second eccentric, the lever G1 and dasher, the lever K, plunger and flat spring, and the strap and pawls on the rims.
DesigndateiBLENDCC0 - Free
24

Churn, or wash

Pour 1.2 litres of heavy cream at about 15 °C, checked with the thermometer, into the churn tub, and warm soapy water and a cloth into the washtub. Turn the crank steadily and time it with the stopwatch: the dasher and plunger rise and fall and both tubs creep round. When the butter comes, lift the dasher out, pour off the buttermilk, wash the butter in cold water until it runs clear, work in a pinch of salt and weigh it.

Materialien für diesen Schritt:

SchlagsahneSchlagsahne1.2 l
Grobes MeersalzGrobes Meersalz1 Stück
WasserWasser1 Stück
Stück SeifeStück Seife1 Stück

Benötigte Werkzeuge:

Einsteck-FühlerthermometerEinsteck-Fühlerthermometer
StoppuhrStoppuhr
Digitale KüchenwaageDigitale Küchenwaage
Große Rührschüssel aus EdelstahlGroße Rührschüssel aus Edelstahl
25

Troubleshooting

Churn-and-washtub troubleshooting.

Flow

Loading...
26

History and honest limits

**Moses Swan** of Potter Hill, Rensselaer County, New York, US 21,221, 17 August 1858, "Operating Churns, &c." He combined the two tubs so that neither two systems of gearing nor two persons are needed, and claimed the arrangement of mechanism that gives the plunger and dasher their up and down motion and both tubs their rotary motion. Our crown ratchets, sizes, pine frame and printed tubs are ours. FDM prints hold food in their layer lines, so wash well and replace when worn.

Materialien

13

Benötigte Werkzeuge

10

Designdateien

16

Dieser Bauplan stellt her

CC0 Gemeinfrei

Dieser Blueprint ist unter CC0 veröffentlicht. Sie dürfen dieses Werk für jeden Zweck frei kopieren, ändern, verbreiten und verwenden, ohne um Erlaubnis zu fragen.

Unterstützen Sie den Maker, indem Sie Produkte über seinen Blueprint kaufen, wo er eine Maker-Provision von Anbietern festgelegt, verdient. Oder erstellen Sie eine neue Iteration dieses Blueprints und verbinden Sie ihn in Ihrem eigenen Blueprint, um Einnahmen zu teilen.

Diskussion

(0)

Anmelden um an der Diskussion teilzunehmen

Kommentare werden geladen...