Zusammenarbeit
KUNST
SCHÖNHEIT & WELLNESS
HANDWERK
KULTUR & GESCHICHTE
UNTERHALTUNG
UMFELD
ESSEN & GETRÄNKE
REVERSE ENGINEERING
WISSENSCHAFTEN
SPORT
TECHNOLOGIE
WEARABLES
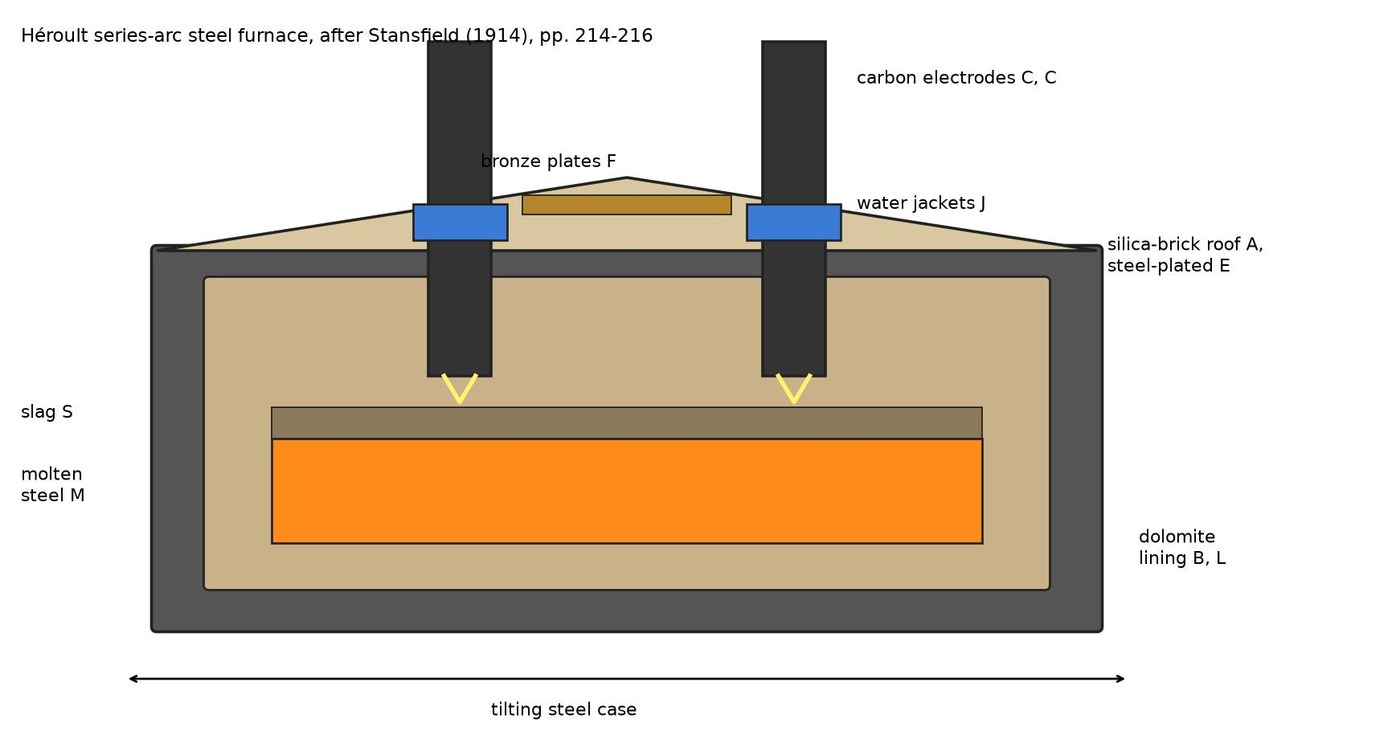

Electric Arc Furnace: the Héroult Series-Arc Steel Furnace (Stansfield, 1914)
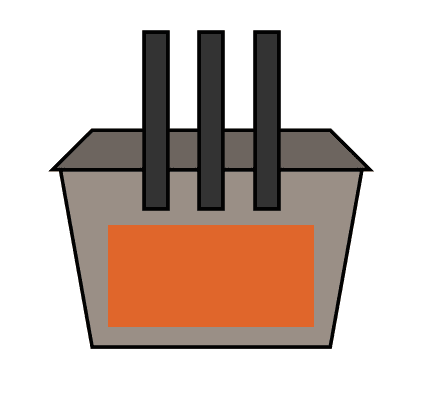
Héroult's steel furnace: a tilting hearth like an open-hearth furnace, lined with dolomite, with two carbon electrodes coming down through the roof. The current goes down one electrode, arcs into the slag, passes through the molten steel and arcs back up the other, so the heat goes straight into the metal.
Result: an electric steel furnace about 7 x 4 ft inside for a 3 ton charge, run at about 350 kW and 110 V.
Source: A. Stansfield, The Electric Furnace, 2nd ed. (1914), pp. 115-116, 214-216. Unknown: case and tilting gear details, electrode size. Picture: a drawn diagram (Fig. 93 is blank in the scan).
Experte
Unknown
Anweisungen
1
1
Build the case and lining
Build the case and lining
Build the furnace in a steel case on a tilting mounting, about 7 x 4 ft inside, with charging doors at the ends. Line it with dolomite bricks and crushed dolomite; dolomite or magnesite on the hearth, which allows strongly basic slags. Ours: mild steel plate. Not given: the case and tilting gear, the bricks' making.
Materialien für diesen Schritt:
 Baustahlplatte1 case
 Dolomit (Magnesiakalkstein)1 lining and crushed dolomite
 Magnesitsteine1 hearth, if magnesite
Benötigte Werkzeuge:
 Lichtbogen-Schweißgerät
 Maurerkelle
 Unbekannte Maße
2
2
Make the removable roof
Make the removable roof
Make the roof of silica brick, covered with steel plates and given eyes so it can be lifted off. Between the two electrode holes use bronze plates instead of steel, because steel there would raise the inductance of the AC circuit. Fit water jackets round each electrode hole for a close fit, so less heat escapes and the electrodes do not burn in the air. Ours: copper tube for the water jackets. Silica brick has no head here.
Materialien für diesen Schritt:
 Unbekanntes Material1 silica brickBaustahlplatte1 roof plates
 Bronzeblech1 plates between electrodes
 Kupferrohr1 water jackets
Benötigte Werkzeuge:
Lichtbogen-Schweißgerät Standbohrmaschine
 Wasser
3
3
Hang the electrodes
Hang the electrodes
Use two vertical carbon electrodes, square in section. Carry each in a holder on an arm supported by the furnace itself, so its height does not change when the furnace tilts: four contact pieces round the electrode, drawn tight by a steel strap and a screw in the arm, with the cable bolted to them. Raise and lower each electrode separately, by a regulator controlled by the voltage between it and the metal. Not given: electrode size, the regulator's build.
Materialien für diesen Schritt:
 Kohleelektrode2 electrodes
 Unbekanntes Metall1 holders, arms, contact pieces
Benötigte Werkzeuge:
Standbohrmaschine4
4
Melt and refine a charge
Melt and refine a charge
Charge steel scrap with some iron ore and lime. Keep each electrode a little above the slag, leaving room for its arc. Regulate the current by hand while the scrap melts, then switch to automatic; full power only after about an hour. Pour off the slag and make a second, then a third, with lime and a little sand and fluorspar, before the final additions. At La Praz this took about 350 kW at 110 V: 5 hours for 1.25 tons of low-carbon steel, 8 hours for 2.33 tons of high-carbon steel. Not given: the electric supply.
Benötigte Werkzeuge:
WasserMaterialien
8- 1 roof platesPlatzhalter
- 1 lining and crushed dolomitePlatzhalter
- 1 hearth, if magnesitePlatzhalter
- 1 silica brickPlatzhalter
- 1 plates between electrodesPlatzhalter
- 1 water jacketsPlatzhalter
- 2 electrodesPlatzhalter
- 1 holders, arms, contact piecesPlatzhalter
Materialien verbundener Blueprints

Dieser Bauplan stellt her
CC0 Gemeinfrei
Dieser Blueprint ist unter CC0 veröffentlicht. Sie dürfen dieses Werk für jeden Zweck frei kopieren, ändern, verbreiten und verwenden, ohne um Erlaubnis zu fragen.
Unterstützen Sie den Maker, indem Sie Produkte über seinen Blueprint kaufen, wo er eine Maker-Provision von Anbietern festgelegt, verdient. Oder erstellen Sie eine neue Iteration dieses Blueprints und verbinden Sie ihn in Ihrem eigenen Blueprint, um Einnahmen zu teilen.