
Zusammenarbeit
KUNST
SCHÖNHEIT & WELLNESS
HANDWERK
KULTUR & GESCHICHTE
UNTERHALTUNG
UMFELD
ESSEN & GETRÄNKE
REVERSE ENGINEERING
WISSENSCHAFTEN
SPORT
TECHNOLOGIE
WEARABLES
Sprung-Blade Inclined-Dasher Churn: The Blades Close to Pass the Narrow Top and Spread to Fill the Wide Bottom
Woody

Erstellt von

Woody

9. November 2026NO
5
0
0
0
0

Sprung-Blade Inclined-Dasher Churn: The Blades Close to Pass the Narrow Top and Spread to Fill the Wide Bottom

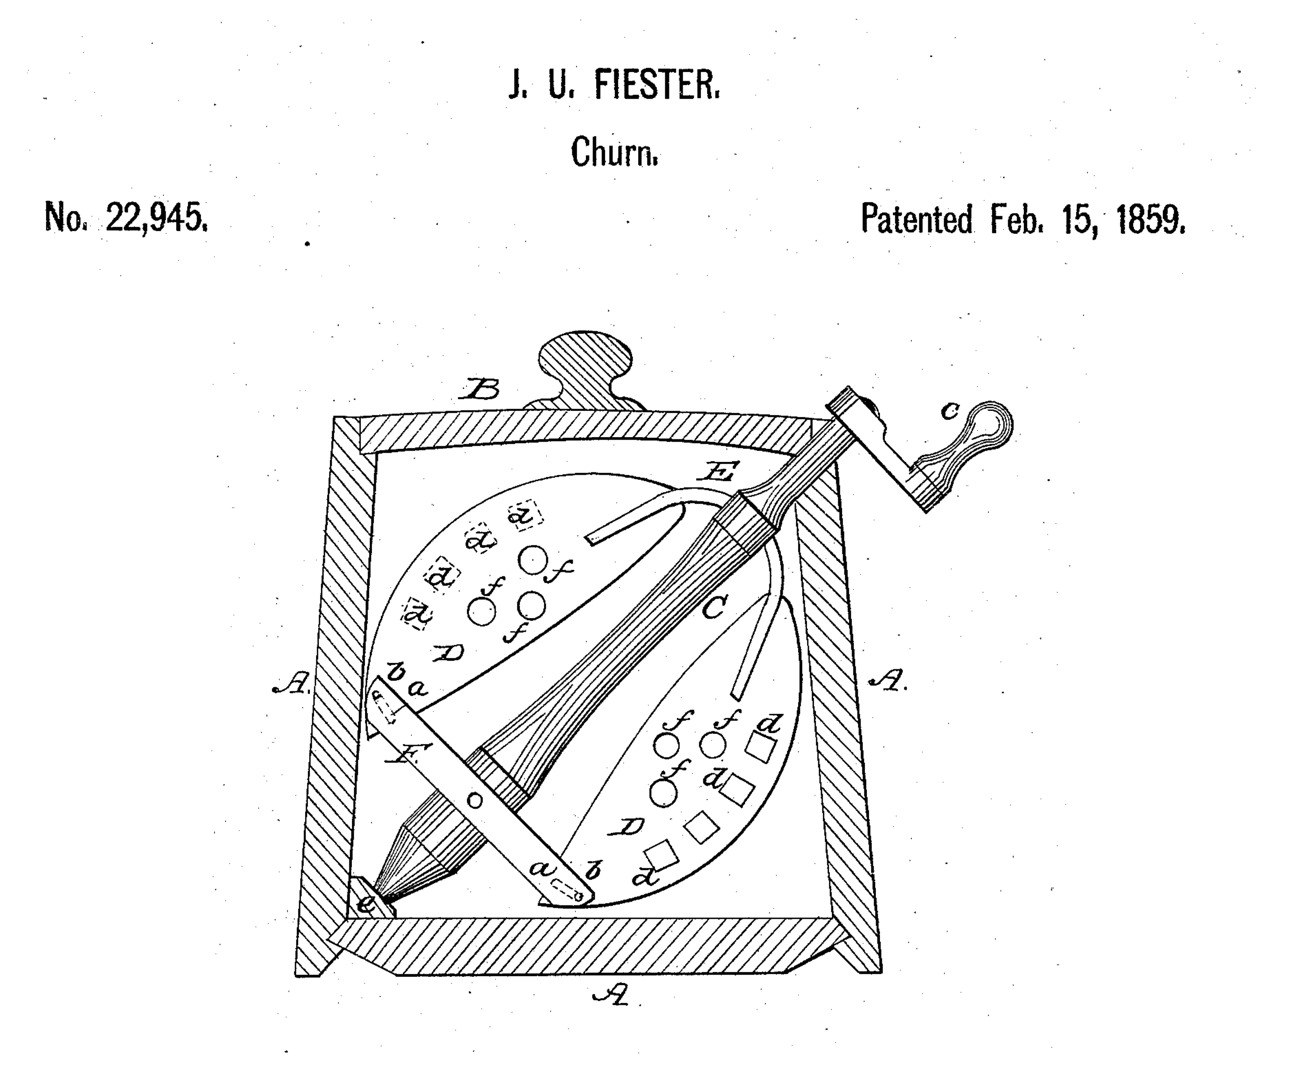
John U. Fiester of Winchester, Ohio, received US 22,945 in February 1859 for a churn with a slanting dasher in a tub wider at the bottom than the top, so it is hard to tip over. The dasher's two blades are held to the spindle by a yoke spring and guided by pins in the slots of a cross tie: they close to pass the narrow top and spread to fill the wide bottom. Holes let the cream through the blades, and square pockets cut part way in carry air down into it. This rung builds it in pine and hardwood with a crank.
Fortgeschritten
About 8 hours, plus printing

Anweisungen

1

Tub, fill and the blades' reach

Jupyter-Notebook wird geladen …
2

Holed beaters, before it

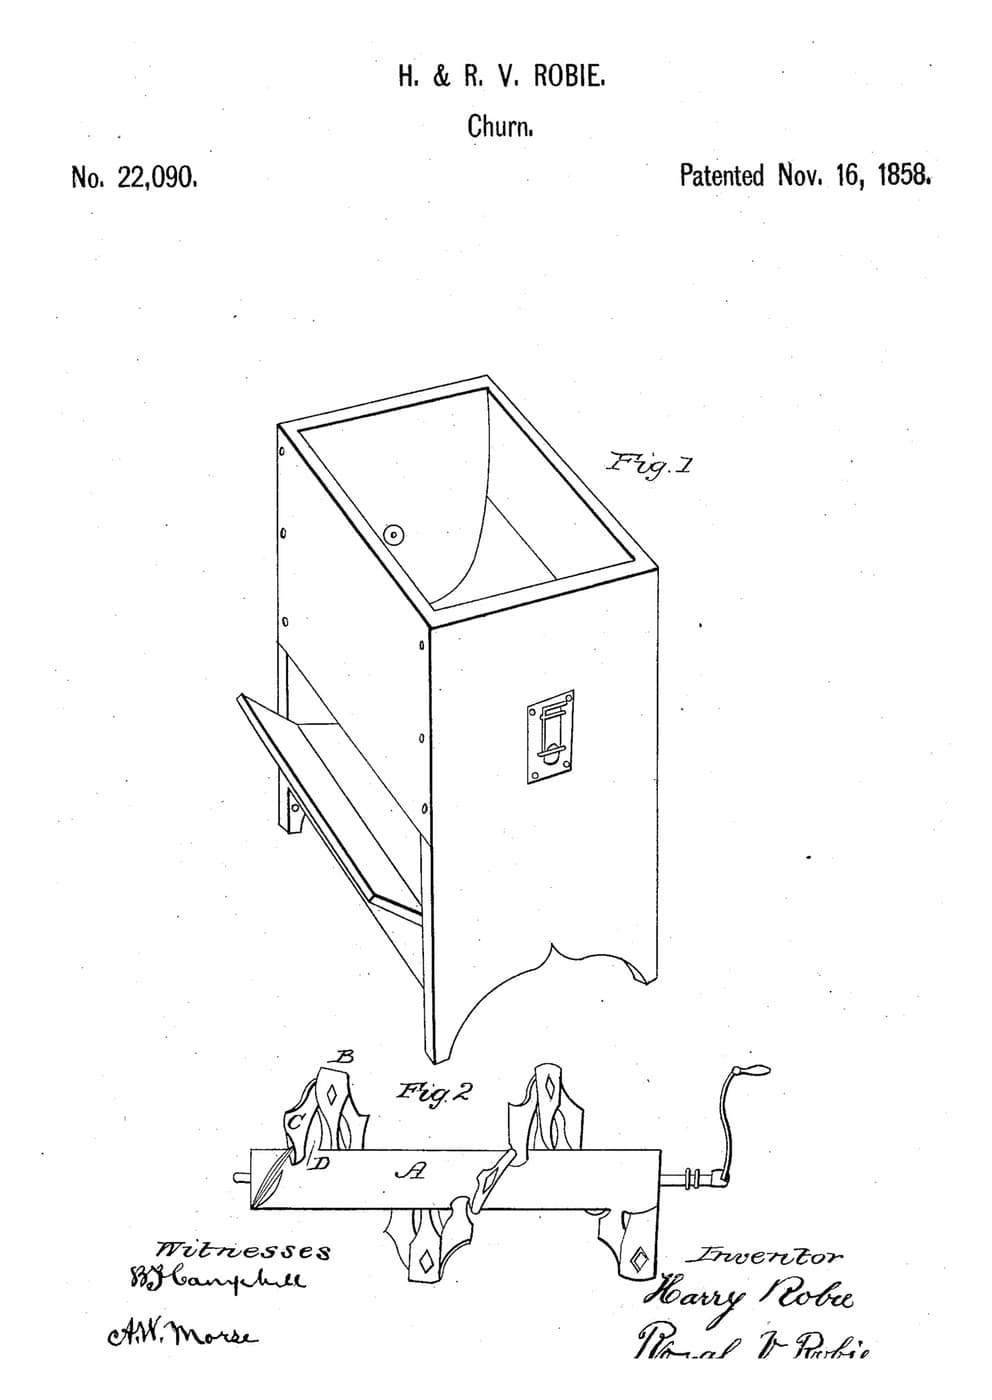
The Robies' beaters pass the cream through holes. Fiester's blades also have pockets that carry air down.
3

Read US 22,945

"... the yoke spring E and slots (a) allow the dasher blades to be forced easily into the smaller opening in the top of the tub, and when in to expand and fill the larger space at the bottom."
4

Print the journal box e

The block with the seat for the spindle's point. PETG, 0.2 mm layers, 40 % infill, 4 walls; wash before first use.
DesigndateiSTLCC0 - Free
5

Print the yoke collar

The collar on the spindle that holds the yoke spring. PETG, 0.2 mm layers, 40 % infill, 4 walls; wash before first use.
DesigndateiSTLCC0 - Free
6

Tub A and lid B

From 18 mm pine cut a floor 460 x 336 mm, two ends 400 mm wide at the foot, 320 mm at the top and 400 mm tall, and two sloping sides 336 mm wide that join them. Glue and screw the ends and sides on the floor so the tub is 400 mm wide inside at the floor and 320 mm at the top, 300 mm front to back. Cut a lid 374 x 336 mm with a turned dowel knob. Drill a 42 mm hole through the right side where the spindle meets it, about 345 mm above the inside floor.

Materialien für diesen Schritt:

KiefernbrettKiefernbrett3 Stück
HolzleimHolzleim1 Stück
HolzschraubenHolzschrauben40 Stück
HartholzdübelHartholzdübel1 Stück

Benötigte Werkzeuge:

HandsägeHandsäge
StichsägeStichsäge
AkkubohrschrauberAkkubohrschrauber
Lochsägen-SetLochsägen-Set
SchraubzwingenSchraubzwingen
Winkelmesser / WinkelmessgerätWinkelmesser / Winkelmessgerät
SchleifpapierSchleifpapier
Schraubendreher-SatzSchraubendreher-Satz
Bandmaß (Rollmeter)Bandmaß (Rollmeter)
7

Spindle C and journal e

Cut a 40 mm hardwood dowel 641 mm long and whittle or plane one end to a point over 30 mm. Screw the journal box in the left corner of the floor, against the sloping side. Cut a half-lap notch 30 mm wide and 12 mm deep across the spindle 85 mm from its point for the cross tie.

Materialien für diesen Schritt:

PETG-FilamentPETG-Filament1 Stück
HartholzdübelHartholzdübel1 Stück
HolzschraubenHolzschrauben4 Stück

Benötigte Werkzeuge:

FDM-3D-DruckerFDM-3D-Drucker
HandsägeHandsäge
StechbeitelStechbeitel
Feilen (Handfeile)Feilen (Handfeile)
Schraubendreher-SatzSchraubendreher-Satz
8

Blades D, tie F and yoke E

Draw an oval 340 x 220 mm on 16 mm hardwood and cut it in two along its length, then take 4 mm off each straight edge so the halves clear the spindle. Drill four 20 mm holes f in each blade and chisel four 20 mm square pockets d, 8 mm deep with bevelled sides, facing the same way. Glue a 9 mm dowel pin b into each blade 31 mm from its straight edge, 30 mm from its lower end. Cut a hardwood cross tie F 190 x 30 x 16 mm with a 10 mm slot 30 mm long near each end, glue it into the spindle's notch, and drop the pins into its slots. Slide the collar onto the spindle above the blades and screw two spring steel strips 15 x 1.5 mm, 42 mm long, from the collar to each blade's top end.

Materialien für diesen Schritt:

HartholzbrettHartholzbrett1 Stück
HartholzdübelHartholzdübel1 Stück
HolzleimHolzleim1 Stück
FederstahlbandFederstahlband1 Stück
MaschinenschraubenMaschinenschrauben8 Stück
Sicherungsmutter mit KunststoffeinsatzSicherungsmutter mit Kunststoffeinsatz8 Stück

Benötigte Werkzeuge:

StichsägeStichsäge
AkkubohrschrauberAkkubohrschrauber
Flachfräsbohrer-SatzFlachfräsbohrer-Satz
StechbeitelStechbeitel
Bügelsäge (Metallsäge)Bügelsäge (Metallsäge)
Feilen (Handfeile)Feilen (Handfeile)
SchleifpapierSchleifpapier
Schraubendreher-SatzSchraubendreher-Satz
9

Fit the dasher and crank

Pass the spindle's top out through the hole in the right side, squeeze the blades together through the tub's top and let them spread, and seat the point in the journal box. Fix a hardwood crank arm 130 mm long on the spindle outside the tub with a screw across, and glue in a 24 mm dowel handle 100 mm long.

Materialien für diesen Schritt:

HartholzbrettHartholzbrett1 Stück
HartholzdübelHartholzdübel1 Stück
HolzleimHolzleim1 Stück
HolzschraubenHolzschrauben1 Stück

Benötigte Werkzeuge:

HandsägeHandsäge
AkkubohrschrauberAkkubohrschrauber
Flachfräsbohrer-SatzFlachfräsbohrer-Satz
Schraubendreher-SatzSchraubendreher-Satz
10

The build in 3D

FreeCAD model of this build, the near half of the tub cut away: the sloping tub, the journal box, the slanting spindle with its two holed blades, the cross tie with its slots and pins, the yoke collar and springs, and the crank outside.
DesigndateiBLENDCC0 - Free
11

Churn

Pour in about 12 litres of heavy cream at about 15 °C, checked with the thermometer, and put the lid on. Turn the crank steadily and time it: the blades dip in and out of the cream, the pockets carrying air down. When the butter comes, pour off the buttermilk, wash the butter in cold water until it runs clear, work in a pinch of salt and weigh it.

Materialien für diesen Schritt:

SchlagsahneSchlagsahne12 l
Grobes MeersalzGrobes Meersalz1 Stück
WasserWasser1 Stück

Benötigte Werkzeuge:

Einsteck-FühlerthermometerEinsteck-Fühlerthermometer
StoppuhrStoppuhr
Digitale KüchenwaageDigitale Küchenwaage
Große Rührschüssel aus EdelstahlGroße Rührschüssel aus Edelstahl
12

Troubleshooting

Sprung-blade churn troubleshooting.

Flow

Loading...
13

History and honest limits

**John U. Fiester** of Winchester, Guernsey County, Ohio, US 22,945, "Churn": the drawing reads 15 February 1859, the text 25 February 1859. A tub wider at the top can be overset; his is wider at the bottom, and the sprung, guided blades still fill it. He claimed the adjustable dasher with its yoke spring, slotted cross tie and pins, holes and air pockets. He gave no sizes or materials: ours are a pine tub, hardwood dasher and steel springs.

Materialien

12

Benötigte Werkzeuge

18

Designdateien

3

CC0 Gemeinfrei

Dieser Blueprint ist unter CC0 veröffentlicht. Sie dürfen dieses Werk für jeden Zweck frei kopieren, ändern, verbreiten und verwenden, ohne um Erlaubnis zu fragen.

Unterstützen Sie den Maker, indem Sie Produkte über seinen Blueprint kaufen, wo er eine Maker-Provision von Anbietern festgelegt, verdient. Oder erstellen Sie eine neue Iteration dieses Blueprints und verbinden Sie ihn in Ihrem eigenen Blueprint, um Einnahmen zu teilen.

Diskussion

(0)

Anmelden um an der Diskussion teilzunehmen

Kommentare werden geladen...