Zusammenarbeit
KUNST
SCHÖNHEIT & WELLNESS
HANDWERK
KULTUR & GESCHICHTE
UNTERHALTUNG
UMFELD
ESSEN & GETRÄNKE
REVERSE ENGINEERING
WISSENSCHAFTEN
SPORT
TECHNOLOGIE
WEARABLES
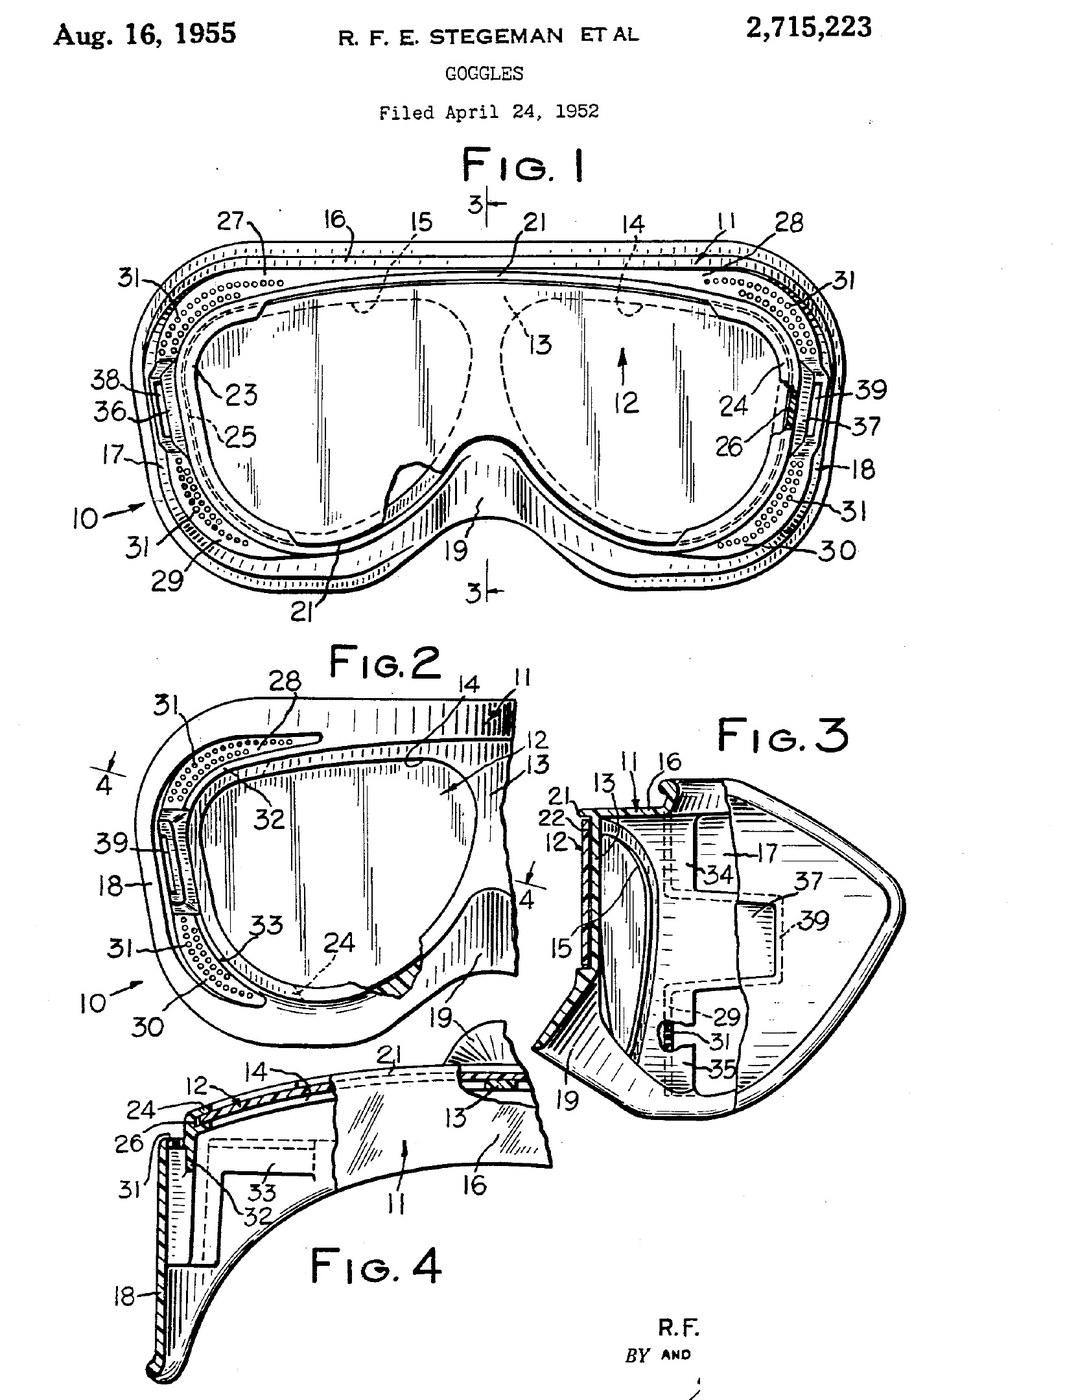


Lab Safety Goggles: Cover-All Body with Baffled Side Vents and a Snap-In Lens (Bausch & Lomb, US 2,715,223, 1955)
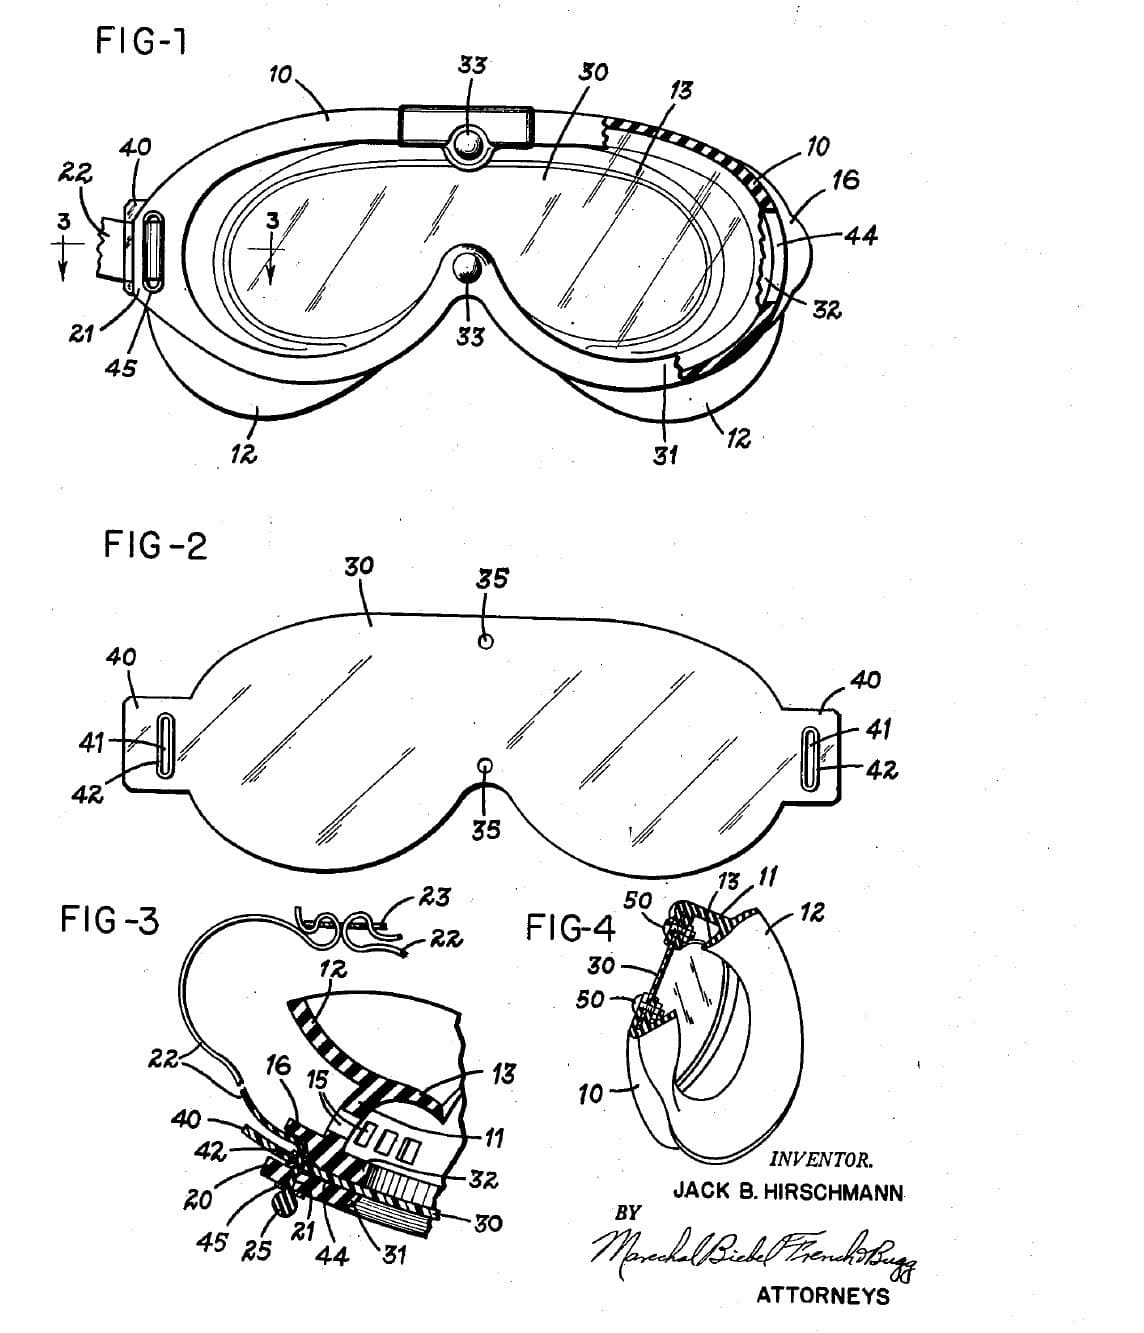
Cover-all goggles in two moulded plastic parts: a one-piece body that wraps the eyes and nose, and a flat clear lens panel sprung into a curve across its front. A raised rib round the front hides the lens edge so no particles can get in. The vents sit in set-back panels at the sides, and baffles inside turn the incoming air away from the eyes.
Result: ventilated goggles that keep out flying particles and splash, with a lens that snaps out for replacement.
Source: R. F. E. Stegeman and F. G. Gay (Bausch & Lomb), US 2,715,223 (1955). Unknown: sizes, the moulding and the strap. Picture: the patent drawing.
Fortgeschritten
Unknown
Anweisungen
1
1
Mould the body
Mould the body
Mould the body in one piece of plastic such as polystyrene or vinyl acetate. Give it a front wall curved from side to side with two sight openings, and a top wall and side walls running round to a projecting nose piece. Add a continuous rib round the front edge that stands forward of the lens, with overhanging flanges at the two temple ends forming grooves for the lens. Ours: polystyrene, injection moulded. Not given: sizes, the moulding.
Materialien für diesen Schritt:
 Polystyrol1 body
Benötigte Werkzeuge:
 Spritzgießmaschine
 Unbekannte Maße
2
2
Form the vents, baffles and strap anchors
Form the vents, baffles and strap anchors
In the same moulding, set back panels on the temple and side parts behind the lens plane and pierce them with many small vent holes. Inside, put baffle walls behind the holes so the incoming air is turned away from the eyes. Form an anchor recess with an opening in each side wall for the head strap.
Benötigte Werkzeuge:
Spritzgießmaschine3
3
Cut and fit the lens, add the strap
Cut and fit the lens, add the strap
Cut a flat, transparent lens panel to cover the whole front wall. Put one end in one temple groove, flex the panel and put its other end in the other groove; its own stiffness holds it curved against the front wall, with the rib covering its edge. Fasten a head strap in the two anchor recesses. Ours: clear plastic sheet, elastic cord. Not given: the lens thickness, the strap.
Materialien für diesen Schritt:
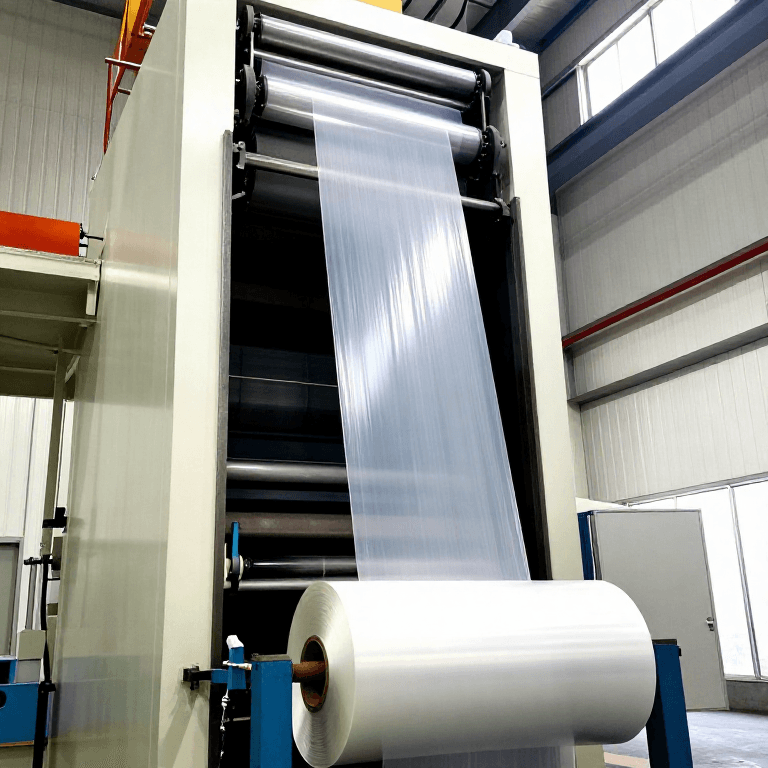
 Klare Kunststoffplatte1 lens panel
 Gummikordel1 head strap
Benötigte Werkzeuge:
 BlechschereUnbekannte Maße
Materialien
3- 1 bodyPlatzhalter
- 1 lens panelPlatzhalter
- 1 head strapPlatzhalter
Benötigte Werkzeuge
3- Platzhalter
- Platzhalter
- Platzhalter
Materialien verbundener Blueprints


Dieser Bauplan stellt her

Verwandte Blueprints
Diese Blueprints teilen Wissen — Techniken, Materialien oder Prinzipien
CC0 Gemeinfrei
Dieser Blueprint ist unter CC0 veröffentlicht. Sie dürfen dieses Werk für jeden Zweck frei kopieren, ändern, verbreiten und verwenden, ohne um Erlaubnis zu fragen.
Unterstützen Sie den Maker, indem Sie Produkte über seinen Blueprint kaufen, wo er eine Maker-Provision von Anbietern festgelegt, verdient. Oder erstellen Sie eine neue Iteration dieses Blueprints und verbinden Sie ihn in Ihrem eigenen Blueprint, um Einnahmen zu teilen.