Zusammenarbeit
KUNST
SCHÖNHEIT & WELLNESS
HANDWERK
KULTUR & GESCHICHTE
UNTERHALTUNG
UMFELD
ESSEN & GETRÄNKE
REVERSE ENGINEERING
WISSENSCHAFTEN
SPORT
TECHNOLOGIE
WEARABLES
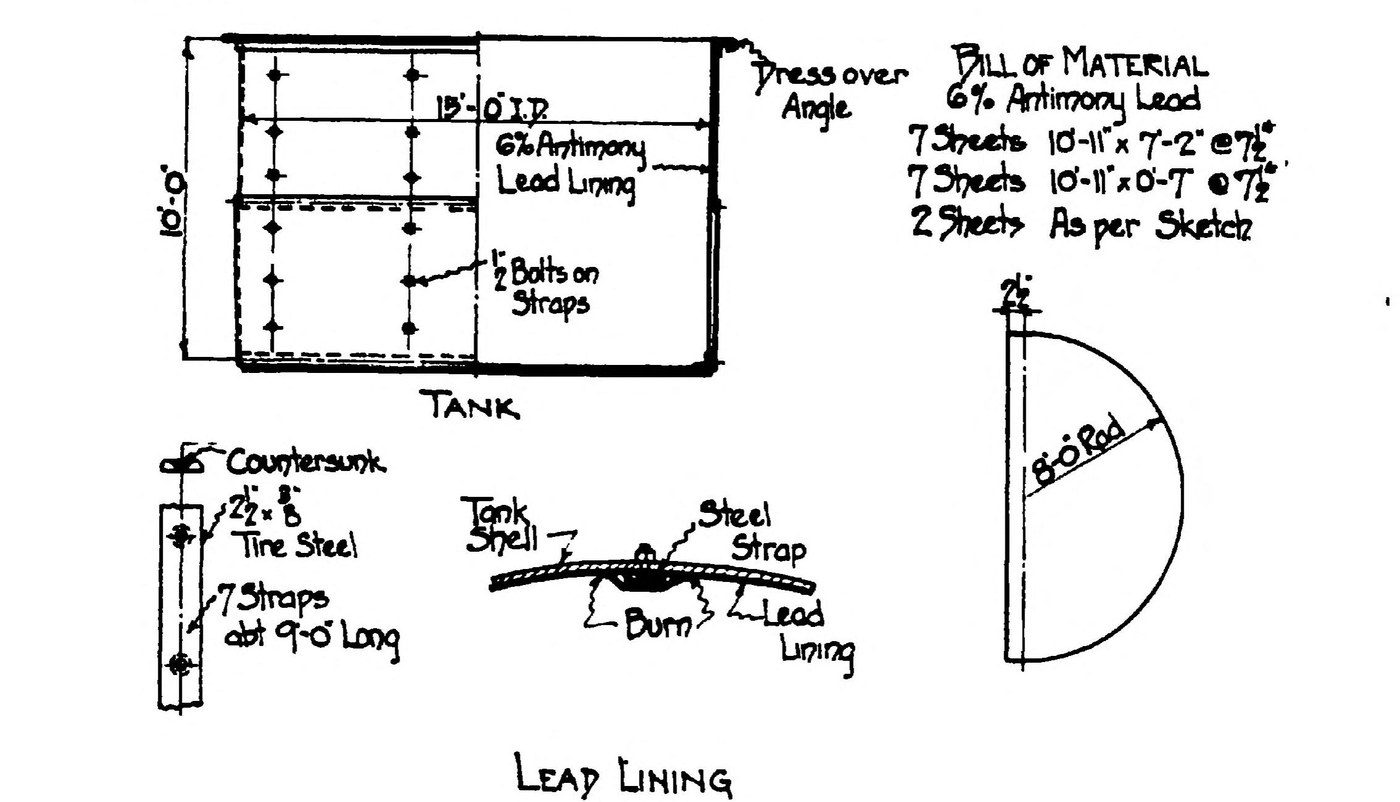


Lead-Lined Tank: a Steel Acid Tank with an Antimonial Lead Lining (Bell, 1923)
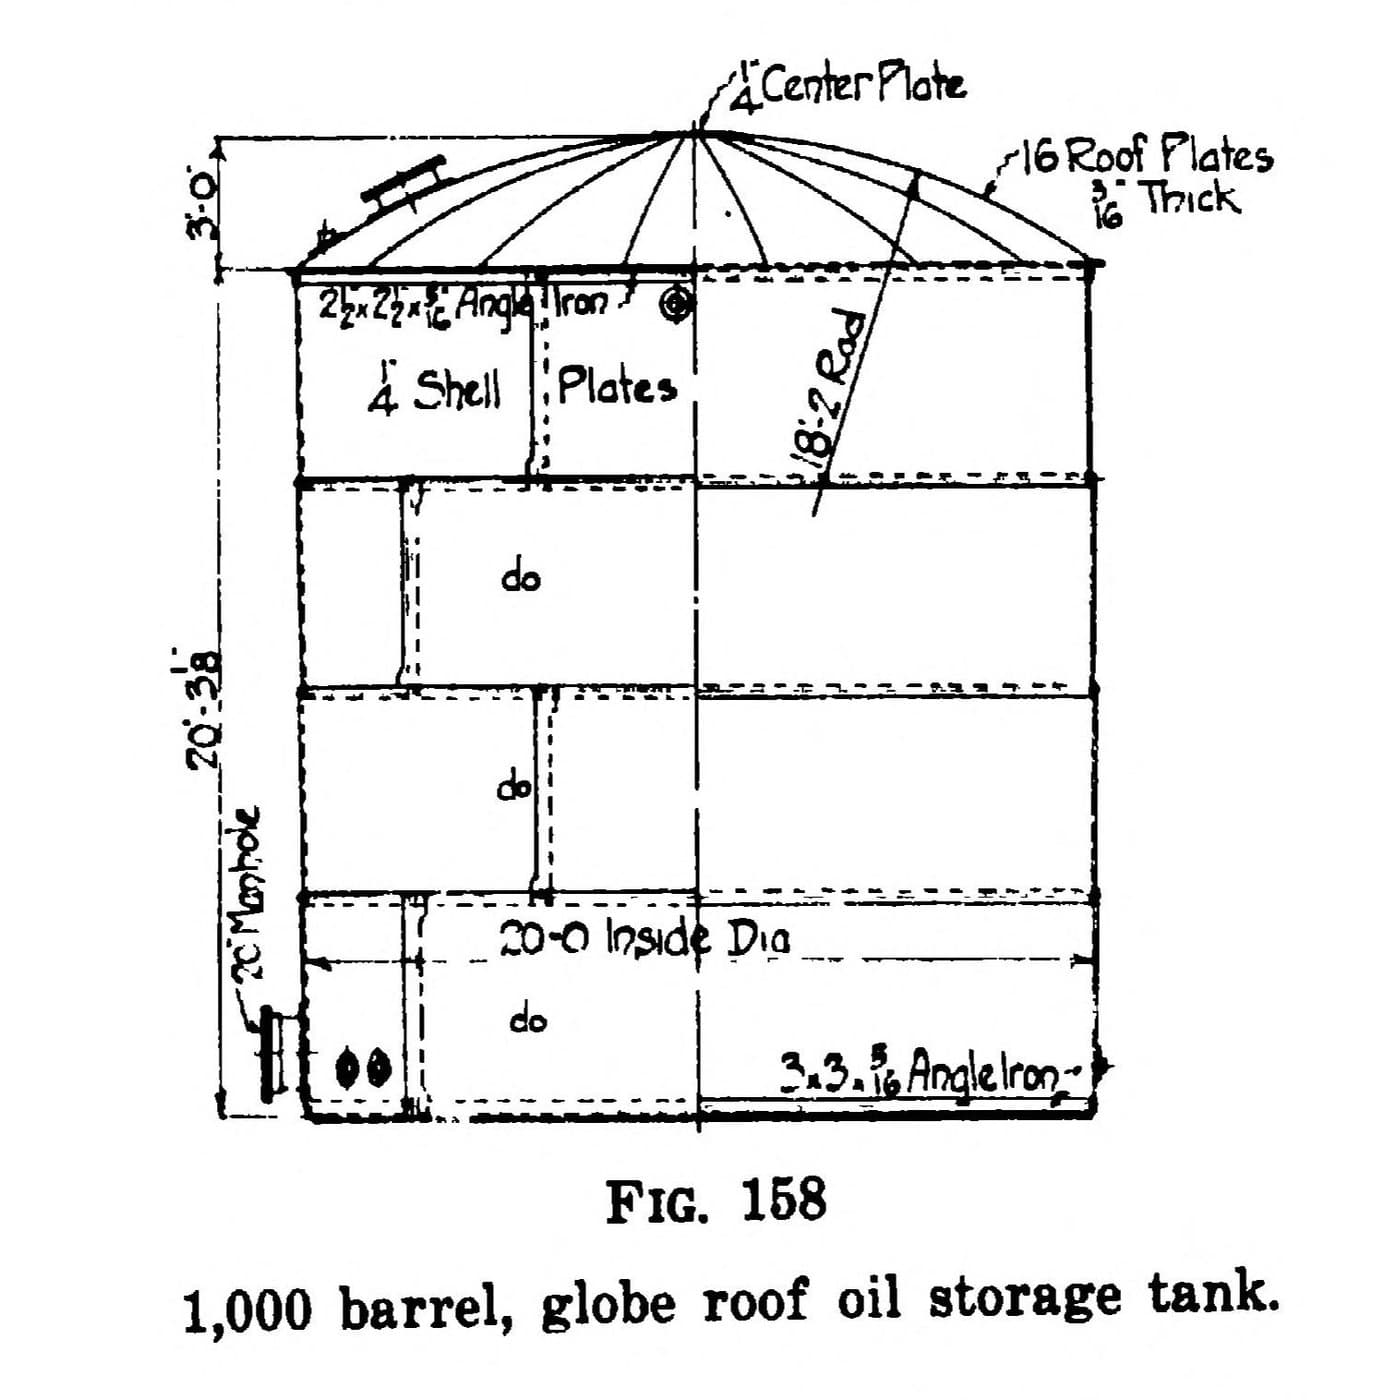
A riveted steel tank lined with sheet lead, for weak sulphuric acid, which eats bare steel. The lead hangs from the top angle and is held to the shell by steel straps covered with lead burned to the lining.
Bell's example (Fig. 170) is a vertical tank 15 ft across and 10 ft high, lined with 6 % antimony lead at 7 1/2 lb per sq ft.
Source: H. S. Bell, American Petroleum Refining (1923), pp. 305-306. Picture: Fig. 170 of the book.
Experte
Unknown
Anweisungen
1
1
Build the steel tank
Build the steel tank
Build the shell as a standard riveted vertical tank, with plate at least 3/8 in thick. Drive the rivets with flat heads 1/16 to 1/8 in high inside, and leave out an occasional rivet so leaks in the lining can be found. The shell plates need not be bevelled or caulked. If you can, stand it on concrete piers with steel I-beams so the bottom can be inspected, and protect the concrete with coal tar or petroleum pitch.
Materialien für diesen Schritt:
 Baustahlplatte1 3/8 in min.
 Stahlnieten1 Stück
Benötigte Werkzeuge:
 Niethammer
 Steinkohlenteerpech
 Unbekannte Maße
2
2
Cut the lead
Cut the lead
Use chemical lead at 8 lb per sq ft, or 6 % antimony lead at 7 1/2 lb per sq ft. For Bell's 15 x 10 ft tank: 7 sheets 10 ft 11 in x 7 ft 2 in, 7 sheets 10 ft 11 in x 7 in, and 2 half-circle sheets of 8 ft radius for the bottom.
Materialien für diesen Schritt:
 Bleiblech16 sheets, 6 % antimony, 7 1/2 lb/sq ft
Benötigte Werkzeuge:
 Blechschere
3
3
Hang and strap the lining
Hang and strap the lining
Dress the lead over the top angle to carry it. Hold it to the shell with straps of round-edged tire steel (Fig. 170: seven straps 2 1/2 x 3/8 in, about 9 ft long), no more than 8 ft apart round the shell; round edges won't cut the lead while it is dressed. Bolt the straps through the shell with 1/2 in bolts, heads countersunk inside.
Materialien für diesen Schritt:
 Baustahl-Flachstahl7 2 1/2 x 3/8 in, about 9 ft
 Sechskantschraube - Festigkeitsklasse 8.81 1/2 in, number not given
Benötigte Werkzeuge:
 Holzhammer (Klüpfel)
4
4
Burn the seams and cover the straps
Burn the seams and cover the straps
Burn (fuse) the lead seams together. Burn a narrow strip of lead over each strap onto the lining, so no steel or bolt head is left bare to the acid. Not given: the burning tool.
Materialien für diesen Schritt:
Bleiblech1 cover stripsBenötigte Werkzeuge:
 Fackel
Materialien
5- 1 3/8 in min.Platzhalter
- 1 StückPlatzhalter
- 1 cover stripsPlatzhalter
- 7 2 1/2 x 3/8 in, about 9 ftPlatzhalter
- 1 1/2 in, number not givenPlatzhalter
Benötigte Werkzeuge
6- Platzhalter
- Platzhalter
- Platzhalter
- Platzhalter
- Platzhalter
- Platzhalter
Materialien verbundener Blueprints
Dieser Bauplan stellt her
CC0 Gemeinfrei
Dieser Blueprint ist unter CC0 veröffentlicht. Sie dürfen dieses Werk für jeden Zweck frei kopieren, ändern, verbreiten und verwenden, ohne um Erlaubnis zu fragen.
Unterstützen Sie den Maker, indem Sie Produkte über seinen Blueprint kaufen, wo er eine Maker-Provision von Anbietern festgelegt, verdient. Oder erstellen Sie eine neue Iteration dieses Blueprints und verbinden Sie ihn in Ihrem eigenen Blueprint, um Einnahmen zu teilen.