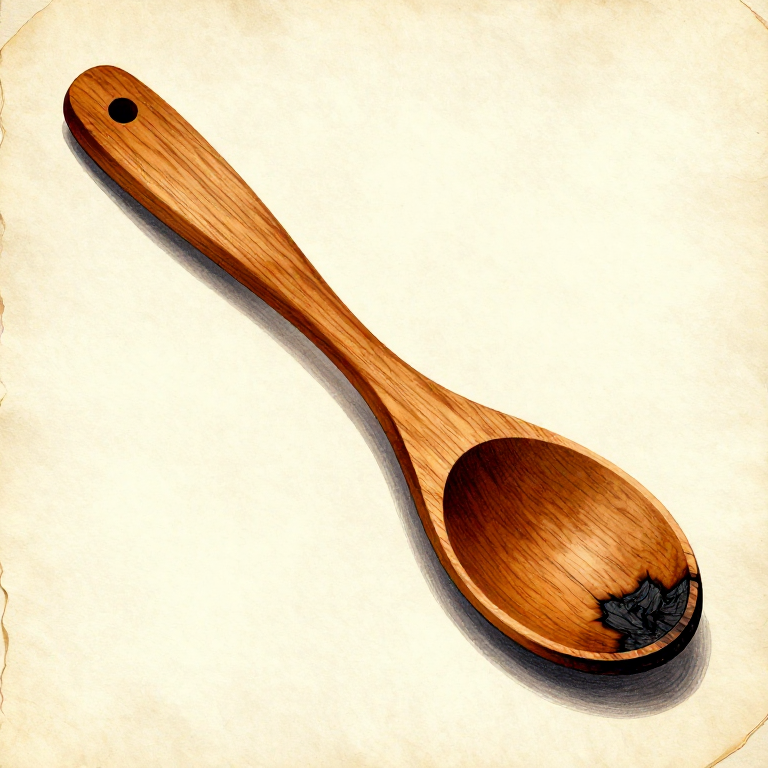
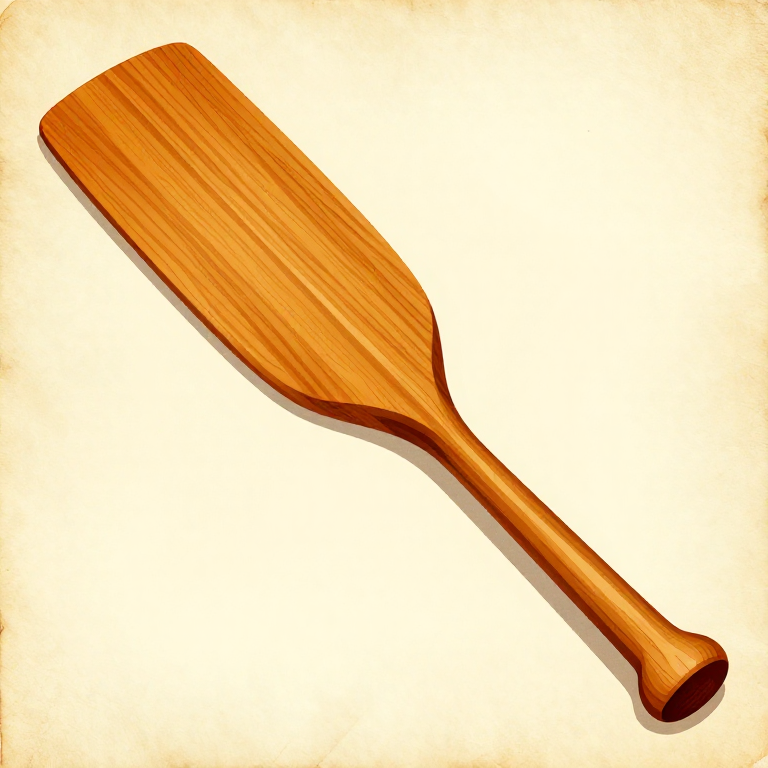
Carving a Wooden Spoon with Stone Tools and Ember Hollowing — The Universal Kitchen Tool
Anweisungen
Select Green Hardwood with Straight Grain
Select Green Hardwood with Straight Grain
Materialien für diesen Schritt:
 Hardwood Sapling1 Stück
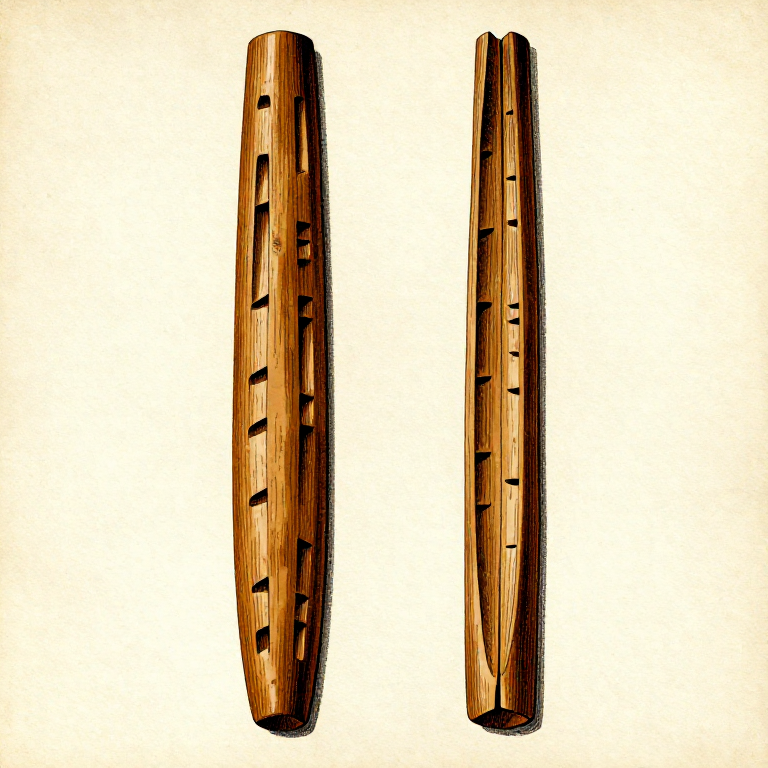
Split the Blank in Half
Split the Blank in Half
Benötigte Werkzeuge:
 Hammerstone
Rough Out the Spoon Profile
Rough Out the Spoon Profile
Benötigte Werkzeuge:
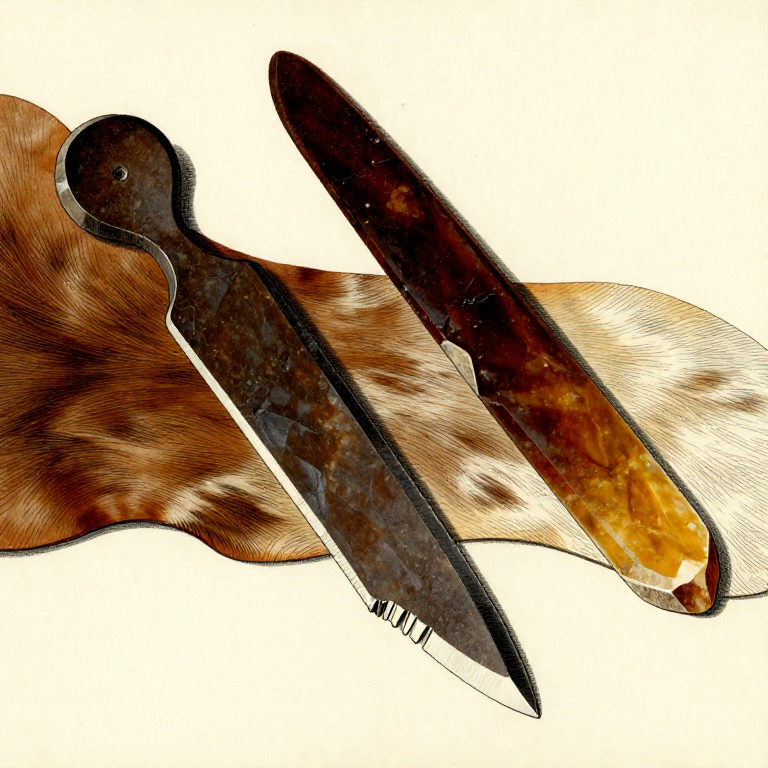
 Flint Knife
Shape the Back of the Bowl
Shape the Back of the Bowl
Benötigte Werkzeuge:
Flint KnifeBegin Ember Hollowing the Bowl
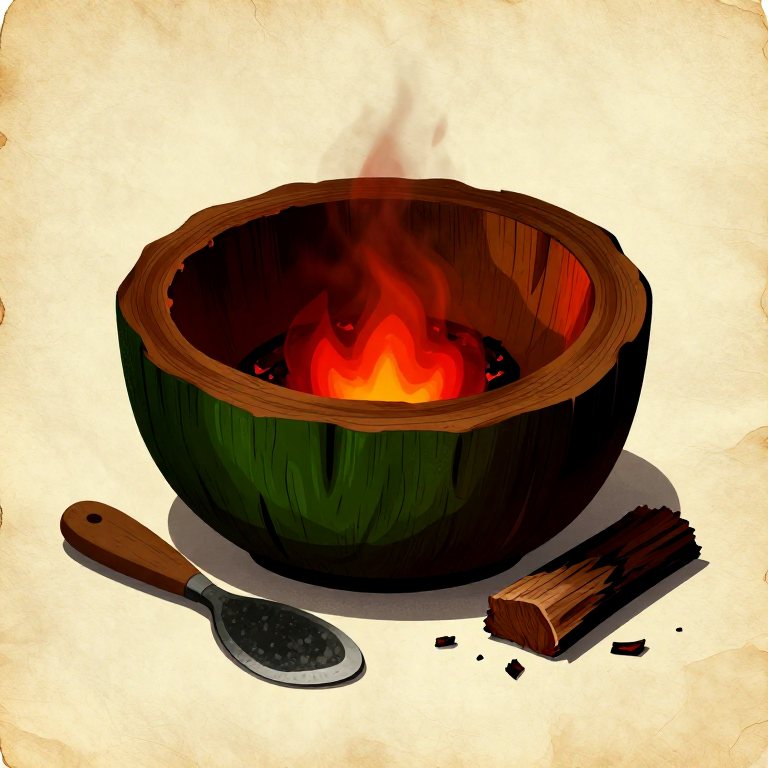
Begin Ember Hollowing the Bowl
Scrape Away Charred Wood
Scrape Away Charred Wood
Benötigte Werkzeuge:
 Stone Scraper
Repeat the Ember Hollowing to Full Depth
Repeat the Ember Hollowing to Full Depth
Refine the Bowl Interior by Scraping
Refine the Bowl Interior by Scraping
Benötigte Werkzeuge:
Stone ScraperShape and Smooth the Handle
Shape and Smooth the Handle
Benötigte Werkzeuge:
Flint KnifeStone ScraperSand the Entire Spoon Smooth
Sand the Entire Spoon Smooth
Benötigte Werkzeuge:
 Sandstone
Dry the Spoon Slowly to Prevent Cracking
Dry the Spoon Slowly to Prevent Cracking
Seal with Animal Fat for Water Resistance
Seal with Animal Fat for Water Resistance
Materialien für diesen Schritt:
 Animal Fat20 g
Materialien
2- 1 StückPlatzhalter
- Platzhalter
Materialien verbundener Blueprints
Verwandte Blueprints
Diese Blueprints teilen Wissen — Techniken, Materialien oder Prinzipien
Related blueprints
Other builds that share materials, tools, or techniques with this one.


CC0 Gemeinfrei
Dieser Blueprint ist unter CC0 veröffentlicht. Sie dürfen dieses Werk für jeden Zweck frei kopieren, ändern, verbreiten und verwenden, ohne um Erlaubnis zu fragen.
Unterstützen Sie den Maker, indem Sie Produkte über seinen Blueprint kaufen, wo er eine Maker-Provision von Anbietern festgelegt, verdient. Oder erstellen Sie eine neue Iteration dieses Blueprints und verbinden Sie ihn in Ihrem eigenen Blueprint, um Einnahmen zu teilen.