Zusammenarbeit
KUNST
SCHÖNHEIT & WELLNESS
HANDWERK
KULTUR & GESCHICHTE
UNTERHALTUNG
UMFELD
ESSEN & GETRÄNKE
REVERSE ENGINEERING
WISSENSCHAFTEN
SPORT
TECHNOLOGIE
WEARABLES
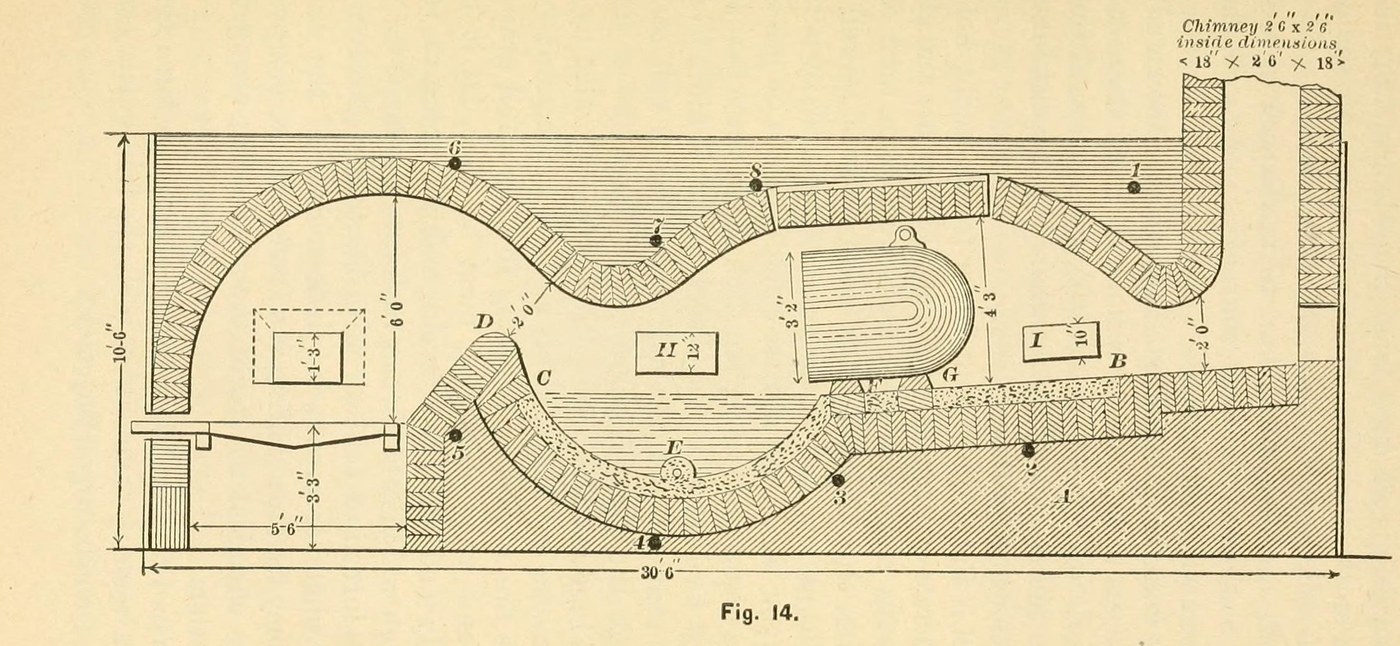


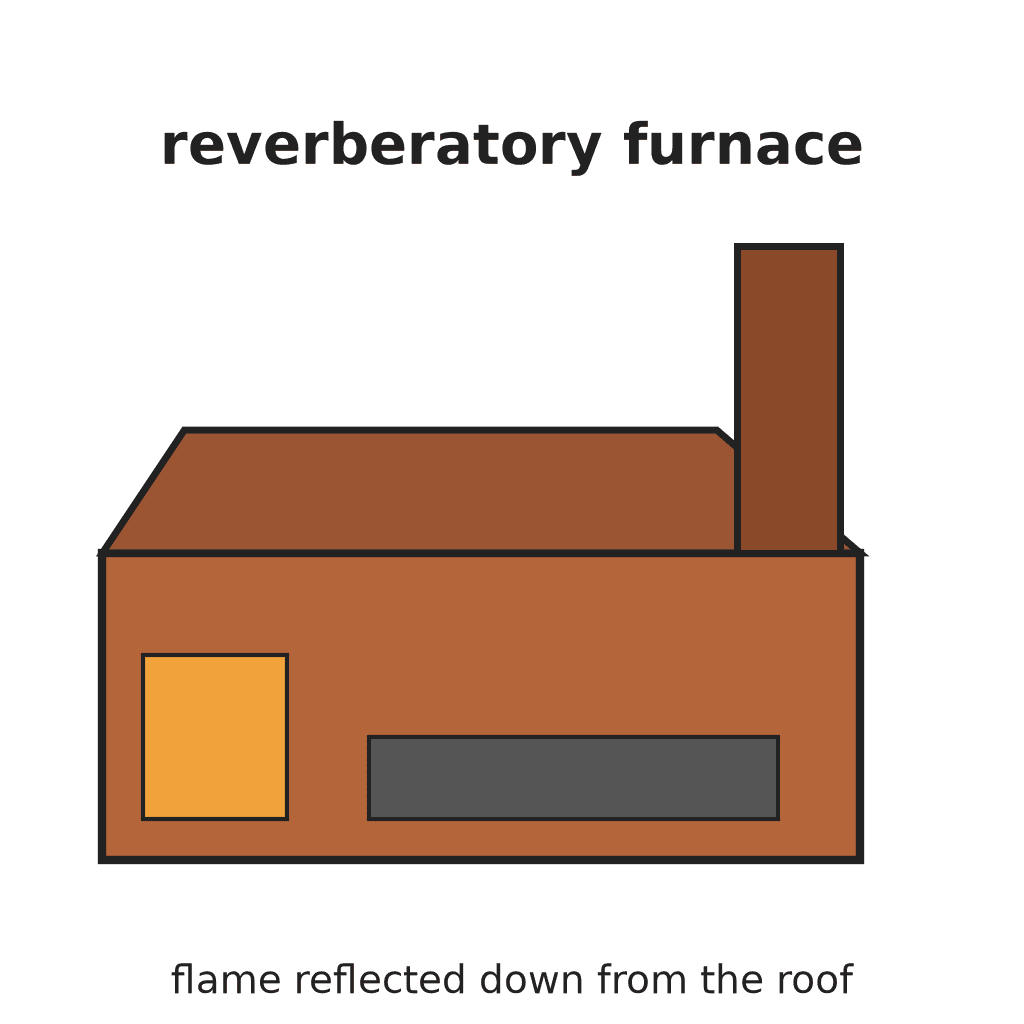
Reverberatory Furnace: the Air Furnace for Melting Cast Iron (Bolland, 1893)
An air furnace melts iron apart from the fuel: coal burns on a grate at one end, and the flame is thrown down from a low arched roof onto the iron on the bed, then leaves by a tall chimney. The iron stays cleaner than in a cupola, so founders used it for guns, rolls, heavy scrap and lumps too big for the cupola.
This furnace is 30 ft 6 in long and 7 ft wide outside, 5 ft wide inside, cased in bolted wrought-iron plates.
Source: S. Bolland, The Iron Founder Supplement (1893), pp. 55-67. Unknown: brick sizes, plate thickness. Picture: Fig. 14 of the book.
Experte
Unknown
Anweisungen
1
1
Lay the foundation
Lay the foundation
Build the foundation solid of common material up to the firebrick, shaped so the firebrick bed slopes down from the chimney end to the reservoir. Keep the bricks from B to C 6 in below the finished bottom, to leave room for the sand bed.
Materialien für diesen Schritt:
 Ziegel1 foundation
Benötigte Werkzeuge:
 Maurerkelle
 Unbekannte Maße
2
2
Build the fireplace, bridge and roof
Build the fireplace, bridge and roof
Build the fireplace the full width of the furnace (5 ft inside, grate 5 ft long). Set the bridge wall at least 2 ft 3 in from the face of the grate bars. Build bridge, sides, roof and fireplace of the most refractory firebrick. Arch the roof the whole length, low, so it throws the flame down onto the bed; fill above the arches with common material. Leave the side charging hole (5 x 4 ft), the top hole (furnace width x 6 ft), the puddling hole over the reservoir, a sight hole and the tap hole.
Materialien für diesen Schritt:
 Schamottesteine1 lining, bridge, roof
 Schamottemörtel1 settingZiegel1 filling above the arch
 Unbekanntes Metall1 grate bars
Benötigte Werkzeuge:
Maurerkelle3
3
Case it in plates and bolt it
Case it in plates and bolt it
Case the whole structure in wrought-iron plates, held at the corners with angle-irons. Run eight chief anchor bolts from side to side, clear of all working parts. Join everything with bolts, not rivets, so any plate can come off for repairs. Line the charging doors with firebrick.
Materialien für diesen Schritt:
 Eisenplatte1 casing, doors
 Schmiedeeiserne Rundstange8 anchor boltsUnbekanntes Metall1 angle-irons, door framesSchamottesteine1 door linings
Benötigte Werkzeuge:
Unbekannte Maße4
4
Build the chimney
Build the chimney
Build the chimney square, 30 to 40 ft high, with an inside course of firebrick (Fig. 14: 2 ft 6 in square inside). Make its area a little larger than the fireplace. Put a damper on top that can be worked from the bottom: it alone sets the draught. It can stand apart on a sole plate on four columns.
Materialien für diesen Schritt:
Schamottesteine1 inside courseZiegel1 chimneyUnbekanntes Metall1 damperBenötigte Werkzeuge:
Maurerkelle5
5
Make the sand bottom
Make the sand bottom
Make the bottom from B round the reservoir to C with 8 parts fire-sand to 1 of clay and 1 of ground coke. Fire it well for one to two hours before the first charge; it should last ten heats. Fill the tap hole with fire-sand and a little coal dust, which will not cake when hot.
Materialien für diesen Schritt:
 Sand8 parts
 Ton1 part
 Hüttenkoks1 part, ground
Benötigte Werkzeuge:
 Steinkohle
6
6
Charge and melt
Charge and melt
Fire with soft, non-caking bituminous coal and keep a full grate; clinker quickly and leave no holes for cold air. Charge all the iron at the start: first layer of pigs lengthwise and a little apart, next layers across, open so the flame passes. Set heavy pieces on firebricks so the flame plays all round them. Through the puddling hole, dip test pieces and skim the iron clean. To blend two grades, thrust green saplings into the melt. Close the damper before tapping. Look the furnace over after every heat.
Benötigte Werkzeuge:
Steinkohle Roheisenmasseln
 Hartholz-Stangenholz
 Lochkelle
Materialien
9- 1 chimneyPlatzhalter
- 1 inside coursePlatzhalter
- 1 settingPlatzhalter
- 1 damperPlatzhalter
- 1 casing, doorsPlatzhalter
- 8 anchor boltsPlatzhalter
- 8 partsPlatzhalter
- 1 partPlatzhalter
- 1 part, groundPlatzhalter
Materialien verbundener Blueprints



Dieser Bauplan stellt her
CC0 Gemeinfrei
Dieser Blueprint ist unter CC0 veröffentlicht. Sie dürfen dieses Werk für jeden Zweck frei kopieren, ändern, verbreiten und verwenden, ohne um Erlaubnis zu fragen.
Unterstützen Sie den Maker, indem Sie Produkte über seinen Blueprint kaufen, wo er eine Maker-Provision von Anbietern festgelegt, verdient. Oder erstellen Sie eine neue Iteration dieses Blueprints und verbinden Sie ihn in Ihrem eigenen Blueprint, um Einnahmen zu teilen.