Zusammenarbeit
KUNST
SCHÖNHEIT & WELLNESS
HANDWERK
KULTUR & GESCHICHTE
UNTERHALTUNG
UMFELD
ESSEN & GETRÄNKE
REVERSE ENGINEERING
WISSENSCHAFTEN
SPORT
TECHNOLOGIE
WEARABLES
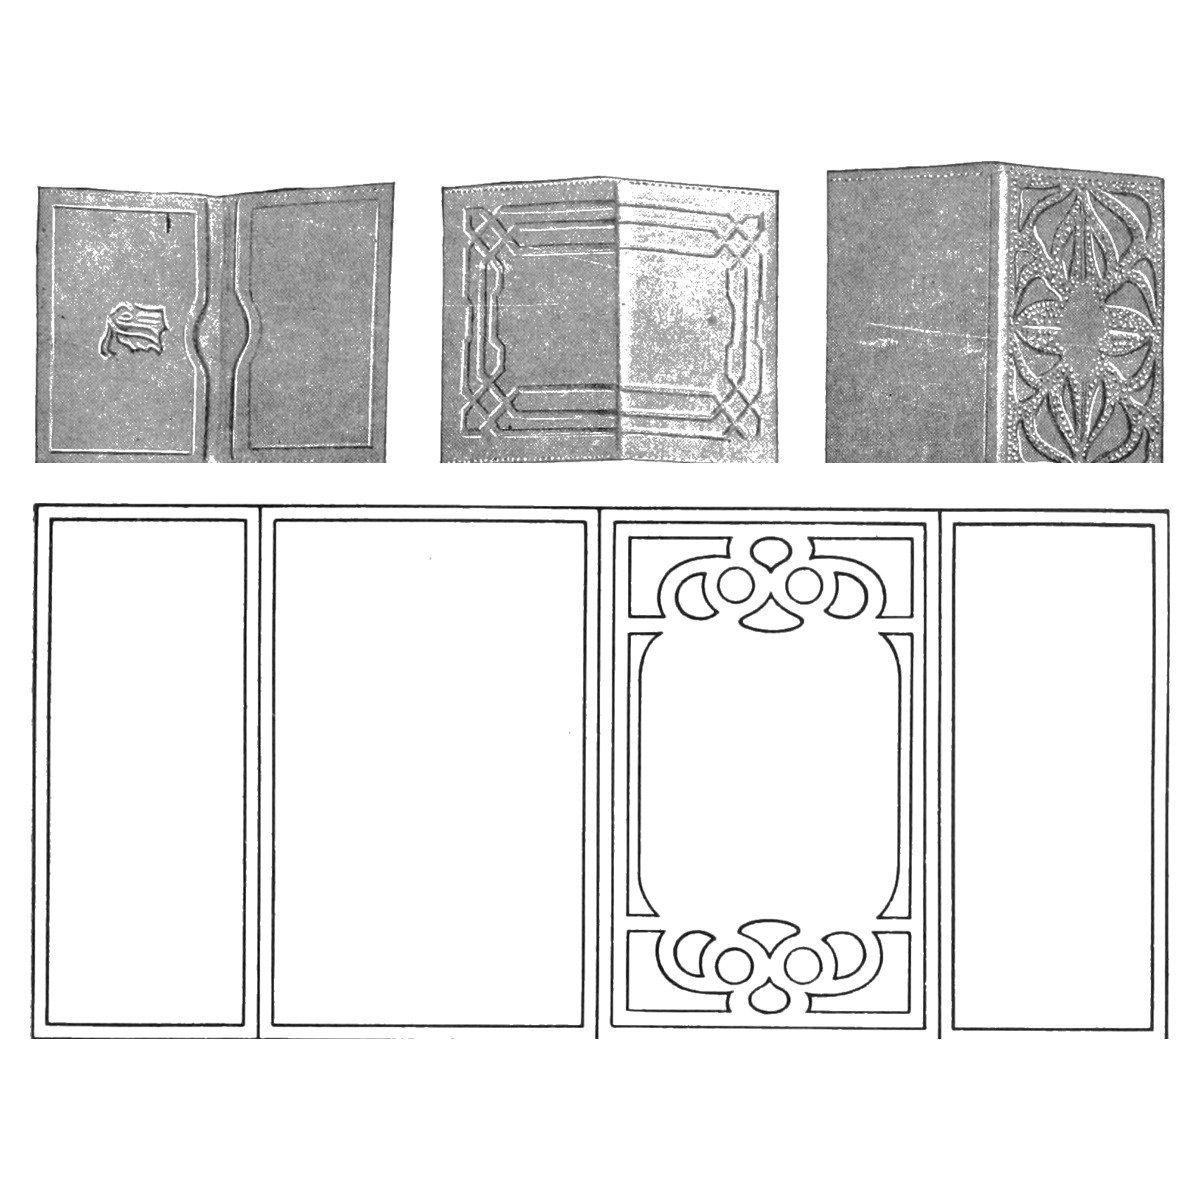


Tooled Calfskin Card Case: Folded Pockets, Lined Centre and a Border Design (Boy Mechanic, 1915)
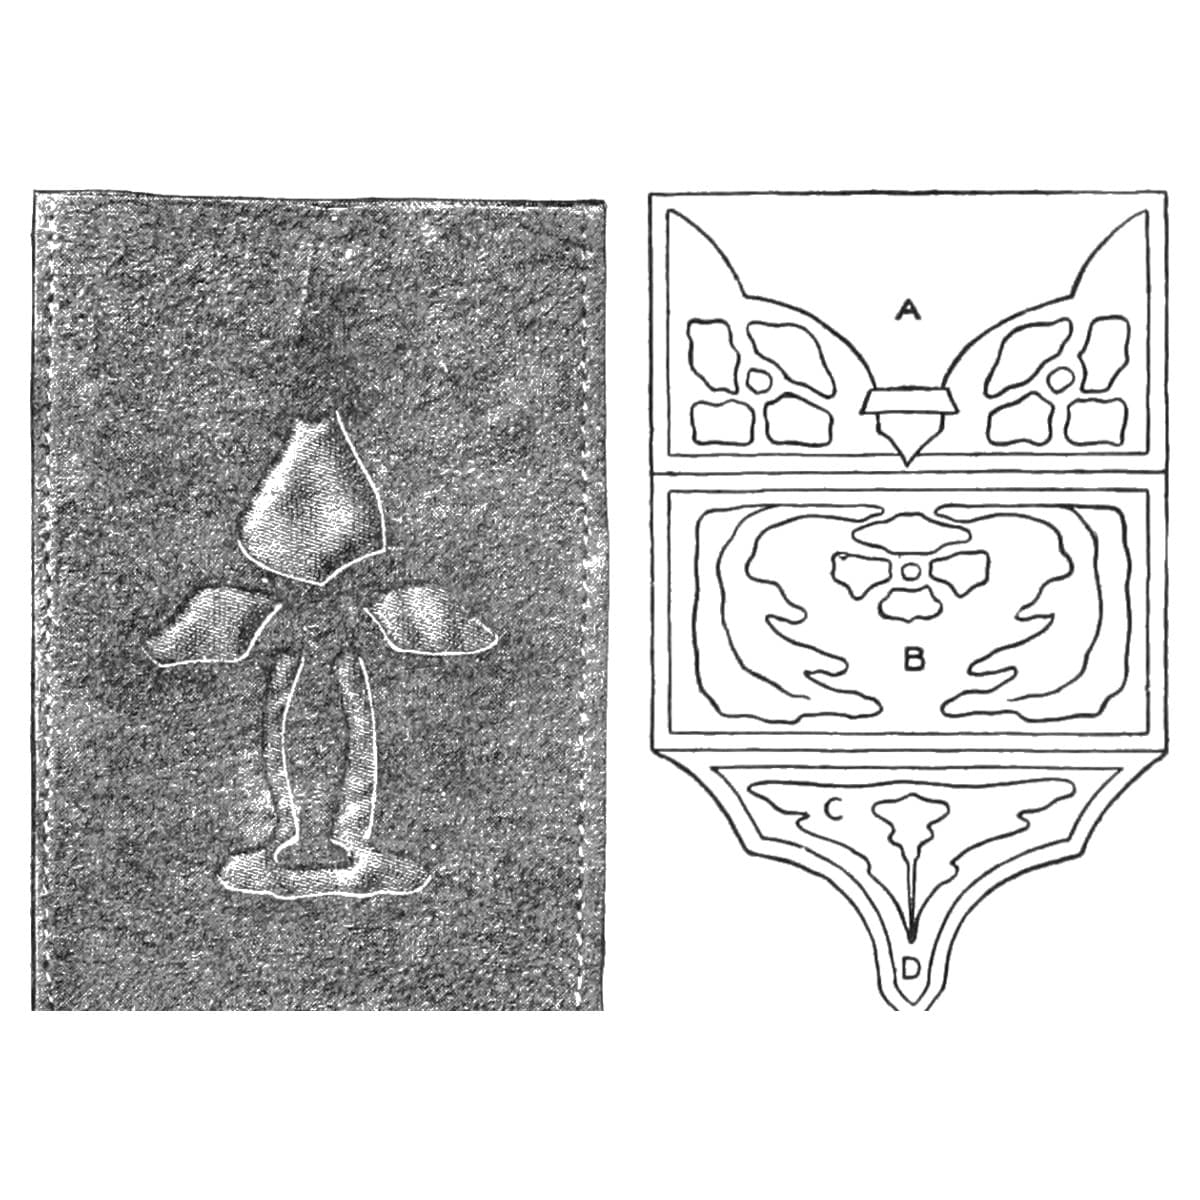
Mary C. Scovel's card case (The Boy Mechanic, Book 2, 1915): a 10 by 4-3/4 in pattern folded in the middle, with 2 in turned in at each end to make the pockets, tooled on one of the wide panels, lined at the centre with skiver or silk, and sewn at top and bottom.
Anfänger
About 3 hours
Anweisungen
1
1
Her pattern in centimetres
Her pattern in centimetres
Jupyter-Notebook wird geladen …
2
2
Read The Boy Mechanic, Book 2
Read The Boy Mechanic, Book 2
Her outfit: "two special tools costing 50 cents each, one with a narrow edge for lining patterns, and one with broad ends for tooling; and a piece of tin, plate glass, or very smooth hard wood, which should not be smaller than 9 by 12 in. A soft sponge, a triangle, a rule, tracing paper and a hard pencil are also needed." Russian calfskin is best for tooling and stamping.
3
3
Make the paper pattern
Make the paper pattern
Take paper 10 by 4-3/4 in and fold it in the middle, 5 in each side, then fold in 2 in at each outside edge toward the centre to make the pockets (a longer paper and deeper fold for deeper pockets). Cut the leather to the pattern with at least 1/4 in margin.
Materialien für diesen Schritt:
 Kalbleder1 Stück
Benötigte Werkzeuge:
 Pauspapier
 Bleistift
 Schere
 Lineal
4
4
Line out the folds
Line out the folds
Damp the leather on the rough side. Lay the folded paper on the right side and, with ruler, triangle and lining tool, draw the vertical lines where it is to fold at the centre and at each pocket, and line all round the four sides. There are now four panels, two wide and two narrow.
Benötigte Werkzeuge:
 SchwammLineal
 Zeichendreieck
 Lederpunzier- und Modellierwerkzeug
5
5
Damp the leather and transfer the design
Damp the leather and transfer the design
Draw the whole design for the front (one of the wide panels) on tracing paper. Wet the leather on the wrong (unfinished) side with a soft sponge: pat it to moisten, not soak, it; too wet and the tool sticks and leaves an uneven background. Pin the design firmly on the leather, tack the leather down on its outer margin to the glass or board, and go over every line with a hard pencil, with firm, even pressure. Lift the paper and go over the lines with the narrow lining tool, with a strong, firm stroke. A line design can stop here.
Materialien für diesen Schritt:
Kalbleder1 StückBenötigte Werkzeuge:
SchwammPauspapierBleistift Reißzwecken (Schachtel mit 50 Stück)
 GlasscheibeLederpunzier- und Modellierwerkzeug
6
6
Tool or stamp the background
Tool or stamp the background
Leave at least 1/8 in between the edge of the pattern and the design. To tool, press the background down with the broad end in even, long strokes; if it will not go down, the leather is too dry, so take it off and damp the back again. Keep the edges sharp between pressed and raised parts. To stamp instead, strike a small carpenter's nail set lightly with a wooden mallet in rows of circles; too hard a blow cuts the leather.
Benötigte Werkzeuge:
Lederpunzier- und Modellierwerkzeug Nageltreiber (Versenker)
 Holzhammer (Klüpfel)Schwamm
7
7
Line, fold and sew
Line, fold and sew
Line only the two centre rectangles, with skiver leather or silk cut about 1/16 in less at top and bottom and 1/4 in wider on each side. Leather: paste its back with library paste, smooth it down and dry it under a heavy weight. Silk: paste only about 1/4 in round its edges, and weight it. Fold the case and sew it at top and bottom; cut off the surplus leather about 1/8 in from the stitches. Stitch on a sewing machine with a long stitch, a large needle and silk as heavy as the needle takes; try it on a scrap first, and put tissue paper over the leather if the foot marks it. Without a machine, prick holes with an awl and sew with needle and silk, running or over-and-over; going over-and-over to the end and back gives an X stitch.
Materialien für diesen Schritt:
 Seidenstoff1 Stück
 Weizenkleister1 Stück
 Nähseide1 Stück
Benötigte Werkzeuge:
Schere Nähmaschine
 Ahle
 Zwei Sattlernadeln
 Bastelmesser
8
8
Troubleshooting
Troubleshooting
Card case troubleshooting.
Flow
Loading...
9
9
History and honest limits
History and honest limits
From Mary C. Scovel, "Arts-Crafts Leather Work", in **The Boy Mechanic, Book 2**, Popular Mechanics, 1915 (Project Gutenberg 44585; checked on the archive.org scan boymechanicbook200chic2, pp. 432-441), Part II. The tools and metric figures are ours.
Materialien
4- 2 StückPlatzhalter
- 1 StückPlatzhalter
- 1 StückPlatzhalter
- 1 StückPlatzhalter
Benötigte Werkzeuge
15- Platzhalter
- 1 vendor sell this, none ship to you yetPlatzhalter
- Platzhalter
- Platzhalter
- Platzhalter
- Platzhalter
- Platzhalter
- Platzhalter
- Platzhalter
- Platzhalter
- Platzhalter
- Platzhalter
- Platzhalter
- Platzhalter
- Platzhalter
Dieser Bauplan stellt her
Verwandte Blueprints
Diese Blueprints teilen Wissen — Techniken, Materialien oder Prinzipien
CC0 Gemeinfrei
Dieser Blueprint ist unter CC0 veröffentlicht. Sie dürfen dieses Werk für jeden Zweck frei kopieren, ändern, verbreiten und verwenden, ohne um Erlaubnis zu fragen.
Unterstützen Sie den Maker, indem Sie Produkte über seinen Blueprint kaufen, wo er eine Maker-Provision von Anbietern festgelegt, verdient. Oder erstellen Sie eine neue Iteration dieses Blueprints und verbinden Sie ihn in Ihrem eigenen Blueprint, um Einnahmen zu teilen.