KUNST
SCHÖNHEIT & WELLNESS
HANDWERK
KULTUR & GESCHICHTE
UNTERHALTUNG
UMFELD
ESSEN & GETRÄNKE
REVERSE ENGINEERING
WISSENSCHAFTEN
SPORT
TECHNOLOGIE
WEARABLES
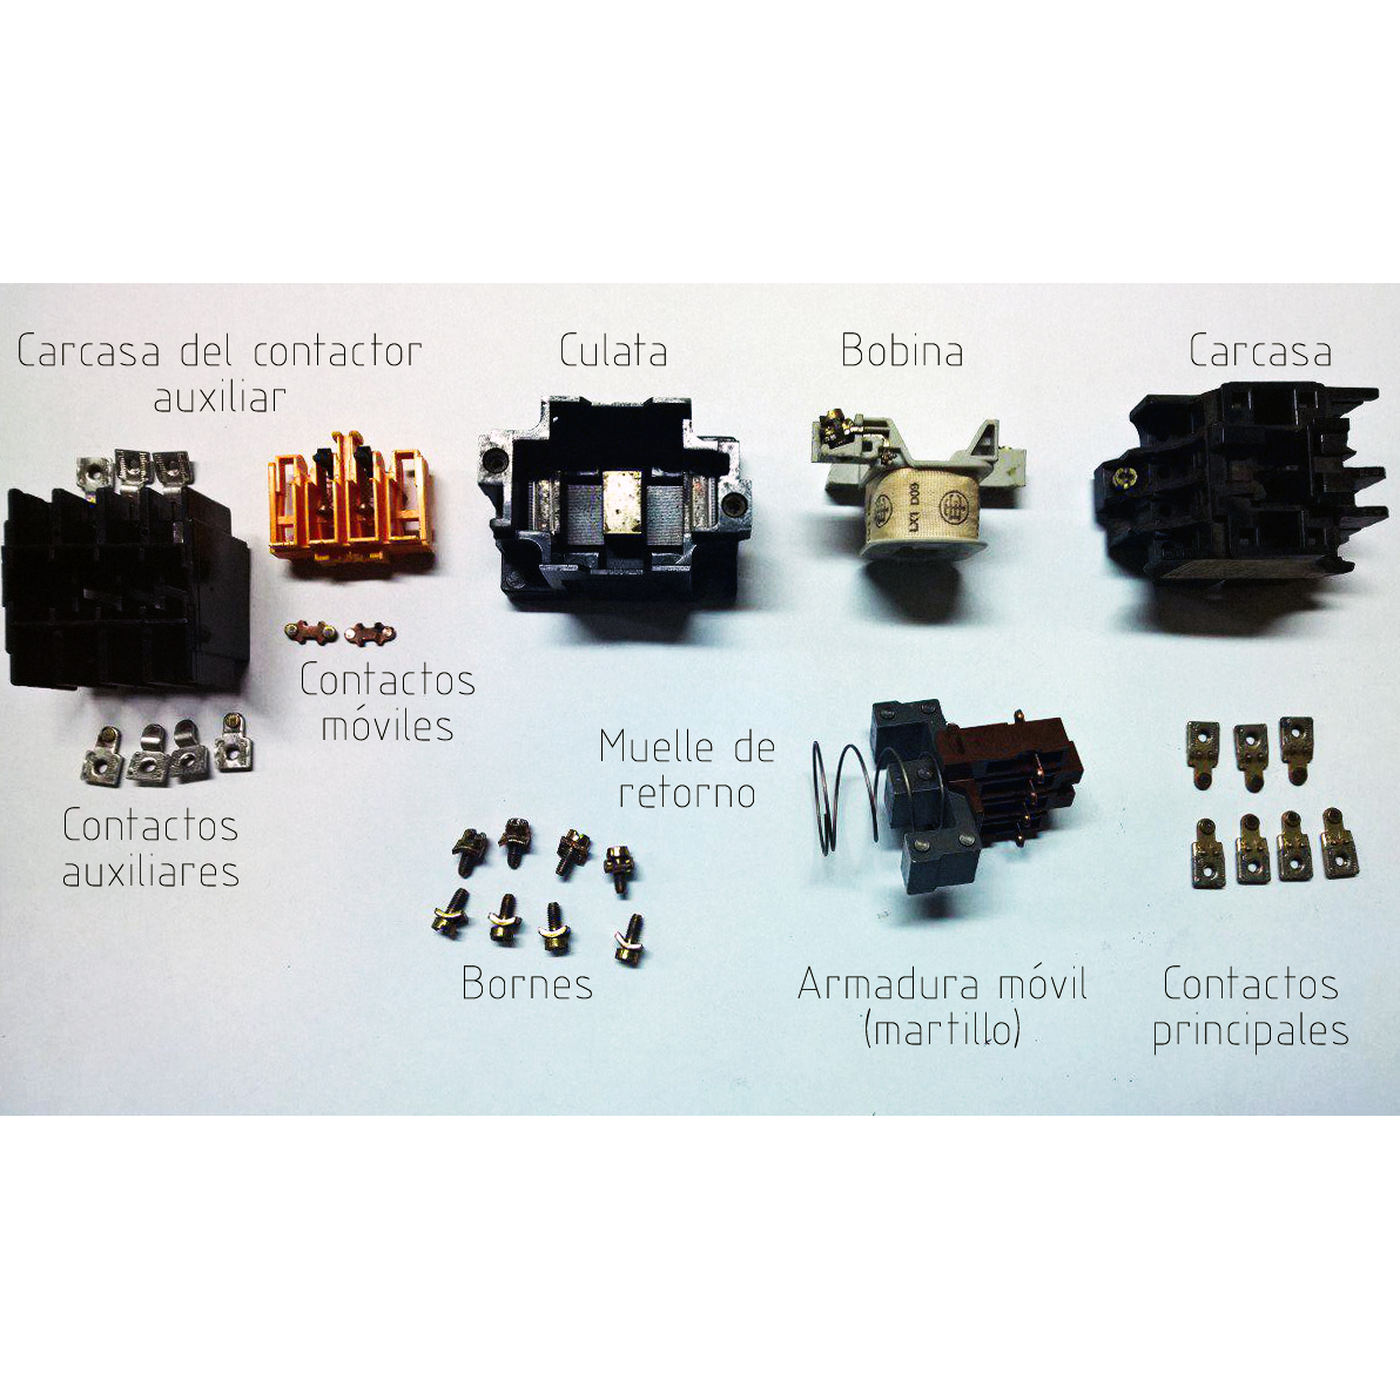


The Contactor: A Relay That Remembers to Stay Off
A motor's supply is too heavy for a hand switch to make and break safely, and a machine that starts by itself when the power returns can kill. The contactor answers both: a heavy relay whose main contacts switch the motor, controlled by a start button, a stop button and one of its own auxiliary contacts that holds it in once started.
That one extra contact — the seal-in — turns the relay into a memory. Press Start and it latches. Press Stop, or lose the supply for a moment, and it drops out and stays out until someone presses Start again. The same circuit, with an overload relay added, is the motor starter on almost every machine.
This rung simulates two- and three-wire control through a power cut, works out why a contactor holds at a lower voltage than it needs to pull in, and wires a working start/stop station on the bench.
Anfänger
About 3 hours
Anweisungen
1
1
Seal-in logic, power cuts and pull-in voltage
Seal-in logic, power cuts and pull-in voltage
Jupyter-Notebook wird geladen …
2
2
The start/stop station, step by step
The start/stop station, step by step
Blockly-Arbeitsbereich
Loading Blockly workspace...
3
3
The seal-in is an OR with memory
The seal-in is an OR with memory
Start OR seal-in, AND NOT Stop: the starter is relay logic. The embedded blueprint builds the gates it is made of.
4
4
Wire a start/stop station at 12 V
Wire a start/stop station at 12 V
Use a 12 V relay with a changeover contact as the contactor: its coil is the contactor coil, one contact carries the load, and — for the seal-in — use a second relay driven from the same coil supply, or a relay with two sets of contacts.
Wire, from the 12 V supply: the **Stop** button (normally closed) → then **Start** (normally open) and the seal-in contact in parallel → the relay coil → 0 V. Wire the load contact to a geared DC motor through its own fused 12 V feed.
Press Start: the motor runs and keeps running when you let go. Press Stop: it stops. Start it again, then switch the power supply off and on: it stays stopped. Now remove the seal-in wire and wire a toggle switch in place of Start and Stop — two-wire control — and repeat the power cut: this time it restarts by itself.
Materialien für diesen Schritt:
 SPDT-Relais2 Stück
 Drucktaster2 Stück
 Gleichstrom-Getriebemotor1 Stück
 Steckbrücken1 Stück
 DC-Sicherungshalter1 Stück
Benötigte Werkzeuge:
 Gleichstromnetzgerät
 Multimeter
 Lötkolben
 Messleitungen mit Krokodilklemmen
5
5
A starter that will not start or will not stay in
A starter that will not start or will not stay in
Motor starter faults, from the control circuit outwards.
Flow
Loading...
6
6
Context and honest limits
Context and honest limits
Magnetic motor starters with start and stop push buttons and a hold-in contact became the standard way to control industrial motors in the first half of the twentieth century, and the three-wire circuit is still drawn the same way in every motor-control manual.
**Honest limits.** A 12 V relay shows the logic, not the job: a real contactor's main contacts must break motor current, and mains and three-phase supplies must be wired only by someone qualified to do it. The pull-in figures in the notebook use the same air-gap-only magnet model as the solenoid valve and overstate the pull.
Materialien
5- 2 StückPlatzhalter
- Platzhalter
- Platzhalter
- Platzhalter
- 1 StückPlatzhalter
Benötigte Werkzeuge
4- Platzhalter
- Platzhalter
- 2 vendors sell this, none ship to you yetPlatzhalter
- Platzhalter
Dieser Bauplan stellt her

Verwandte Blueprints
Diese Blueprints teilen Wissen — Techniken, Materialien oder Prinzipien

CC0 Gemeinfrei
Dieser Blueprint ist unter CC0 veröffentlicht. Sie dürfen dieses Werk für jeden Zweck frei kopieren, ändern, verbreiten und verwenden, ohne um Erlaubnis zu fragen.
Unterstützen Sie den Maker, indem Sie Produkte über seinen Blueprint kaufen, wo er eine Maker-Provision von Anbietern festgelegt, verdient. Oder erstellen Sie eine neue Iteration dieses Blueprints und verbinden Sie ihn in Ihrem eigenen Blueprint, um Einnahmen zu teilen.