ARTE
BELLEZA Y BIENESTAR
ARTESANÍA
CULTURA E HISTORIA
ENTRETENIMIENTO
MEDIO AMBIENTE
COMIDA Y BEBIDAS
INGENIERÍA INVERSA
CIENCIAS
DEPORTES
TECNOLOGÍA
TECNOLOGÍA VESTIBLE
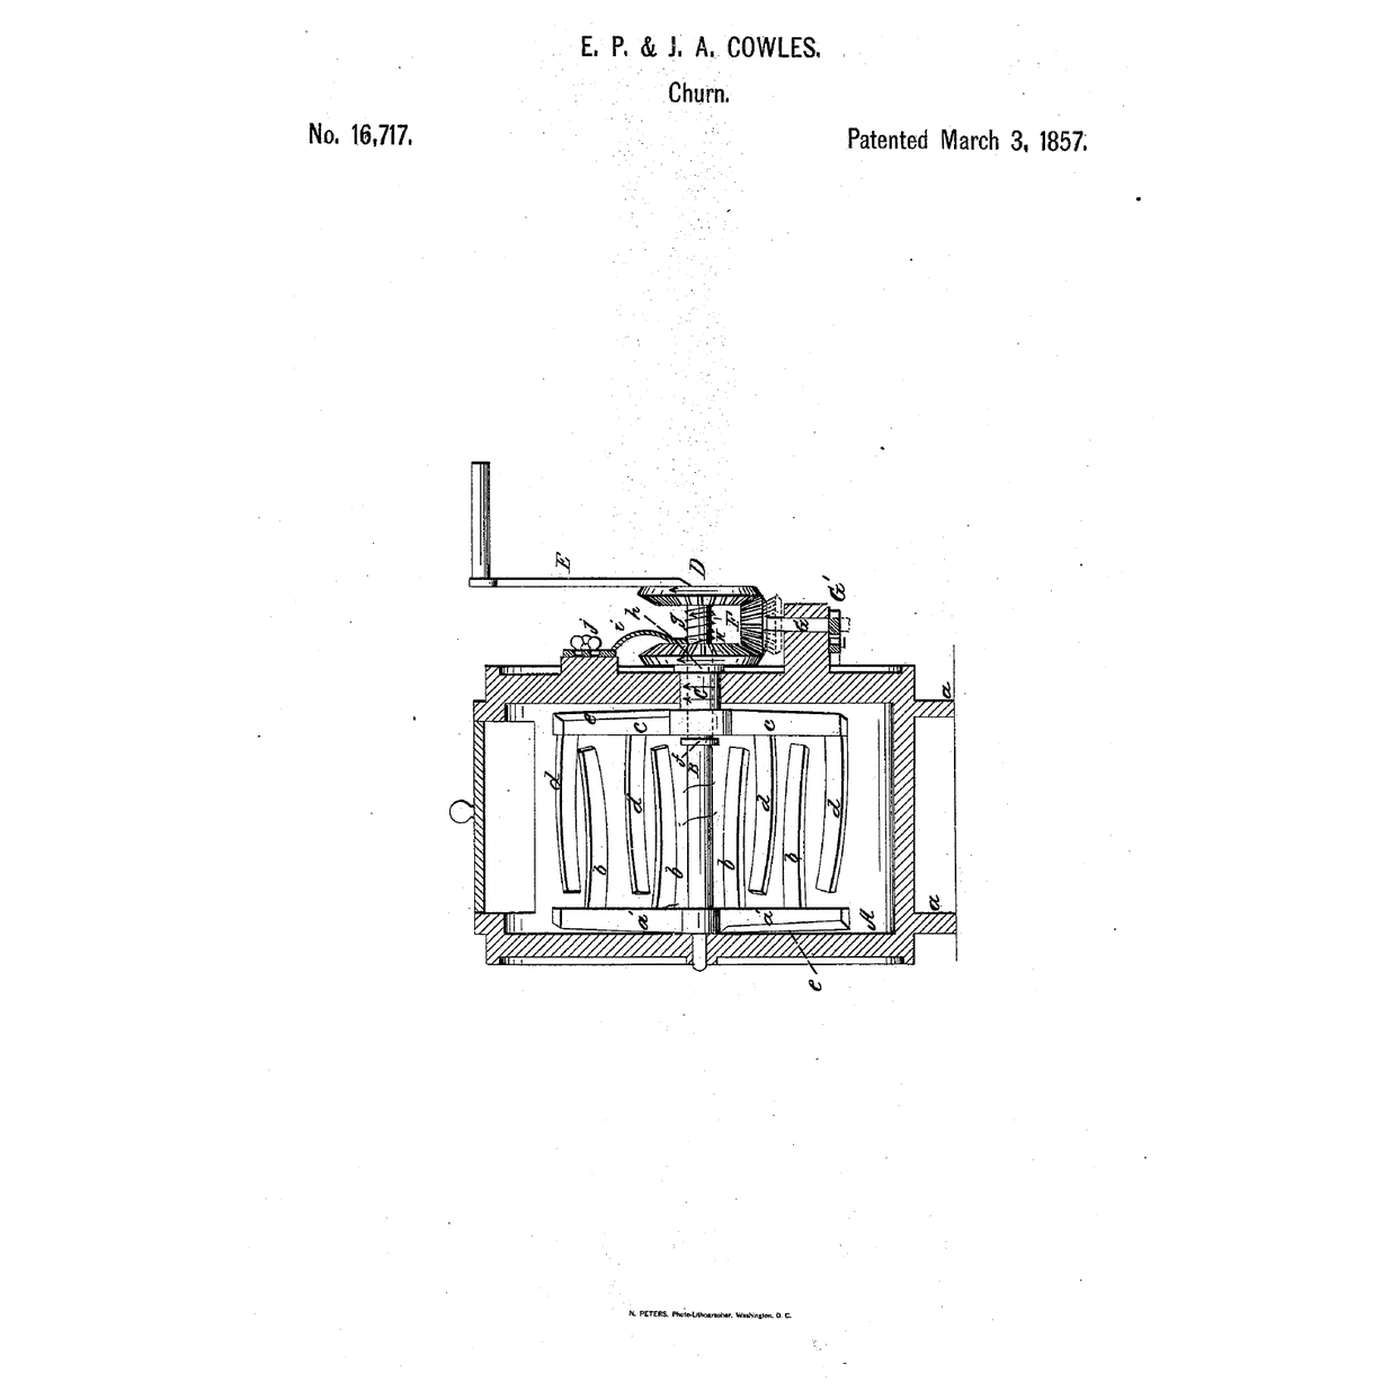

Counter-Turning Curved Beater Churn: Two Beater Sets Turn Opposite Ways, Then Together to Gather
E. P. and J. A. Cowles of Oakfield, New York, received US 16,717, dated 3 March 1857, for two sets of curved beaters turned opposite ways through wheels and a pinion that can be dropped out of gear, so both then turn together to gather the butter, the beaters curved "to draw the cream from the center of the churn, and force it against the sides."
This rung prints the beater sets, sleeve, wheels, pinion and bracket, builds the churn and makes butter.
Avanzado
About 5 hours, plus printing
Instrucciones
1
1
Opposite ways, then together
Opposite ways, then together
Cargando el cuaderno de Jupyter…
2
2
The counter-turning churn they name
The counter-turning churn they name
The Cowleses disclaim Brown and Bigelow's opposite-turning dashers and claim the curved arms, the drop-out pinion and the sprung seals.
3
3
Read US 16,717
Read US 16,717
"When the pinion F is in gear with the wheels D, H, and the shaft B is rotated the two sets of arms (a1) (c) with their beaters attached will rotate in opposite or reverse directions the arms and beaters forming dashers which act upon the cream. The beaters (b) (d) owing to their curved form throw the cream from the center toward the sides of the body A."
4
4
Print the parts
Print the parts
Print beater set B, beater set C, the sleeve, wheel D, wheel H, pinion F and its bracket. Print in PETG at 0.2 mm layers, 30 % infill, 4 walls; wash before first use.
Materiales para este paso:
 Filamento PETG1 pieza
Herramientas necesarias:
 Impresora 3D de filamento (FDM)
5
5
Print the beater set B
Print the beater set B
The beater set B, printed as step 4 describes.
6
6
Print the beater set C
Print the beater set C
The beater set C, printed as step 4 describes.
7
7
Print the sleeve
Print the sleeve
The sleeve, printed as step 4 describes.
8
8
Print the wheel D
Print the wheel D
The wheel D, printed as step 4 describes.
9
9
Print the wheel H
Print the wheel H
The wheel H, printed as step 4 describes.
10
10
Print the pinion F
Print the pinion F
The pinion F, printed as step 4 describes.
11
11
Print the bracket of pinion F
Print the bracket of pinion F
The bracket of pinion F, printed as step 4 describes.
12
12
Shafts and beaters
Shafts and beaters
Lay a round food-grade container about 180 mm across on its side in a pine cradle and cut a lid opening in its top. Run a 10 mm stainless rod through it as shaft B, with beater set B fixed near the far end. Slide the sleeve over the rod through the near end wall, beater set C fixed on it, with a compression spring pressing a collar on it against the sleeve's end, and seal the wall round the sleeve with food-safe silicone.
Materiales para este paso:
 Recipiente de almacenaje de grado alimentario1 pieza
 Tabla de pino1 pieza
 Redondo de acero dulce1 pieza
 Juego de muelles de compresión1 pieza
 Sellador de silicona1 pieza
 Epoxi de dos componentes1 pieza
Herramientas necesarias:
 Segueta (sierra de marquetería)
 Taladro inalámbrico
 Juego de brocas
 Sierra para metales
13
13
Wheels, pinion and crank
Wheels, pinion and crank
Fix wheel H on the sleeve's outer end and wheel D, facing it, on the rod's end with a crank. Screw the bracket to the cradle so pinion F on a short 6 mm rod sits between and meshes both wheels; a turn button under the rod holds it up in gear, and swung aside lets it drop out.
Materiales para este paso:
Redondo de acero dulce1 pieza Espigas de madera dura1 pieza
 Tornillo para madera n.º 8 x 1"1 pieza
Herramientas necesarias:
 Juego de destornilladoresSierra para metales
14
14
The build in 3D
The build in 3D
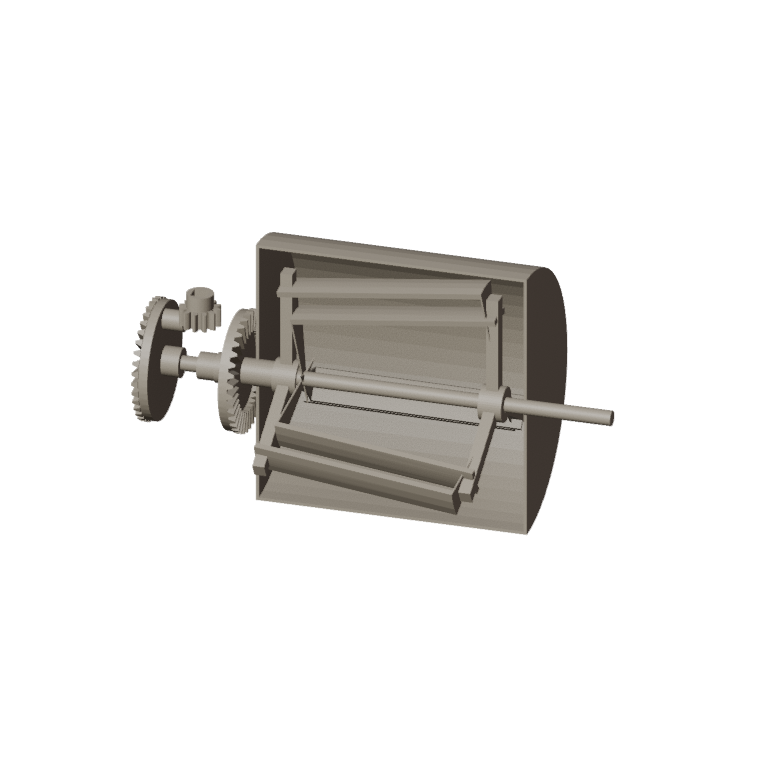
FreeCAD model of this build: the cylinder cut open to show the two beater sets on the shaft and sleeve, and wheels D and H with pinion F between them.
15
15
Churn, then gather
Churn, then gather
Let the heavy cream stand until it reaches about 15 °C, checked with the thermometer. Pour in 1.5 litres. With the pinion in gear, crank steadily; time until the butter comes. Swing the button aside so the pinion drops out, and crank on slowly so both sets turn together to gather the butter. Pour off the buttermilk, add cold water, churn a little and pour off again until it runs clear; work in a pinch of salt and weigh the butter.
Materiales para este paso:
 Crema de leche espesa1500 ml
 Sal marina gruesa1 pieza
 Agua1 pieza
Herramientas necesarias:
 Termómetro de sonda permanente
 Cronómetro
 Báscula digital de cocina
 Bol grande de acero inoxidable
16
16
Troubleshooting
Troubleshooting
Counter-turning beater churn troubleshooting.
Flow
Loading...
17
17
History and honest limits
History and honest limits
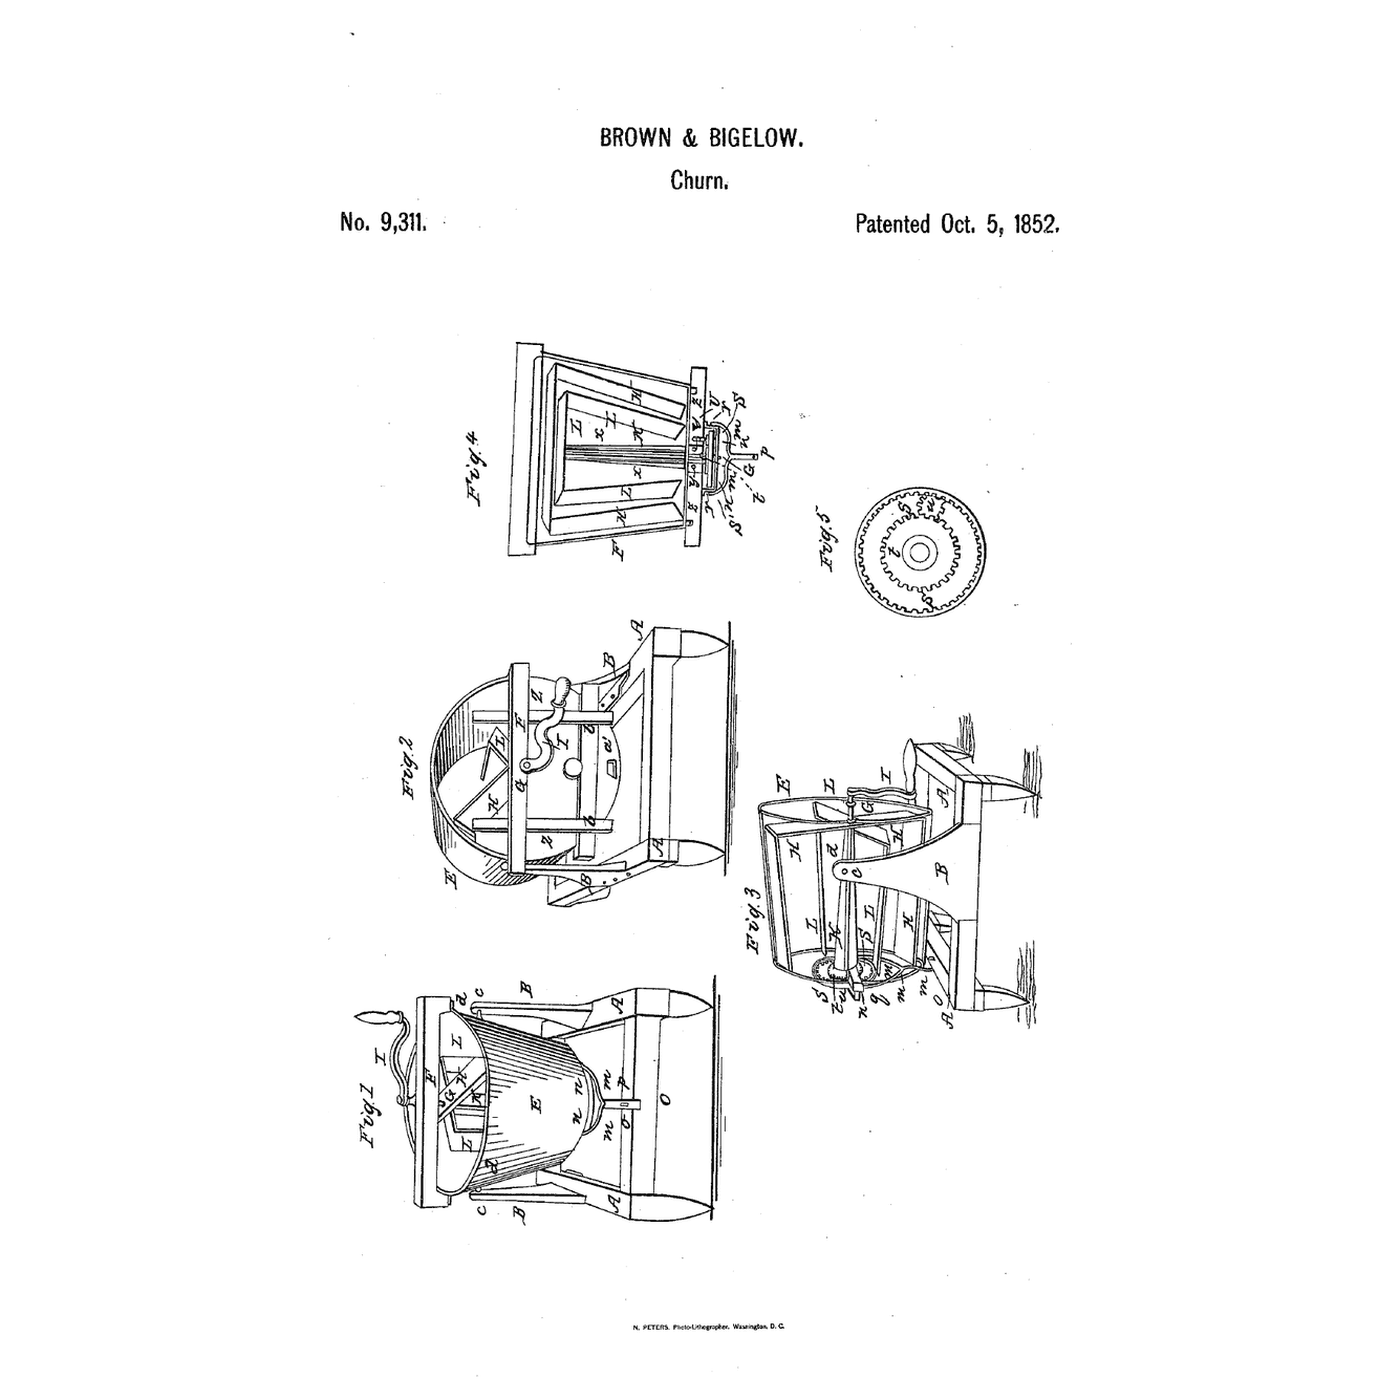
**E. P. and J. A. Cowles** of Oakfield, Genesee County, New York, US 16,717, 3 March 1857. They disclaimed two dashers turned opposite ways by gears and a pinion, naming Brown & Bigelow's patent of 1852 and Mansfield and Moore's rejected application of 1853, and claimed the shafts, collars and wheels combined with the springs. Crown wheels and a spur pinion stand in for their toothed wheels. FDM prints hold food in their layer lines, so wash well and replace when worn.
Materiales
12- 1 piezaMarcador de posición
- Marcador de posición
- 1 piezaMarcador de posición
- 1 piezaMarcador de posición
- Marcador de posición
- 1 piezaMarcador de posición
- 1 piezaMarcador de posición
- 1 piezaMarcador de posición
- Marcador de posición
- 1500 mlMarcador de posición
- 1 piezaMarcador de posición
- 1 piezaMarcador de posición
Herramientas requeridas
10- Marcador de posición
- Marcador de posición
- 1 vendor sell this, none ship to you yetMarcador de posición
- Marcador de posición
- Marcador de posición
- Marcador de posición
- Marcador de posición
- Marcador de posición
- Marcador de posición
- Marcador de posición
Archivos de diseño
8Este plano hace

Blueprints relacionados
Estos blueprints comparten conocimiento — técnicas, materiales o principios
Tilting-Tub Counter-Fan Churn: Two Fans Turn Opposite Ways, the Tub Tips to Drain and Work
por Martin
COMIDA Y BEBIDAS
33
0
0
0
0
0
Stopped Auxiliary Dasher Churn: A Loose Dasher Held Still by a Stop, One Turning Below It
por Millie
COMIDA Y BEBIDAS
31
0
0
0
0
0

Churning Butter from Cream — The 5,000-Year-Old Fat Separation
por TheChef
ARTESANÍA
54
0
0
0
0
0
CC0 Dominio público
Este Blueprint se publica bajo CC0. Eres libre de copiar, modificar, distribuir y usar este trabajo para cualquier propósito, sin pedir permiso.
Apoya al Maker comprando productos a través de su Blueprint, donde gana una Comisión del Maker establecida por los vendedores, o crea una nueva iteración de este Blueprint e inclúyela como conexión en tu propio Blueprint para compartir ingresos.